


1. Installation
1. Installation
11
Chapter 1. Installation
11
It may take a moment to update the cartridge. When
the process is completed, the following appears on
the display:
action
completed
/
remove
card
12
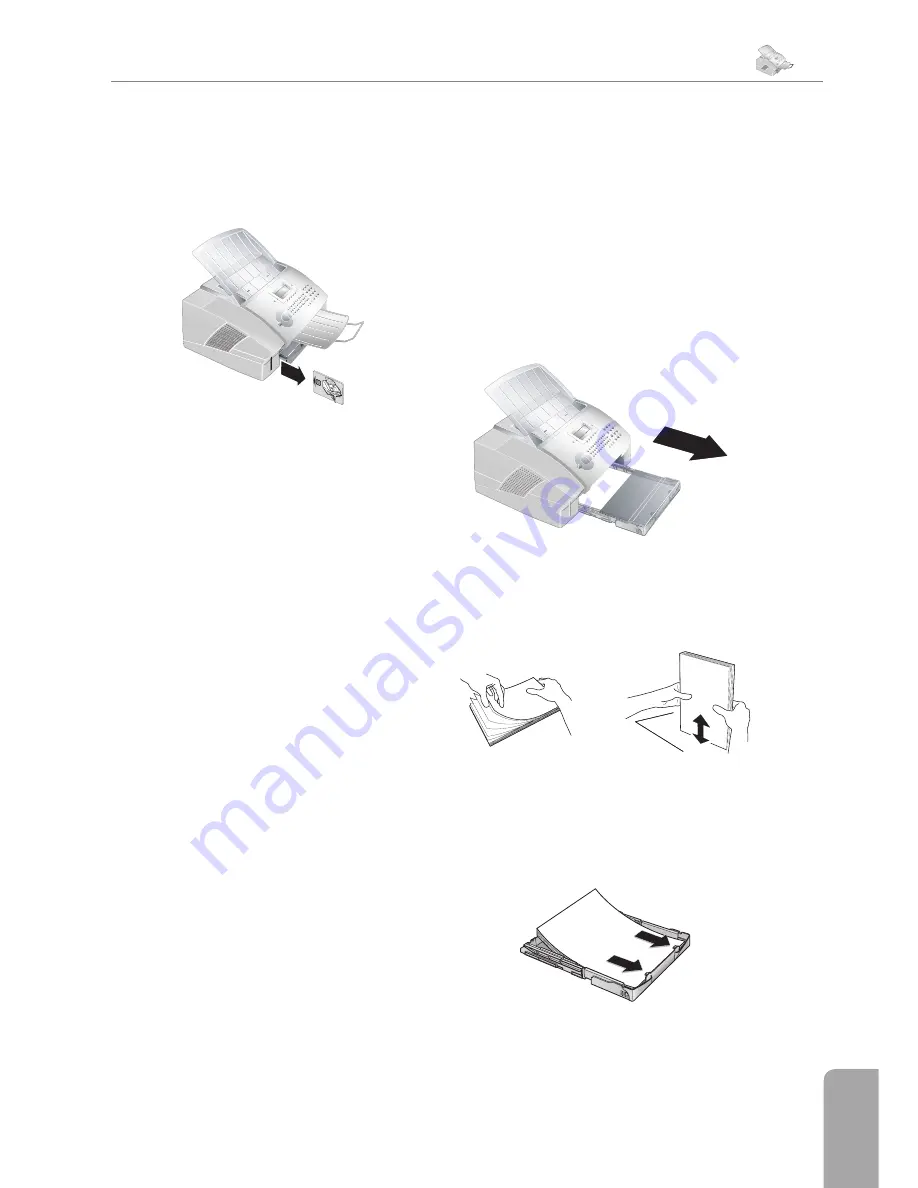
Pull the Plug’n’Print card out of the fax machine.
You can interrupt the recharging process at any time by
simply pressing
STOP
. However, the toner level memo-
ry must be updated for each new toner cartridge. If you
have pressed the
STOP
key by mistake, you can restart
the recharging process as follows:
1
Press
MENU/OK
,
62
and
OK
2
Select
new
black
with
¾
, and confi rm with
OK
. Select
yes
with
¾
. After a short time, the fax
machine will ask you to insert the Plug’n’Print card.
If the toner level of your cartridge is low, then every time
you open and close the cover, the following question will
appear on the display:
black=new?
If you have not
installed a new cartridge, press
STOP
. If you have in-
stalled a new cartridge, press
OK
and follow the descrip-
tion set forth above.
Displaying the Toner Level
Æ
Whenever you insert a new toner cartridge,
you must update the toner level memory of
your fax machine with the Plug’n’Print card that is
included with the new cartridge. Your fax machine
registers the extent of toner usage for every print-
out and calculates the toner level of the cartridge
based on this. Th
e indicated toner level is only
meaningful if you update each new toner cartridge
with the Plug’n’Print card provided.
1
Press
MENU/OK
,
62
and
OK
.
2
Select
cart
capacity
with
¾
and confi rm
with
OK
. Th
e toner level of the toner cartridge is
indicated by a percentile value between 100 percent
(full) and 0 percent (empty).
3
Pressing
C
will return you to the previous menu step;
pressing
STOP
will return you to the root menu.
Paper
Before your fax machine will be ready to make copies or
receive faxes, you must load paper into the machine. Use
the following paper size:
A4
, 210 × 297 millimetres. Your
fax machine works with normal copier paper and with
typewriter paper (60 to 90 g/m
2
).
Loading Paper
1
Pull out the paper tray.
2
Separate the paper sheets by fanning them out,
then align them by tapping edge of the stack lightly
against a fl at surface. Th
is will prevent several sheets
of paper from being drawn in all at once.
3
Remove the cover from the paper tray. Put in only as
much paper as will fi t under the raised limit mark-
ers on the upper edge of the paper tray (see also the
drawings on the cover of the paper tray). You can
load up to 250 sheets into the paper tray.


