


Operation
68
Runco X-200i Series Installation/Operation Manual
PRE
L
IMINAR
Y
White Balance:
To precisely adjust the white point associated with the custom color
gamut, choose White Balance from the PCE sub-menu. These controls operate identically
to the Gain controls in the RGB Adjust menu (described on page 66).
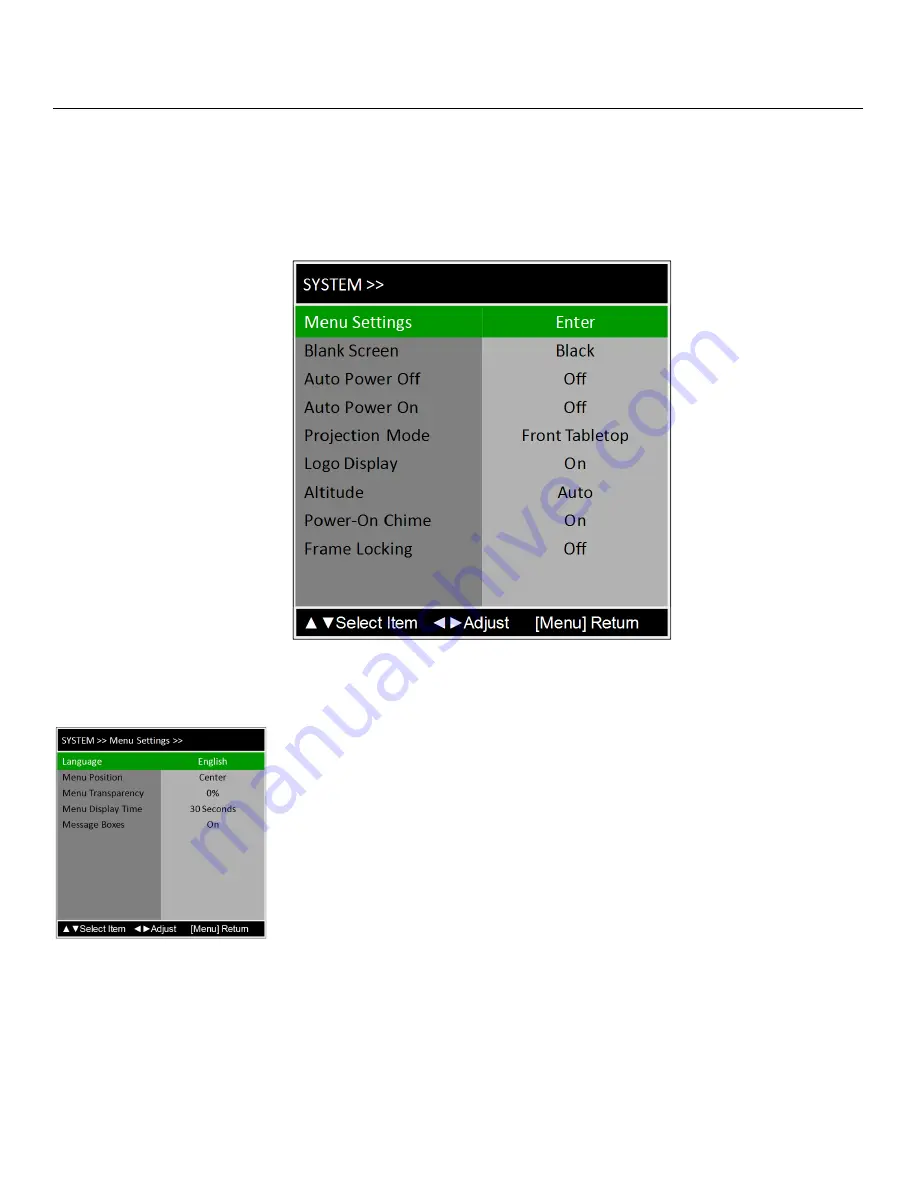
System
Use the controls in the System menu, shown in Figure 4-10, to change the display
orientation and perform other, common installation tasks.
Figure 4-10. X-200i
S
ystem Menu
Menu
S
ettings:
Select Menu Settings from the System menu to customize the OSD
menu appearance and behavior, as follows.
• Language:
Select Language from the Menu Settings menu to change the OSD
language. Refer to
Changing the OSD Language
on page 38 for detailed
instructions.
• Menu Position:
Select Menu Position from the Menu Settings menu to change the
OSD menu position. The default setting is
Center
.
• Menu Transparency:
Select Menu Transparency from the Menu Settings menu to
adjust the degree of translucence (show-through) in the menus and message boxes.
0% means that the menus are opaque. The default setting is
25%
.
• Menu Display Time:
Select Menu Display Time from the Menu Settings menu to
specify how long the OSD menu remains on-screen after any key presses. The default
setting is
30
S
econds
.
• Message Boxes:
When you select a new input source or turn the projector off, or
when an error occurs, the X-200i briefly displays an on-screen message confirming
your action or briefly describing the error. To prevent the display of these messages,
select Message Boxes from the Menu Settings menu to and set it to
Off
.
➤


