Section 6 Maintenance
SG10A Manual
www.rottlermfg.com
6-3
Calibrating the Digital Level
NOTE:
Even though the level has been carefully calibrated at
the factory, it is a good idea to recheck calibration before putting
the machine into service. In the event that the level is dropped or
handled roughly then the following recalibration methods should be
implemented.
The level assembly is referenced to the spindle via the level pin. It
is there for important to check alignment of pin in reference to the
spindle. This is accomplished by mounting a magnetic base dial
indicator to the machine spindle and sweeping the pin vertically
by raising or lowering spindle to check alignment. Pin alignment
should be checked in two positions at 90 degrees to each other.
If the pin alignment needs correcting, do so with the set screws
located at base of pin block.
Install level on pin. Orient level to read left to right. Tilt head left
or right until level reads 0.00. Now rotate level 180 degrees. The
reading should be 0.00, if not then it will be necessary to calibrate
the inclinometer to the level body. This is accomplished by
loosening the inclinometers two retaining screws and pivoting the
inclinometer until it repeats when level is rotated 180 degrees.
Example: level reads 0.05 to the left, when rotated 180 degrees to the right it should read minus 0.05.
Check the level reading with the pickup oriented front to back. It should read 0.00 if the machine has been
properly leveled with a machinist level.
If the LED does not read 0.00 then chances are the machine’s leveling procedures have not been
properly followed or there are internal problems with the levels electronics.
The sensitivity of the level is so great that it may not zero totally, even while the machine is not being
touched. The alignment tolerance for installing guides is plus or minus .05 degrees, and for forming three
angle seats is plus or minus .05 degrees.
Spindle
Wipe clean and oil 5 drops daily. To oil, lift lever at top of oiler. To adjust, rotate lever knob.
Summary of Contents for SG10A
Page 2: ......
Page 4: ......
Page 8: ...Section 1 Introduction SG10A Manual www rottlermfg com 1 4...
Page 22: ...Section 2 Installation SG10A Manual www rottlermfg com 2 13...
Page 61: ...Section 5 Operating Instructions SG10A Manual www rottlermfg com 5 15...
Page 62: ...Section 5 Operating Instructions SG10A Manual www rottlermfg com 5 16...
Page 82: ...Section 6 Maintenance SG10A Manual www rottlermfg com 6 9...
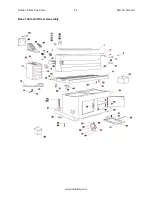
Page 90: ...Section 8 Machine Parts SG10A Manual www rottlermfg com 8 3 Base Table and Riser Assembly...
Page 91: ...Section 8 Machine Parts SG10A Manual www rottlermfg com 8 4...
Page 92: ...Section 8 Machine Parts SG10A Manual www rottlermfg com 8 5...
Page 93: ...Section 8 Machine Parts SG10A Manual www rottlermfg com 8 6 Base Assembly...
Page 94: ...Section 8 Machine Parts SG10A Manual www rottlermfg com 8 7...
Page 95: ...Section 8 Machine Parts SG10A Manual www rottlermfg com 8 8...
Page 96: ...Section 8 Machine Parts SG10A Manual www rottlermfg com 8 9 Spindle Assembly...
Page 97: ...Section 8 Machine Parts SG10A Manual www rottlermfg com 8 10...
Page 98: ...Section 8 Machine Parts SG10A Manual www rottlermfg com 8 11...
Page 99: ...Section 8 Machine Parts SG10A Manual www rottlermfg com 8 12...
Page 100: ...Section 8 Machine Parts SG10A Manual www rottlermfg com 8 13 Transmission Assembly...
Page 101: ...Section 8 Machine Parts SG10A Manual www rottlermfg com 8 14...
Page 102: ...Section 8 Machine Parts SG10A Manual www rottlermfg com 8 15...
Page 103: ...Section 8 Machine Parts SG10A Manual www rottlermfg com 8 16 Head Support Assembly...
Page 104: ...Section 8 Machine Parts SG10A Manual www rottlermfg com 8 17...
Page 105: ...Section 8 Machine Parts SG10A Manual www rottlermfg com 8 18...
Page 106: ...Section 8 Machine Parts SG10A Manual www rottlermfg com 8 19 Pneumatic Circuit Diagram...
Page 107: ...Section 8 Machine Parts SG10A Manual www rottlermfg com 8 20 Electrical Components...
Page 110: ...Section 9 Options SG10A Manual www rottlermfg com 9 2...
Page 112: ...Section 10 Material Data Safety Sheets SG10A Manual www rottlermfg com 10 2...
Page 113: ...Section 10 Material Data Safety Sheets SG10A Manual www rottlermfg com 10 3...
Page 114: ...Section 10 Material Data Safety Sheets SG10A Manual www rottlermfg com 10 4...
Page 115: ...Section 10 Material Data Safety Sheets SG10A Manual www rottlermfg com 10 5...
Page 116: ...Section 10 Material Data Safety Sheets SG10A Manual www rottlermfg com 10 6...
Page 117: ...Section 10 Material Data Safety Sheets SG10A Manual www rottlermfg com 10 7...
Page 118: ...Section 10 Material Data Safety Sheets SG10A Manual www rottlermfg com 10 8...
Page 119: ...Section 10 Material Data Safety Sheets SG10A Manual www rottlermfg com 10 9...
Page 120: ...Section 10 Material Data Safety Sheets SG10A Manual www rottlermfg com 10 10...
Page 121: ...Section 10 Material Data Safety Sheets SG10A Manual www rottlermfg com 10 11...
Page 122: ...Section 10 Material Data Safety Sheets SG10A Manual www rottlermfg com 10 12...
Page 123: ...Section 10 Material Data Safety Sheets SG10A Manual www rottlermfg com 10 13...
Page 124: ...Section 10 Material Data Safety Sheets SG10A Manual www rottlermfg com 10 14...


