background image

19

  PVR:

 This feature provides fast access to the Recordings. Use the VOL+- buttons to  


  select FILE and press OK. You can then use the CH+- buttons to select your desired  


  file and then press OK. The receiver will then playback the file which can be controlled  


  as described above. This menu Keeps all recordings and Movie files separate.

This facility enables you to quickly select and preview any recordings that you have made. 
You can also watch FULL SCREEN or DELETE any unwanted recordings.

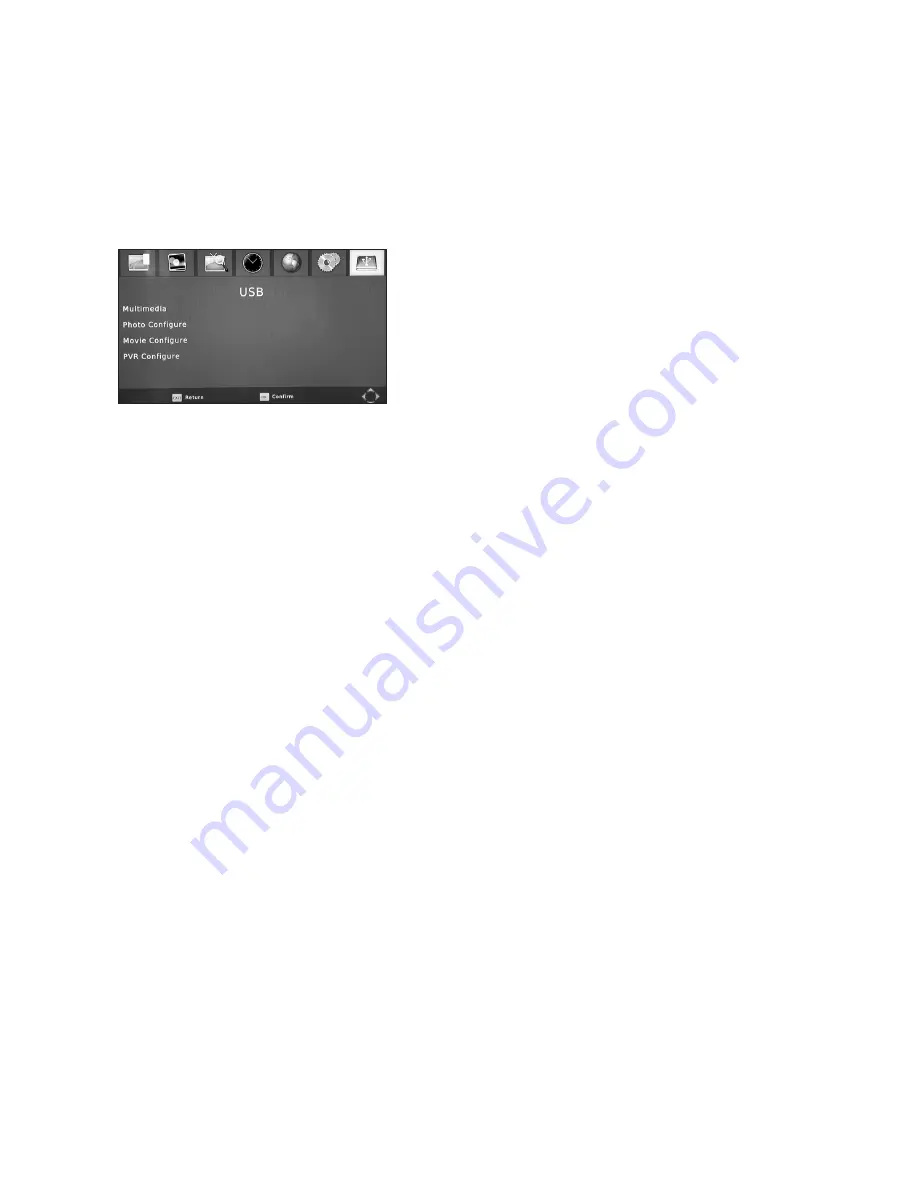
  Multimedia: 

This will bring up the Mutlimedia menu to browse contents of USB device,    

  see 5.5.1 Fast access to this menu is by use of MEDIA key on the remote.

  Movie Configure:

 In this section you can adjust:

  Subtitle Specific:

 Size – BIG, NORMAL, SMALL.

  Subtitle BG:

 Alter the subtitle box background colour – TRANSPARENT, GRAY, 

  YELLOW GREEN, WHITE

  Subtitle Font Colour:

 White, Blue, Green, Yellow

  Resume Play:

 ON or OFF

 
Use the CH+- buttons to select and the VOL+- to select your preference. Press EXIT to save.
 

  Photo Configure: 

In this setup menu you can adjust the transition time between slides

  when viewing a photo slideshow. Use the VOL+- buttons to select the transition time 
  between 2, 3, 5 and 7 seconds. Press EXIT to save your choice.
 

  PVR Configure:

  It should 

not

 be necessary to change any of the settings in this section as they will have    

  already have been adjusted when you setup the basic receiver to your preferences. 

Care    

  should be taken when making any changes in this section.


Summary of Contents for HD DVB-S2 1201

Page 1: ...HD Digital Receiver User Manual MODEL NUMBER HD DVB S2 1201 Please read this Manual thoroughly before using your Receiver and then retain for future reference TM...

Page 2: ......

Page 3: ...Astra 2 A B D Eurobird 1 p8 4 2 6 Chosen Satellite Scan p8 5 Menu System p9 5 1 Channel Search p9 5 1 1 Selecting your Satellite p9 5 1 2 Selecting your SCAN Options p9 5 1 3 Scanning p10 5 1 4 DB Ma...

Page 4: ...unit DO NOT allow anything to trap pinch or otherwise damage the Power Cord If the power cord should become damaged IMMEDIATELY switch the Receiver off at the wall and unplug it You should then conta...

Page 5: ...t Therefore as with the unit itself dispose of the batteries according to the prevailing statutory regulations Never put the batteries in normal household waste Please note this receiver has an Automa...

Page 6: ...receiver if required TV SCART Socket To connect to the video audio SCART input of the TV for SD Standard definition viewing only HDMI Socket To connect to an HDTV with an HDMI cable for HD High Defin...

Page 7: ...CH NUMERIC BUTTONS REV PLAY FWD PAUSE 2 4 7 6 8 9 10 11 13 12 14 REC 5 3 4 Remote Control INFO AUDIO 3 16 MUTE TTX SUBTITLE EXIT TV RADIO RECALL GO TO NEXT PREV 17 18 19 21 22 23 24 25 OK 20 REPEAT ST...

Page 8: ...ection for FR 2 FR 4 FR 8 FR 16 FR32 for different speeds PLAY Press to play when using live Pause or to continue playback of Media PAUSE Pauses live TV or movie playback V FOR Press to select the vid...

Page 9: ...ur choice blue for menu Selections WIDE Adjusts screen format between 16 9 4 3 orAUTO Please observe the following when using your Remote Control Change the batteries when operation becomes poor or er...

Page 10: ...flicker or the picture disappear briefly when changing resolution Make sure your TV source is set to receive the signal from your Receiver NOTE When connecting the receiver to other equipment e g TV...

Page 11: ...on Free to Air English language channels such as BBC 1 2 etc NOTE DO NOT change any of the other settings on the Antenna Setting Menu these have already been programmed into your receiver during manuf...

Page 12: ...menu to select your desired Satellite NOTE If you change the selected Satellite you may need to re adjust your dish When you are satisfied with the signal quality and strength Press the red Scan butto...

Page 13: ...is section allows you to save and load channel databases This function is so you can back up your personalized channel lists during software updates and also update channel lists from a downloaded dat...

Page 14: ...e Press EXIT and then the OK button This will lock the selected channel from unauthorised viewing Pressing the OK button one more time before saving will unlock the channel When you press exit you wil...

Page 15: ...can use the s t button to select the preferred program If there is more than one page of information use the BLUE button for page up and the YELLOW button for page down Sort Sort your channels from t...

Page 16: ...L buttons to select your preference You will be prompted to save your new settings on exiting TV Format to Select between PAL recommended and NTSC dependent on TV video Input type 5 3 2 Time Settings...

Page 17: ...te information as determined by the Timer Cycle setting Start Time Use the numeric keys to enter time information as determined by the Timer Cycle setting Stop Time Use the numeric keys to enter time...

Page 18: ...e preferred OSD language English is set as the default language Options available are ENGLISH FRENCH GERMAN ITALIAN SPANISH and ARABIC Use the VOL buttons to select your preference You will be prompte...

Page 19: ...OTE If you change the password REMEMBER to WRITE DOWN the NEW PASSWORD and keep it safe Factory Default This enables the User to return the receiver to the settings that were made in the Factory It is...

Page 20: ...this is the same as the Parental Control password and then finally prompted to confirm that you wish to carry out the deletion operation Press CANCEL if you have changed your mind or OK to confirm NO...

Page 21: ...playback Press the GREEN Repeat AB button to set the A start point press the GREEN Repeat AB button when you have reached the B stop point you desire The loop will then replay repeatedly until you pre...

Page 22: ...ey on the remote Movie Configure In this section you can adjust Subtitle Specific Size BIG NORMAL SMALL Subtitle BG Alter the subtitle box background colour TRANSPARENT GRAY YELLOW GREEN WHITE Subtitl...

Page 23: ...rade the Software please refer to Section 7 0 Software Update 5 5 3 Database Backup This feature enables a back up of all your Channel Information to be taken which can then be used to restore the inf...

Page 24: ...one on the moment by selecting the recording key on remote This can then be stopped by pressing the Stop key For record Time Size and available space on USB press INFO for more information Live Pause...

Page 25: ...e set top box has power but cannot find any channels or shows any signal strength Is the Satellite dish installed correctly Reinstall the dish and calibrate it LNB input is not connected correctly Rec...

Page 26: ...7 8 2 MPEG2 Decoding Transport Stream Profile Level MPEG 4 H 264 MPEG 2 MP ML MP HL MPEG 4 AVC Aspect ratio Video 4 3 16 9 Format 480i 480p 576i 576p 720p 1080i Audio Decoding MPEG 1 MPEG 2 Layer I I...

Page 27: ......

Page 28: ...fice Stafford Park 1 Telford Shropshire England TF3 3BD Tel 44 0 1952 238 100 Fax 44 0 1952 238 180 Helpline UK 0845 194 7584 IRL 1800 930 185 For further product information please go to www ross co...

Reviews: