7
Basic Operation
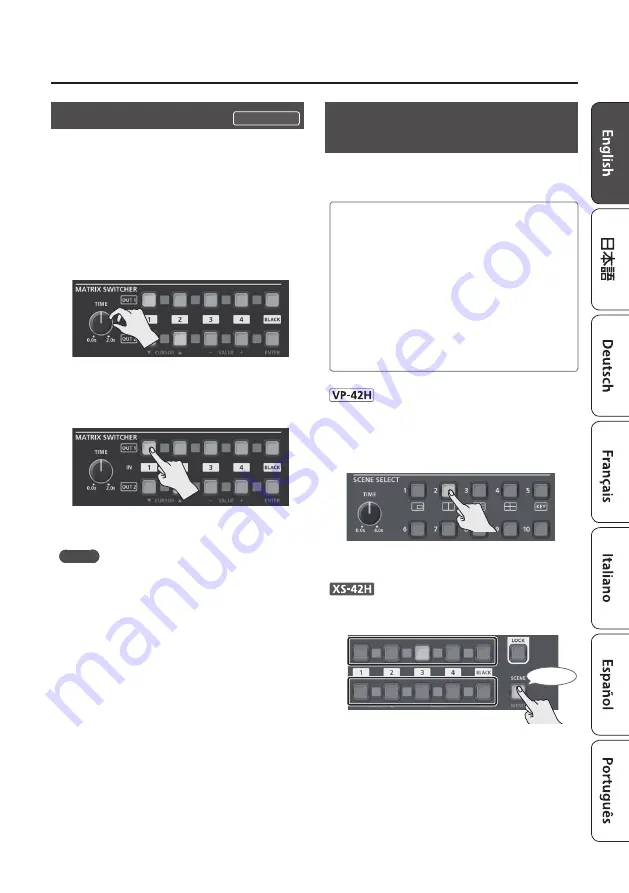
Switching the Video
Use the cross-point buttons to switch the
combination of four inputs and two outputs, and
output the video. The internal frame synchronizer
allows seamless video switching.
* Video and audio are switched in tandem.
1.
Make sure that the [SCENE]/[MENU] button is
unlit.
2.
Use the [TIME] knob to specify the video
transition time.
3.
Press a cross-point button.
The horizontal direction of the cross-point
buttons is the input channel, and the vertical
direction is the output channel.
The output video is switched.
MEMO
You can individually specify the scaling for each
video output.
Long-press the [MENU] button
0
“Output”
0
“Output 1”–“Output 2”
0
adjust each of the Scaling
items.
Recalling Video/Audio Settings
(Scenes)
Video/audio settings can be registered as “scenes”
and recalled for use when necessary. This unit
provides ten scenes.
Registering to a scene
Video/audio settings are automatically registered
in the currently selected scene. You don’t need to
perform any operation to register them.
The following settings are registered in a scene.
5
Output menu
* Except for “Color Space” and “Signal Type”
5
Input menu
5
Composition menu (VP-42H)
5
Audio menu
5
Cross-point (XS-42H)
1.
Make sure that the [INPUT]/[MENU] button is
unlit.
2.
Press the SCENE SELECT button of the scene
number that you want to recall.
The settings are recalled. The currently selected
button is lit yellow.
1.
Press the [SCENE] button to make it light green.
SCENE 1–5
SCENE 6–10
Lit green
Now you can use the cross-point buttons and the
[BLACK] button to select a scene. The currently
selected button is lit yellow.
2.
Press the cross-point button or [BLACK] button
of the scene number that you want to recall.
The settings are recalled.
XS-42H only