


2
Panel Descriptions
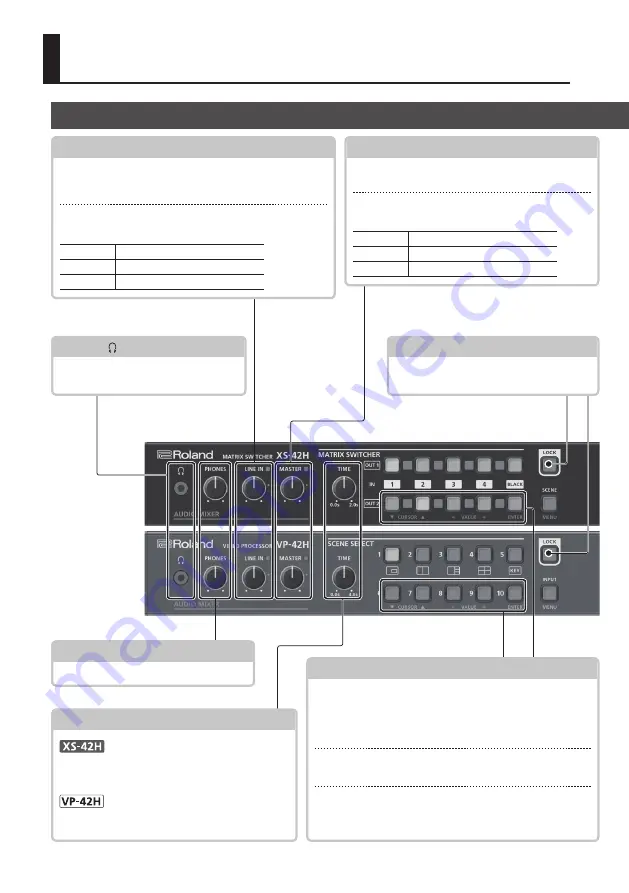
PHONES ( ) jack
Connect stereo mini-jack headphones
here.
[LOCK] button
Long-press this to turn on/off the panel
lock function.
While a menu is displayed
While a menu is displayed, these function as the following
buttons.
CURSOR [
?
] [
=
] buttons
These buttons select a menu category or item.
VALUE [–] [+] buttons
These buttons change the value of a menu item.
[ENTER] button
This button moves to a lower-level menu, or executes an
operation.
[PHONES] knob
Adjusts the volume of the headphones.
Front Panel
LINE IN
[LINE IN] knob
Adjusts the volume of the line input. Adjust this so that
the LINE indicator is sometimes lit yellow.
LINE IN indicator
Indicates the volume level of the line input.
Lit red
Volume is excessive.
Lit yellow
Volume is appropriate.
Lit green
Volume is insufficient.
MASTER
[MASTER] knob
Adjusts the overall volume.
MASTER indicator
Indicates the overall volume level.
Lit red
Volume is excessive.
Lit yellow
Volume is appropriate.
Lit green
Volume is insufficient.
[TIME] knob
Specifies the transition time when switching
between scenes (p. 7) or video.
Specifies the transition time when switching
between scenes (p. 7).
XS-42H
VP-42H


