Selecting Parameters
Before you can adjust a parameter’s setting, or “value,” you must first
select the area on the display that contains the desired parameter. A
thick black outline—the selection box—appears around the currently
selected group of parameters.
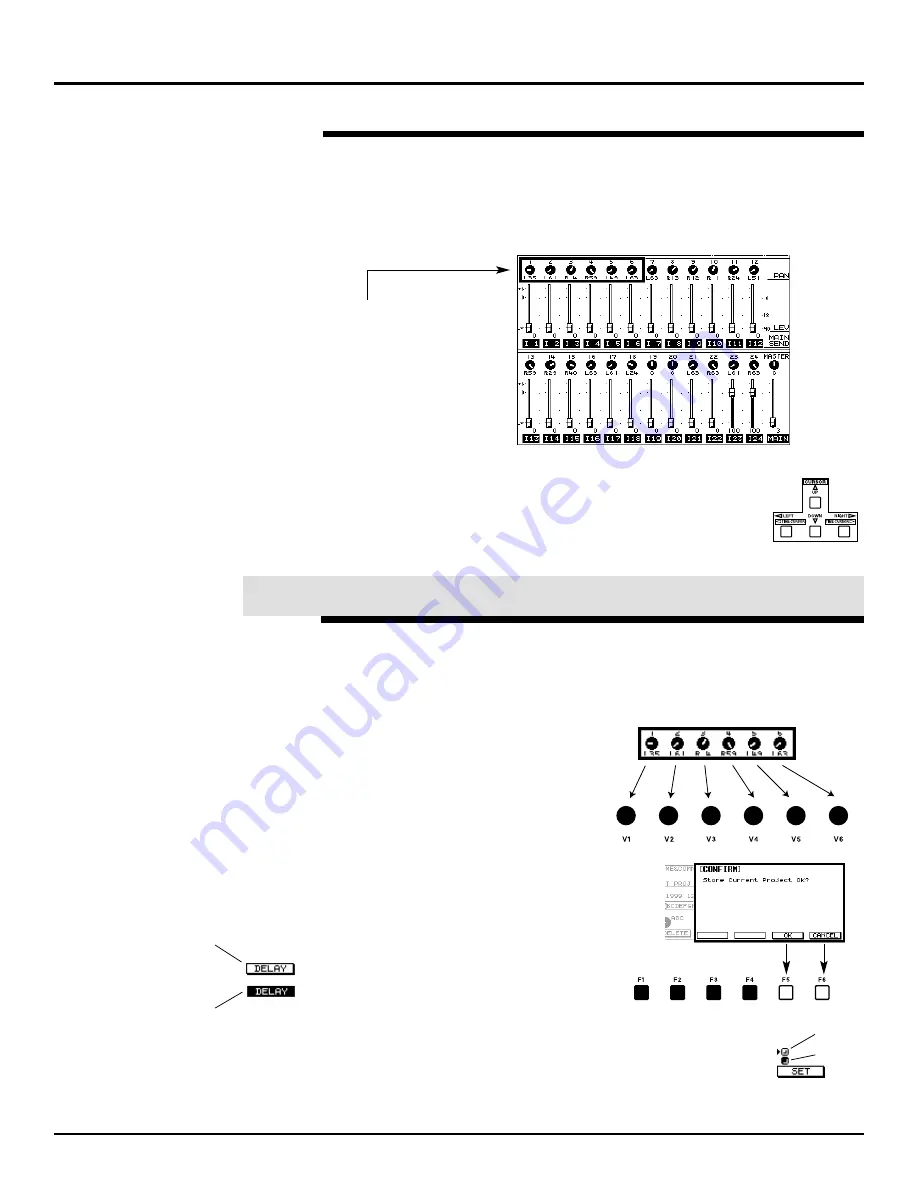
The selection box designates the parameters to be controlled
by the V knobs and F buttons. To select a group of parameters
containing the one you want to adjust, press the CURSOR
buttons to move the selection box to the desired group. The
CURSOR buttons light to show the direction or directions in
which the selection box can be moved at any given time.
When a parameter is selected on the display, you can use the
corresponding V 1-6 knob or F 1-6 buttons to change its value.
Some parameter values are adjusted using the V knobs and some with
the F buttons. Here’s how to tell which is which:
•
Parameter values that can be set
using a V knob appear on the
display as small black knobs or
faders. The left-most knob/fader
corresponds to the first V knob,
the next one to the second V
knob, and so on.
•
Parameter values that can be set with an
F button appear on the display as
rectangles. The F button that edits the
value lights. The left-most rectangle can
be edited using the first lit F button, and
so on. Some of these parameters are
on/off switches—when they’re on, their
values are shown in reverse, with white
text on a black background.
•
Some multiple-choice parameters appear with
active/inactive switches next to their possible values.
When a switch is active, it’s darkened. To change a
switch’s active/inactive state, select it with a V knob and
click the SET button beneath it.
©
2000 Roland Corporation U.S.
Getting Started with the VM-7000
2796US, v1.0
Page 11
Navigating the Display (Continued)
®ÂØÒňÎ
Application Guide
Getting Started with the VM-7000
The first six input channel PAN
parameters are selected in this
illustration.
XIII.
Adjusting Parameter Values
Inactive
Active
Off
On


