Creating New Polygons
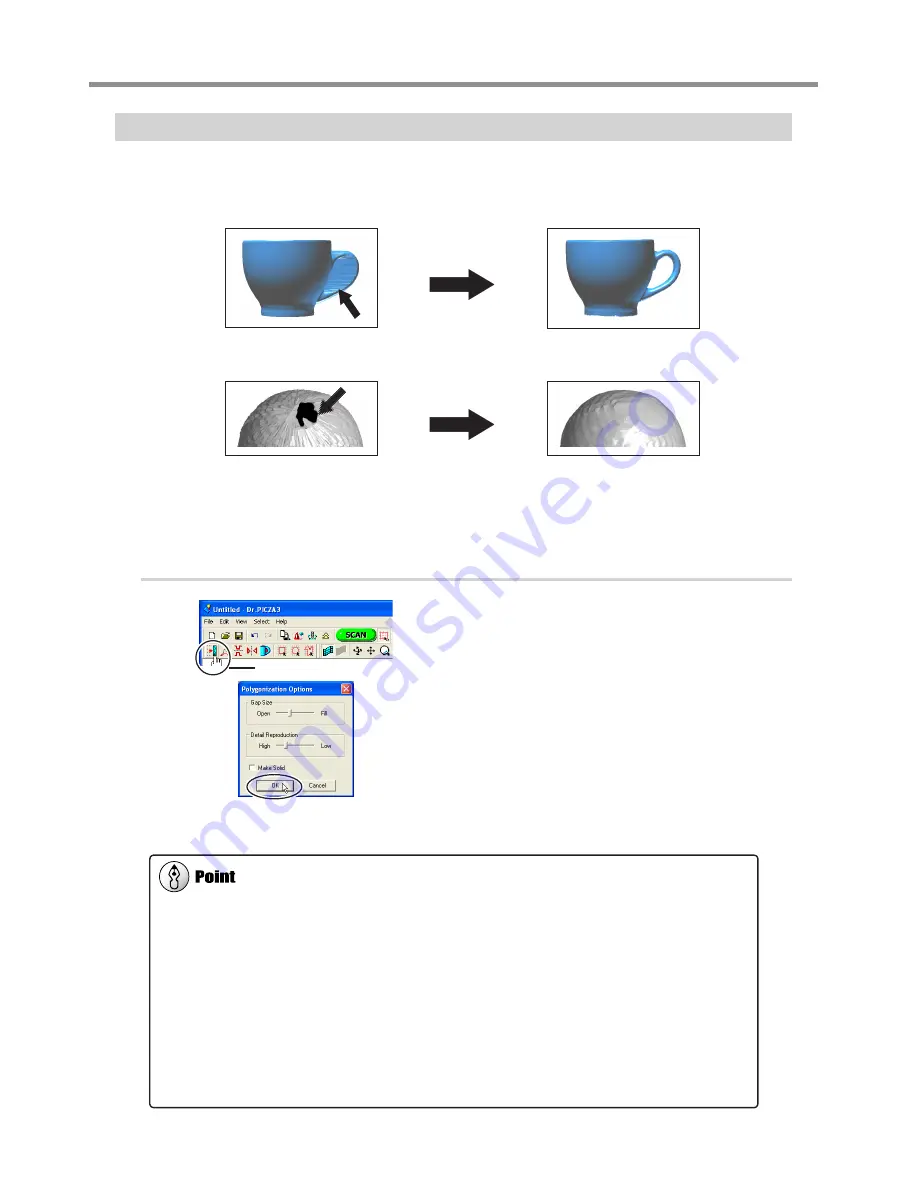
You can create new polygons using all the scanning points, including the data produced by rescanning. These polygons are
called a "polygon mesh." Creating a polygon mesh can make it possible for you to reproduce cavities and voids in the object
and fill in holes according to the surrounding shape.
A polygon mesh is composed of polygons created by estimating the original shape of the scan object from the scanning
points. They differ from the polygons displayed immediately after scanning, which are generated simply by connecting the
scanning points.
Procedure
Click the [Create Polygon Mesh...] button.
The [Polygonization Options] dialog box appears.
Select the parameters for creating a polygon mesh,
then click [OK].
For detailed information on the [Polygonization Options] dialog
box, refer to the online help for Dr. PICZA3.
If the polygon mesh is not what was intended, change the parameters and create it
again.
Tips for Creating a Polygon Mesh
To create a polygon mesh having a high degree of completion, you may need to scan at as fine a pitch as possible in order to
increase the number of scanning points. In particular, cases like those described below may yield a polygon mesh having a
configuration that is not what you intended.
When there is a small number of scanning points with respect to undulations in the scan object
When areas with holes are too big or the shape of them is complex
In such cases, rescan just that area at a fine pitch. When little memory is available on the computer, it may be a good idea to
divide the area into parts and repeat rescanning several times to increase the number of scanning points sufficiently, and then
create the polygon mesh.
Go to "3-4 Finishing Data," see "Selecting and Scanning a Specific Area."
Creating a polygon mesh for
area of connected voids...
...deletes surfaces, reproducing
the void area of the original!
Creating a polygon mesh when
a hole has occurred...
...lets you fill in the hole
simply and easily!
[Create Polygon Mesh...] button
3-4 Finishing the Data
42
3. Creating 3D Data
Summary of Contents for Picza LPX-600
Page 11: ...1 Getting Started 9...
Page 17: ...15...
Page 30: ...28...
Page 54: ...52...
Page 59: ...6 Appendix 57...
Page 63: ......


