11
Press
MENU
.
(8)
PROTOCOL 1
STOP DATA PARITY
PROTOCOL 2
BAUD HANDSHAKE
AREA AXIS
REPLOT SUBMENU
VS-COMND FS-CMND
COMAAND I/O
Use
or
to select.
Press
ENTER
.
Use
or
to select.
Press
ENTER
.
Press
MENU
twice.
(3), (4)
(5)
(6)
(7)
Use
or
to select.
Press
ENTER
.
CROPMARK UPDOWN
OVER-CUT CALIB
INTERFACE
PARA SERI<AUTO>
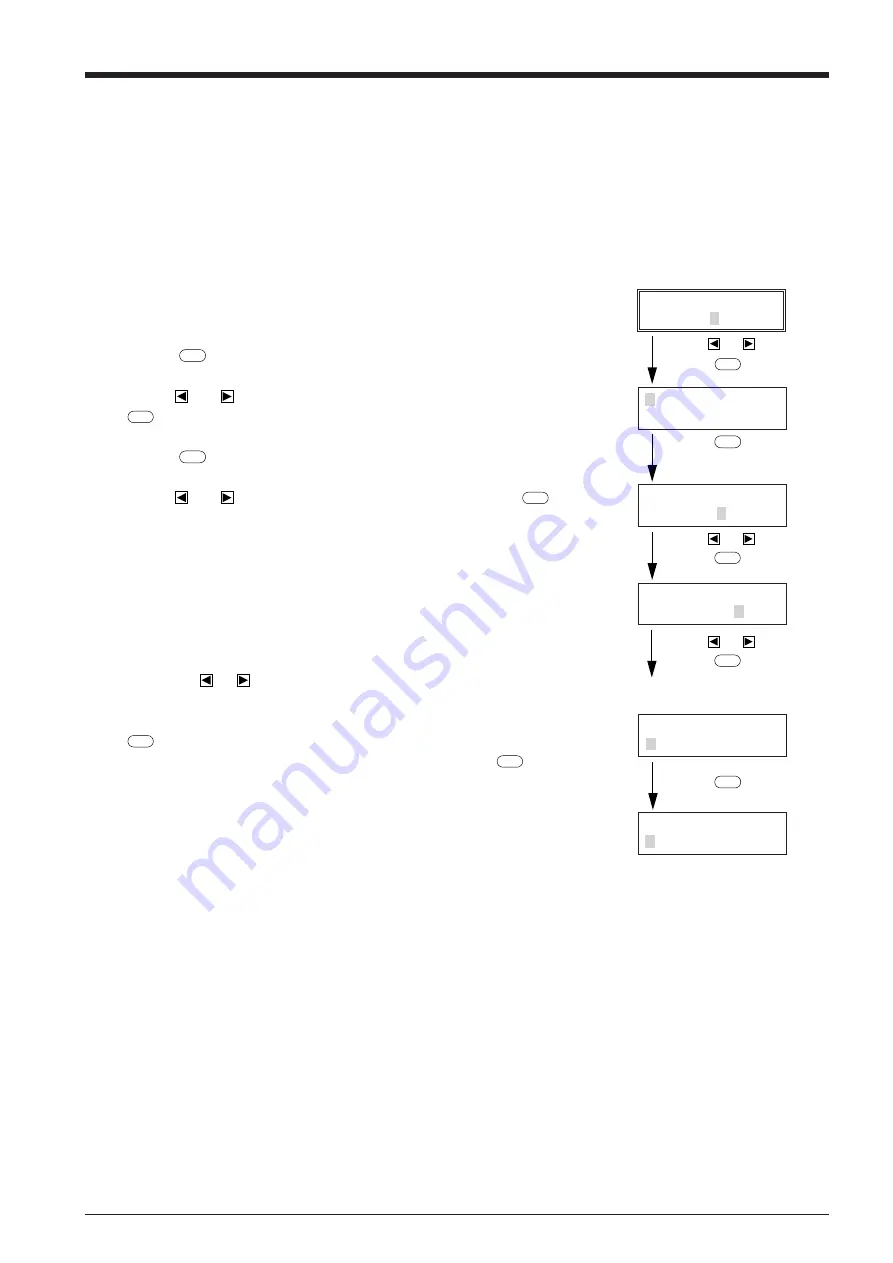
(1) Set the output port for the computer (or software) to “Parallel” for a parallel
connection, or to “Serial” or “RS-232C” for a serial connection.
* The method used to make this setting varies according to the software
used. For details, refer to the manual for your software.
(2) Close the front cover.
(3) Press the
MENU
key to display the menu shown at right.
(4) Use the
and
keys to move the blinking cursor to “SUBMENU” and press
ENTER
key.
(5) Press the
MENU
key twice.
(6) Use the
and
keys to move the blinking cursor to “I/O” and press
ENTER
key.
* The PNC-1860/1410/1210 is equipped with an auto-interface function, and
so when left set to “AUTO,” it will automatically determine whether a parallel
or serial connection is used. When a serial connection is used, however, it
is necessary to set the communication parameters to match those set for the
computer (and/or software).
(7) Pressing the
or
key will sequentially display “PARA,” “SERI,” and
“AUTO.”
If you are using a parallel connection, display “PARA” or “AUTO” and press
ENTER
key.
If a serial connection is used, display “SERI” or “AUTO” and press
ENTER
key.
Then set the communication parameters for the PNC-1860/1410/1210 to match
those selected for the computer (and/or software).
(8) When “SERIAL” or “AUTO” is selected, the menu at right then appears on the
display. Set each parameter to match the parameters used by the computer or
software. (Refer to “Setting the protocol for a Serial connection” on page 21.)
* If the communication parameters for the computer and the PNC-1860/1410/
1210 are not identical, the cutting data cannot be received correctly, which
may result in faulty operation.
3-4 Selecting the Interface
Use the control panel to select the type of interface.
The selected interface type and communication parameters are stored in memory even after the power is switched off.
To change the interface type or the communication parameters, configurations must be re-entered.
Summary of Contents for Camm-1 Pro GX-640
Page 8: ...v MEMO...
Page 38: ...30 Automatic backspace 13 CHARACTER SET...
Page 41: ...R9 980506...


