background image

1-6

Getting Started


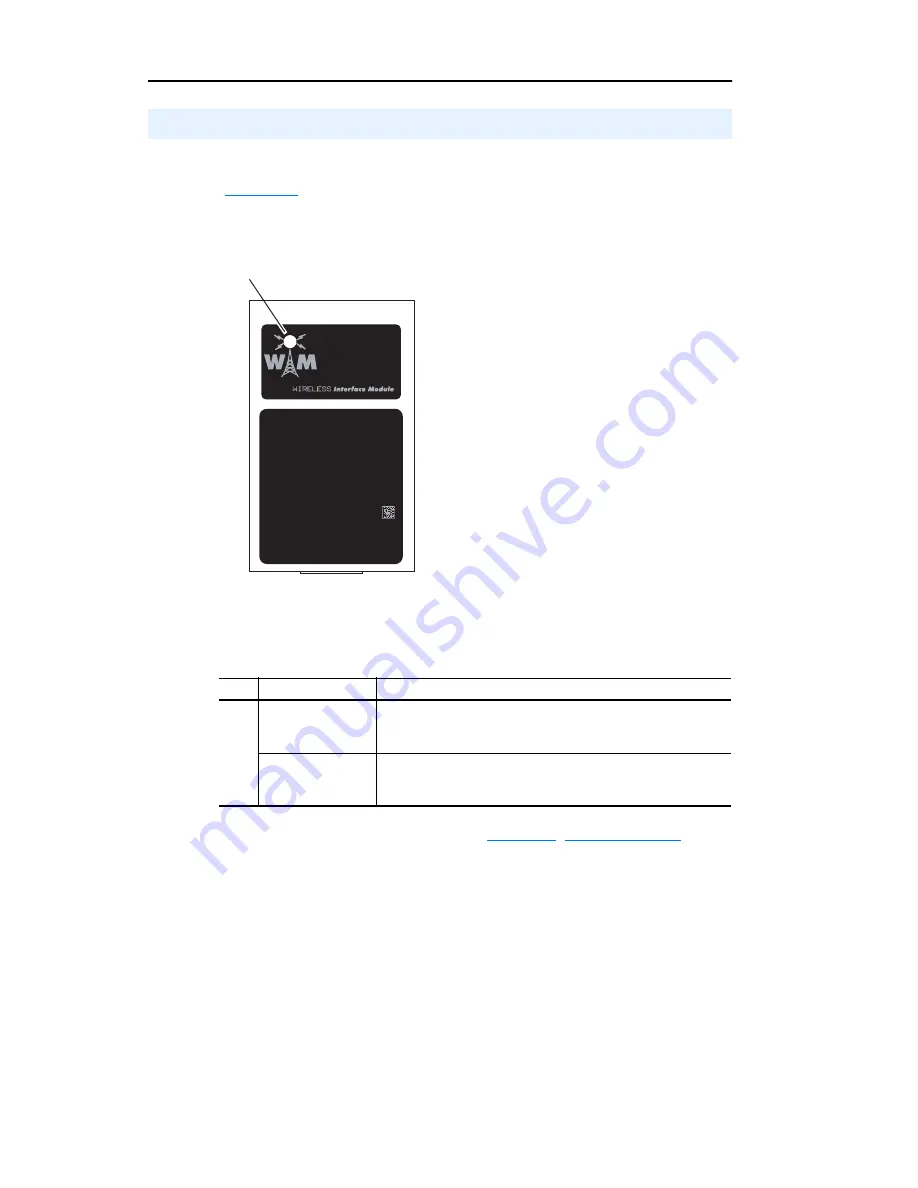
The WIM reports its operating status using a tri-color status indicator 
(

Figure 1.3

).

Figure 1.3   Status Indications of the WIM  

Status indications under normal operation are described below:  

If any other conditions occur, refer to 

Chapter 4

Troubleshooting

.

Status Indicator

Item Status Indication Description

Solid Blue

The WIM is receiving data from the 

Bluetooth

 wireless 

technology enabled Pocket PC or computer, or transmitting 
data to the Pocket PC or computer.

Flashing Green

The WIM is operating, but has not established wireless 
communication with the 

Bluetooth

 wireless technology 

enabled Pocket PC or computer.

Contains FCC ID: SNT-2XWIMNX
 

  IC: 5450A-2XWIMNX 

This device complies with Part 15 of the FCC rules.
Operation is subject to the following two conditions:
1) this device may not cause harmful interference, and
2) this device must accept any interference received,
including interference that may cause undesired operation

(NEMA 1 WIM shown)

Summary of Contents for PowerFlex 22-WIM-N1

Page 1: ...User Manual DSI Wireless Interface Module 22 WIM N1 22 WIM N4S FRN 1 xxx...

Page 2: ...scribed in this manual Reproduction of the contents of this manual in whole or in part without written permission of Rockwell Automation Inc is prohibited Throughout this manual when necessary we use...

Page 3: ...Name for the WIM 3 14 In Chapter 3 in the Using DriveExecutive section added the new subsection Assigning a Name for the WIM 3 23 Description of Change Page s In Chapter 1 In section Equipment Shippe...

Page 4: ...soc ii Summary of Changes...

Page 5: ...IM 22 WIM N4S 2 2 Removing the NEMA 1 WIM 22 WIM N1 2 4 Chapter 3 Configuring the WIM Configuration Tools 3 1 Using Pocket DriveExplorer for Pocket PC 3 2 Using DriveExplorer DriveExplorer Lite 3 10 U...

Page 6: ...Using Pocket DriveExplorer for Pocket PC C 1 Using DriveExplorer DriveExplorer Lite C 6 Using DriveExecutive C 11 Appendix D Using RTU Master Mode Establishing Wireless Connection D 1 Configuring the...

Page 7: ...com drives driveexplorer and DriveExplorer online help installed with the software DriveTools SP includes DriveExecutive http www ab com drives drivetools and DriveExecutive online help installed wit...

Page 8: ...ntry in the world Local Product Support Contact your local Rockwell Automation Inc representative for Sales and order support Product technical training Warranty support Support service agreements Tec...

Page 9: ...y Bluetooth Places software version 1 4 2 DriveExplorer Lite version 4 04 and DriveExecutive version 3 01 were used for the screen pictures in this manual Different versions of the software may differ...

Page 10: ...P 4 About This Manual Notes...

Page 11: ...ndicator 1 6 Components Contains FCC ID SNT 2XWIMNX IC 5450A 2XWIMNX This device complies with Part 15 of the FCC rules Operation is subject to the following two conditions 1 this device may not cause...

Page 12: ...used to configure the WIM Pocket DriveExplorer for Pocket PC version 1 01 or higher DriveExplorer version 4 04 or higher DriveExecutive version 3 01 or higher PowerFlex 4 Class HIM The WIM can be use...

Page 13: ...able This manual Pocket DriveExplorer for Pocket PC software version 1 01 or higher running on a Pocket PC equipped with Bluetooth wireless technology DriveExplorer software version 4 04 or higher run...

Page 14: ...nal hard wired stop circuit to disable the drive ATTENTION Risk of injury or equipment damage exists Only personnel familiar with drive and power products and the associated machinery should plan or i...

Page 15: ...2 for installation instructions Chapter 2 Installing the WIM 3 Configure the WIM parameters The WIM is provided ready for use It is only necessary to configure the WIM if you want to Change the defau...

Page 16: ...ireless technology enabled Pocket PC or computer or transmitting data to the Pocket PC or computer Flashing Green The WIM is operating but has not established wireless communication with the Bluetooth...

Page 17: ...ort on the bottom of the drive 3 Install the WIM into the HIM bezel cradle Figure 2 1 Figure 2 1 Installing the WIM in a HIM Bezel Topic Page Installing the NEMA 1 WIM 22 WIM N1 2 1 Installing the NEM...

Page 18: ...ll turn solid blue The NEMA 4 WIM 22 WIM N4S is designed for remote installation Refer to Figure 2 2 for overall WIM dimensions Choose an appropriate location to mount the NEMA 4 WIM A cable distance...

Page 19: ...5 Align the six threaded studs of the WIM with the panel clearance holes and place the WIM against the panel 6 Tighten the nuts onto the six threaded studs of the WIM extending behind the panel Recom...

Page 20: ...g DriveExecutive on page 3 16 When communication is achieved the WIM status LED will turn solid blue Figure 2 4 Mounting NEMA 4 WIM onto Panel The drive can remain powered when removing a WIM Remove t...

Page 21: ...Using DriveExecutive 3 16 Setting the Fault Action 3 24 Enabling and Setting the Security Mode 3 25 Resetting the WIM 3 26 TIP The WIM is provided ready for use It is only necessary to configure the...

Page 22: ...Connection Manager Screen Using Pocket DriveExplorer for Pocket PC ATTENTION Risk of injury or death exists from machine motion when using wireless communications and software to Start Stop Jog config...

Page 23: ...Select one of the radio button choices Local point to point Choose Local if you want to connect only to a local drive using the WIM Selecting Local and tapping Next displays the Local Connection scree...

Page 24: ...sub steps A through H Figure 3 4 Local Connection Screen 5 Enter a name and tap Next The Connection Summary screen Figure 3 5 appears Figure 3 5 Connection Summary Screen 6 You can save the connection...

Page 25: ...cted Bluetooth device Figure 3 7 Searching for Bluetooth Connections Screen 8 Select the Bluetooth device from this screen and tap OK This screen only appears the first time you connect to this Blueto...

Page 26: ...om the Tasks menu 10 If you will be routing to one or more remote networked drives you will need to perform sub steps A through H in this step This requires that you are able to connect to the Bluetoo...

Page 27: ...OK C With the Remote Configuration screen Figure 3 12 displayed enter a name for this example Drive 1 for the drive Then set its node address for this example 1 to match the node address of the 22 COM...

Page 28: ...Connect and the drive to which you want to connect to for example Drive 1 dfc This establishes connection to that drive and displays its StatusMonitor screen Note Using the Remote connection option fo...

Page 29: ...n the white area above the 22 WIM Nx catalog number to display the User Text entry screen Figure 3 17 In the text box enter the desired name for the WIM for example Pump 1 shown in Figure 3 18 and tap...

Page 30: ...Bluetooth Places version 1 4 2 which was included with a specific brand Bluetooth wireless technology module Different versions of this software and different programs may differ in appearance and pro...

Page 31: ...a search to find the device to which you want to connect The Entire Bluetooth Neighborhood window Figure 3 20 appears displaying icons of all Bluetooth wireless technology enabled devices detected by...

Page 32: ...tion Window 4 In the PowerFlex 40 connection window double click the COM1 on PowerFlex icon to initiate the wireless communication connection A pop up dialog box Figure 3 22 appears indicating the spe...

Page 33: ...DriveExplorer Lite to access parameters in the WIM connected drive and any connected peripherals Then select Explore Configure Communication The Configure Communication screen Figure 3 24 will appear...

Page 34: ...or the WIM optional The WIM can be assigned a custom name up to 16 alpha numeric characters that represents its associated drive s application function such as Pump 1 or Conveyor A After successfully...

Page 35: ...P When using DriveExplorer version 5 01 or higher you can also name the WIM with this alternate method A With the DriveExplorer DriveExplorer Lite Menu Tree window Figure 3 25 displayed select the 22...

Page 36: ...brand Bluetooth wireless technology module Different versions of this software and different programs may differ in appearance and procedures 1 Launch the My Bluetooth Places program The program wind...

Page 37: ...a search to find the device to which you want to connect The Entire Bluetooth Neighborhood window Figure 3 30 appears displaying icons of all Bluetooth wireless technology enabled devices detected by...

Page 38: ...x 40 Connection Window 4 In the PowerFlex 40 connection window double click the COM1 on PowerFlex icon to initiate the wireless communication connection A pop up dialog box Figure 3 32 appears indicat...

Page 39: ...sts Figure 3 33 PowerFlex 40 Connection Window with Lit Green Icon 5 Launch RSLinx to create a driver to represent the connection on COM8 communication port assigned in Step 4 on Page 3 18 6 Select Co...

Page 40: ...dow Use the following settings Then click OK 9 The Configure Drivers window Figure 3 36 will re appear Verify that the status of the newly created driver is Running Then click Close Configuration Fiel...

Page 41: ...ting with the device The screen should look similar to Figure 3 37 Figure 3 37 RSLinx Browse Window 11 Launch DriveExecutive to access parameters in the WIM connected drive and any connected periphera...

Page 42: ...a DriveExecutive directory established for this purpose 14 In the left pane of the DriveExecutive menu tree window click the signs to expand the tree For this example click on 22 WIM Nx and click Lin...

Page 43: ...in the Entire Bluetooth Neighborhood screen and will now be recognized on the network 1 With the DriveExecutive Menu Tree window Figure 3 39 displayed and the 22 WIM Nx DF1 selected select Peripheral...

Page 44: ...determine the action of the WIM and connected drive if communications are disrupted By default this parameter faults the drive You can set this parameter so that the drive continues to run Precautions...

Page 45: ...ease write down your assigned PIN number and store it in a safe place PIN Number ___ ___ ___ ___ 2 Reset the WIM see Resetting the WIM on page 3 26 To use the WIM when security mode is enabled When es...

Page 46: ...for contact information Changes to some WIM parameters require that you reset the WIM before the new settings take effect You can reset the WIM by cycling power to the drive or by using Parameter 08...

Page 47: ...Communication Statistics 4 5 Understanding the Status Indicator Status Cause Corrective Action Off WIM is not powered Securely place WIM in bezel or securely connect bezel or WIM cable to the drive A...

Page 48: ...h WIM firmware If issue persists return WIM to factory for repair replacement Solid Blue WIM is communicating with drive or is in process of flash updating WIM or DSI peripheral No action required Sol...

Page 49: ...present value of the Reference being transmitted to the drive by the WIM 4 Logic Command The present value of the Logic Command being transmitted to the drive by the WIM 5 Logic Status The present va...

Page 50: ...onnel troubleshoot the problem The following events may appear in the event queue Viewing and Clearing Events Code Event Description F0 No Event No event present in the WIM event queue F1 Adapter Rese...

Page 51: ...arameter 11 DF1 Packets Rcvd store this data To view and clear DF1 data you must access the main menu in the WIM firmware To view DF1 data 1 Access the parameters in the WIM using a configuration tool...

Page 52: ...4 6 Troubleshooting Notes...

Page 53: ...80 GHz Frequency Hopping 2 5mW Maximum RF Output Class II 10 m 32 8 ft anticipated range will vary due to environmental conditions Drive Protocol Data Rate Drive Serial Interface DSI 19 2 kbps Electri...

Page 54: ...ironmental Temperature Operating Storage 0 to 50 C 32 to 122 F 40 to 85 C 40 to 185 F Relative Humidity 5 to 95 non condensing Atmosphere Important The WIM must not be installed in an area where the a...

Page 55: ...lletin 65 To comply with FCC RF exposure requirements for mobile transmitting devices this transmitter should only be used or installed at locations where there is at least 20 cm 7 9 inches separation...

Page 56: ...A 4 Specifications Notes...

Page 57: ...No Name and Description Details 01 Adapter Cfg Sets the operating mode of the WIM Default 0 Auto Values 0 Auto 1 Master 2 Slave 3 RTU Master Type Read Write Reset Required Yes 02 Adapter Type Display...

Page 58: ...et Required No 09 Clear DF1 Counts No action if set to Ready Resets the DF1 statistical parameters 10 and 11 to 0 if set to 1 Clear Counts This parameter is a command It will be reset to 0 Ready after...

Page 59: ...cation circumstances dictate that a flash update using wireless communication is necessary then follow the procedure for the respective software tool in this appendix This wireless flash update proced...

Page 60: ...uter during the synchronization process Click Open to launch the firmware installation tool Then click Next to launch the ControlFLASH wizard to install the device s firmware update on the desktop or...

Page 61: ...gure C 4 select the product to list available updates on the desktop or laptop PC for this example 20 COMM D via 22 SCM 232 or 22 WIM In the Select Available Update window select the firmware version...

Page 62: ...1 to display the StatusMonitor screen Figure C 6 for the peripheral device being flashed for this example the 22 COMM D 7 Select Tasks Flash Update to open the DeviceFlash screen Figure C 7 In the Ava...

Page 63: ...shing red and then to flashing green after the reset process is complete 9 Tap Close to exit the flash update process Figure C 11 Figure C 11 DeviceFlash Completed Screen The WIM status indicator chan...

Page 64: ...n the device to access all of its firmware updates Then select Firmware Updates Application Firmware Updates or vx xxx Flash Kit vx xxx Flash Kit 2 Click on the appropriate flash kit version to open t...

Page 65: ...orer DriveExplorer Lite on page 3 10 4 With the DriveExplorer linear list screen Figure C 14 displayed click on the device to be flash updated for this example a 22 COMM D communication adapter Figure...

Page 66: ...ate button to open the Select Flash Update screen Figure C 16 Figure C 16 Select Flash Update Screen In the Available Flash Updates window on this screen select the desired firmware version from the l...

Page 67: ...igure C 18 Executing Flash Update Progress Screen Note Near the end of the flash update process the WIM status indicator changes from solid blue to flashing red and then to flashing green 8 When the f...

Page 68: ...wer cycle the drive to initialize the device with the WIM When flashing the WIM click No The wireless connection to the WIM breaks after the flash update requiring a manual reconnection Use the Blueto...

Page 69: ...lick on the device to access all of its firmware updates Then select Firmware Updates Application Firmware Update or vx xxx Flash Kit vx xxx Flash Kit 2 Click on the appropriate flash kit version to o...

Page 70: ...efer to Using DriveExecutive on page C 11 4 With the DriveExecutive linear list screen Figure C 23 displayed right click on the device to be flash updated for this example a 22 COMM D communication ad...

Page 71: ...sh Update button to open the Select Device to Update screen Figure C 25 which shows the device s firmware revision information Figure C 25 Select Device to Update Screen Click on the device to be flas...

Page 72: ...are version from the Available Flash Updates list for this example 1 007 01 Full Then click Next to continue The Confirm Flash Update warning screen Figure C 27 appears Figure C 27 Confirm Flash Updat...

Page 73: ...lash Update screen changes to indicate that flash update was completed Figure C 29 Figure C 29 Executing Flash Update Completed Screen Click Close to exit the Flash Update Completed screen The Select...

Page 74: ...wireless connection to the device 12 On the Select Device to Update screen verify that the Revision number shown now matches the firmware version flashed into the device 13 Click Cancel to close the S...

Page 75: ...the WIM and the computer For this procedure refer to the respective section in Chapter 3 that corresponds to the drive software tool you are using Using Pocket DriveExplorer for Pocket PC on page 3 2...

Page 76: ...ive parameter 103 Comm Data Rate to 4 19 2K Setting Drive Addresses 1 For Drive 1 connected to the WIM set drive parameter 104 Comm Node Addr to match the WIM node address default 1 set with Parameter...

Page 77: ...ow to note the settings for each drive to be networked Network Drive Number Address Setting for Parameter 104 Drive Addr Cfg Comm Fault Setting for Parameter 105 Comm Loss Action 1 2 3 4 5 6 7 8 9 10...

Page 78: ...een Figure D 3 Then tap WIM Parameter 01 Adapter Cfg to display the Adapter Cfg parameter screen Figure D 4 3 Select RTU Master from the pull down menu and tap Apply to confirm the change Then tap OK...

Page 79: ...e click WIM Parameter 01 Adapter Cfg and set its value to 3 RTU Master Figure D 5 DriveExplorer WIM Linear List Screen 2 Remove power from the drive to which the wireless connection has been made Then...

Page 80: ...fied by the letter M at the port of the splitter cable Important Only one splitter cable can be used on the network and it must be used to connect the WIM to the first drive Using a 22 RJ45CBL Cxx Com...

Page 81: ...lex 4 40 400 Drive 2 Drive 32 Up to 32 PowerFlex 4 40 400 Drives on RTU Master Network AK U0 RJ45 TB2P Connector with Terminating Resistor AK U0 RJ45 TB2P Connector RS 485 AK U0 RJ45 SC1 Splitter Cabl...

Page 82: ...munication between the WIM and the computer Launch Pocket DriveExplorer for Pocket PC The ConnectionMgr screen Figure D 10 appears Select Connect New to display the New Connection Wizard screen Figure...

Page 83: ...Select the drive to which the WIM is connected for this example PowerFlex 40 3P 460V 1 0HP and click OK to display the Remote Configuration screen Figure D 14 Enter a name for this example Drive 1 for...

Page 84: ...The StatusMonitor screen for the drive appears 7 Repeat Steps 1 through 6 for each remaining drive on the network 8 After connections for all drives on the network have been created and saved you can...

Page 85: ...ction screen Figure D 20 Figure D 20 Network Connection Node Selection Screen 3 Select the Multiple radio button Then enter the node address for the first network drive for this example 1 and the node...

Page 86: ...and identity Then expand each node to display the connected drive and WIM representation Figure D 22 Figure D 22 DriveExplorer Expanded Network Menu Tree TIP WIM representation appears for each drive...

Page 87: ...sent the drives or the DSI icons The window should look similar to Figure D 23 Figure D 23 Connect to Drive Window 2 Select the drive to which you want to connect to for this example the node address...

Page 88: ...Drive 1 Online Linear List Window 3 Repeat Steps 1 and 2 for each remaining drive on the network Figure D 25 shows online windows for each of the drives in this example RTU Master network Figure D 25...

Page 89: ...alls the application code C ControlFLASH ControlFLASH is an Allen Bradley software tool that lets users electronically update firmware on printed circuit boards The tool takes advantage of the growing...

Page 90: ...rs running various Microsoft Windows operating systems DriveExplorer version 3 xx or higher can be used to configure the WIM and PowerFlex drives Information about DriveExplorer and a free Lite versio...

Page 91: ...verter it will continue to run at the same Reference N NVS Non Volatile Storage NVS is the permanent memory of a device Devices such as the WIM and drive store parameters and other information in NVS...

Page 92: ...s W WIM Wireless Interface Module The WIM provides a wireless communications interface between any Allen Bradley DSI drive and a computer or Pocket PC with an RS 232 port The WIM uses a full duplex RS...

Page 93: ...CRC Cyclic Redundancy Check G 1 D DF1 Packets Rcvd parameter B 2 DF1 Packets Sent parameter B 2 DF1 protocol G 1 diagnostic items 4 3 dimensions A 1 Drive Addr Act parameter B 2 Drive Addr Cfg parame...

Page 94: ...b site P 1 mechanical specifications A 1 N naming the WIM optional using DriveExecutive 3 23 using DriveExplorer 3 14 using Pocket DriveExplorer for Pocket PC 3 8 Non Volatile Storage NVS G 3 P parame...

Page 95: ...ata 4 5 diagnostic items 4 3 W web site DriveExecutive G 2 DriveExplorer G 2 DriveTools SP G 2 Pocket DriveExplorer for Pocket PC G 3 technical manuals documentation P 1 WIM assigning a name optional...

Page 96: ...Index 4...

Page 97: ...Index 5...

Page 98: ...Index 6...

Page 99: ......

Page 100: ...ific Rockwell Automation Level 14 Core F Cyberport 3 100 Cyberport Road Hong Kong Tel 852 2887 4788 Fax 852 2508 1846 Power Control and Information Solutions Headquarters U S Allen Bradley Drives Tech...

Reviews: