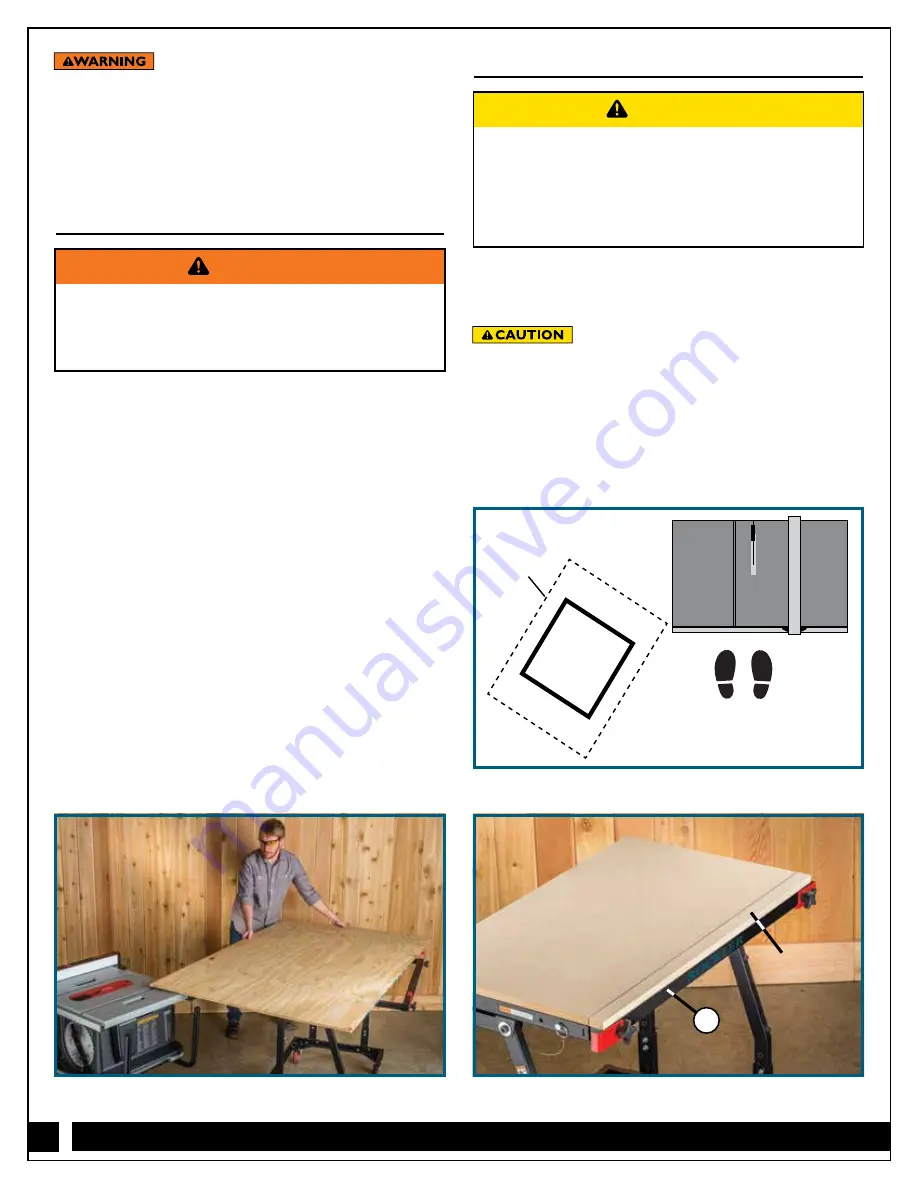
1. Position the cart so that, when sheet is tipped to the
horizontal position, the leading edge of the sheet will be
near but not on the saw’s table. Engage the Locking
Casters (17)
.
Fig. 12.
2. With the saw turned off, verify that the cart is positioned
correctly. Holding the sheet with both hands, carefully tip it
and guide it to the horizontal position. Keep your hands clear
of the cart to avoid pinching your fingers, and make sure the
Latch Arm (26) engages against Crossbar (21) with a “click”
to keep table in horizontal position.
3. If necessary, adjust the cart position by carefully tilting the
sheet back upright, unlocking the casters and moving the
cart. Repeat Steps 2-3 until optimal position is achieved.
Engage the Locking Casters (17).
4. Holding the sheet with both hands, carefully slide it off the
cart so one corner is on the edge of the table saw.
Fig. 13.
5. Turn on the saw.
6. Make sure there is proper outfeed support for the material
when it leaves the table saw.
7. Advance the material into the blade, keeping the edge tight
against the fence. If necessary, use a push stick at the end of
the cut to keep your hands away from the blade.
Check Rockler.com for updates. If you have further questions, please
contact our Technical Support Department at 1-800-260-9663
8
Distributed by Rockler Companies, Inc.
©2016 Rockler Woodworking and Hardware
56889
Rev 12/16
> The Table Extension (23) must be retracted and
secured if the Material Mate
™
is to be used as a
worktable. Use of the Material Mate
™
as a table
with the Table Extension (23) extended creates
a tipping hazard. Make sure bullet pins and Safety
Locking Pin (8) are fully engaged.
CAUTION
> Never feed sheet directly from the Material Mate
™
into the table saw. This can cause kickback and
injury. Transfer sheet to table saw before turning
on saw.
WARNING
Sliding sheets off the cart while in the
upright position could cause the cart to tip, resulting in
injury or property damage. Only unload when table frame
is in a horizontal position.
2. Engage the Locking Casters (17).
3. Lift the sheet above the Flip Stops (24 and 26) and
off the cart.
Positioning the Material at a Table Saw
Using as a Worktable
1. Attach a top and narrow extension strip to the Material
Mate
™
by driving screws (not included) through predrilled
holes in the frame
.
Fig. 14.
Maximum thickness for a top is 3/4". If a
top is attached, a narrower strip of equal thickness must
be attached separately to the Table Extension (23). Fig. 14.
This is necessary to maintain an even surface for stable
handling of sheet goods.
Fig. 14
Fig. 12
Fig. 13
Material
Mate
Table
Saw
Sheet
Narrow strip
23


