Chapter 3 Functions for Master Making
69
3
Selecting a Separation Method
from Preview Images
[Rec. Preview] (Dual-Color Mode)
1
Display the master making basic
screen for dual-color mode.
24), touch [
m
Dual-
Color].
2
Place an original on the glass
platen.
Place the original with the scanning side facing
down and align the center of the original with
the [
H
] mark.
3
Place the paper.
30 “Setting up the paper feed tray and the
4
Set the paper receiving tray.
31 “Setting up the paper receiving tray”)
5
Touch [Rec. Preview] in the [Func-
tions] tab screen.
6
Set the other required printing
conditions.
52 “Functions for Master Making”)
7
Press the [START] key.
Scanning of the original starts.
When scanning is complete, the [Rec. Preview]
screen is displayed.
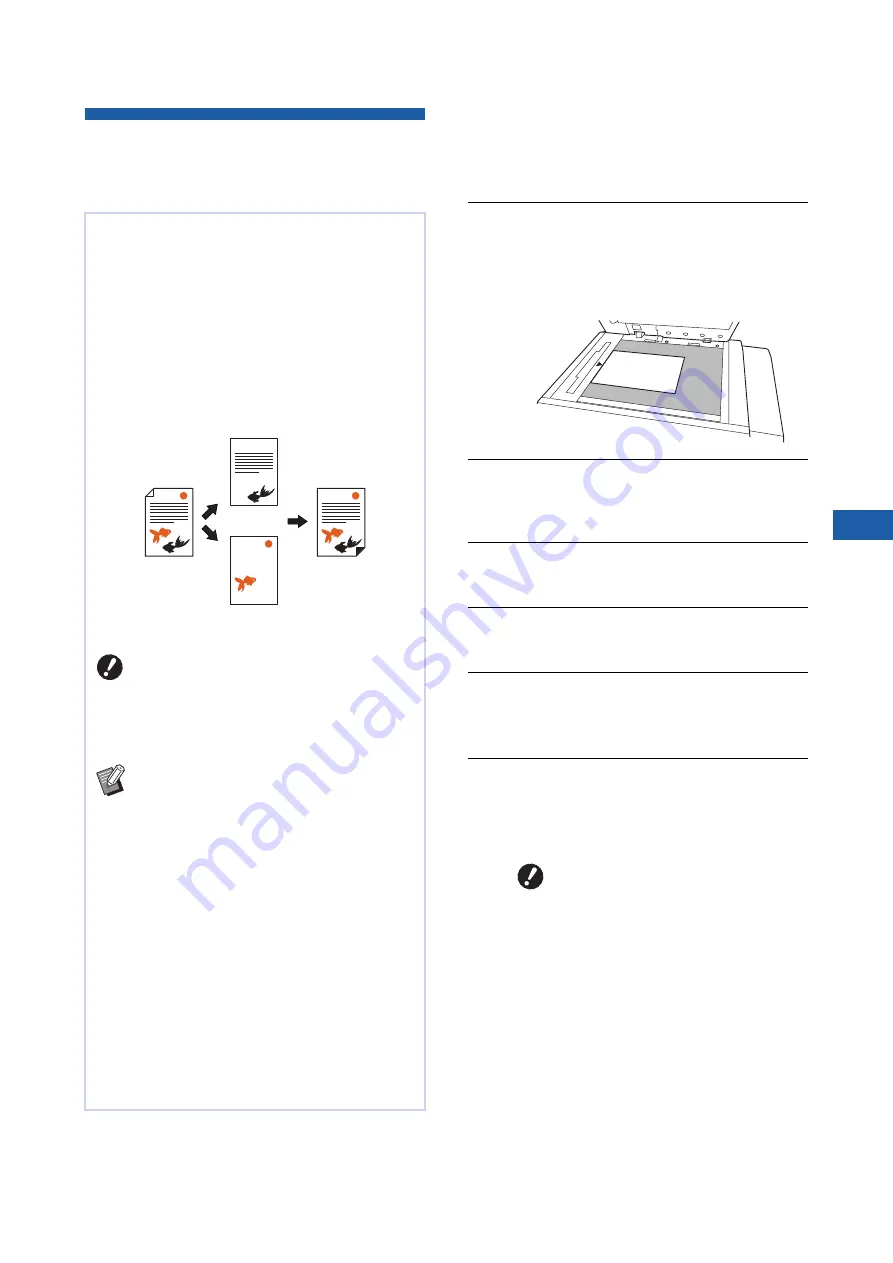
This function is dedicated for dual-color mode.
You can perform dual-color printing by assigning an
original that is made with more than one color to the
two print drums (cylinders) and then making a mas-
ter for each drum (separation).
When you use [Rec. Preview], the results of the
three types of separation are displayed in the pre-
view screen before making a master for compari-
son. You can check the preview images and
intuitively select the most appropriate separation
method.
B
When you use [Rec. Preview], [Image]
and [Contrast] are automatically set to
[Line] and [Auto], respectively. For orig-
inals that contain photos, use [Speci-
fied area] (
B
To use [Rec. Preview], it is necessary to
install a memory card in this machine.
(
43 “Installing a memory card”)
B
In [Rec. Preview], the same separation
processes are executed as in [Red Sepa-
ration], [Chromatic Separation], and
[Warm/Cool Color Sep.] from [Color Sepa-
ration] (
B
You cannot use this function with the fol-
lowing functions:
C
C
C
C
C
C
[Binding Margin Adj.] (
C
C
C
Original
Print result
Print drum (cylinder) 1
Print drum (cylinder) 2
B
The original is scanned multiple
times.
Do not take out the original until a
dual-color proof copy is output.
Summary of Contents for MH 9350
Page 21: ...Chapter 1 19 1 About This Machine ...
Page 31: ...29 2 Chapter 2 Basic Operations ...
Page 53: ...51 3 Chapter 3 Functions for Master Making ...
Page 97: ...95 4 Chapter 4 Functions for Printing ...
Page 109: ...107 5 Chapter 5 Useful Functions ...
Page 130: ...Chapter 5 Useful Functions 128 ...
Page 131: ...129 6 Chapter 6 Functions for Scanning ...
Page 137: ...135 7 Chapter 7 Setting the Operation Conditions ...
Page 159: ...157 8 Chapter 8 RISO Console ...
Page 165: ...163 9 Chapter 9 Replacing Consumables ...
Page 177: ...175 10 Chapter 10 Maintenance ...
Page 181: ...179 11 Chapter 11 Troubleshooting ...
Page 205: ...203 12 Chapter 12 Appendix ...
Page 215: ...Chapter 12 Appendix 213 12 V View edit 48 W WAKE UP key 23 Z Zoom 71 ...


