Chapter 2 Basic Operations
30
Overview
■
Preparation
■
Operation
Preparation before Printing
Setting up the paper feed tray and
the paper
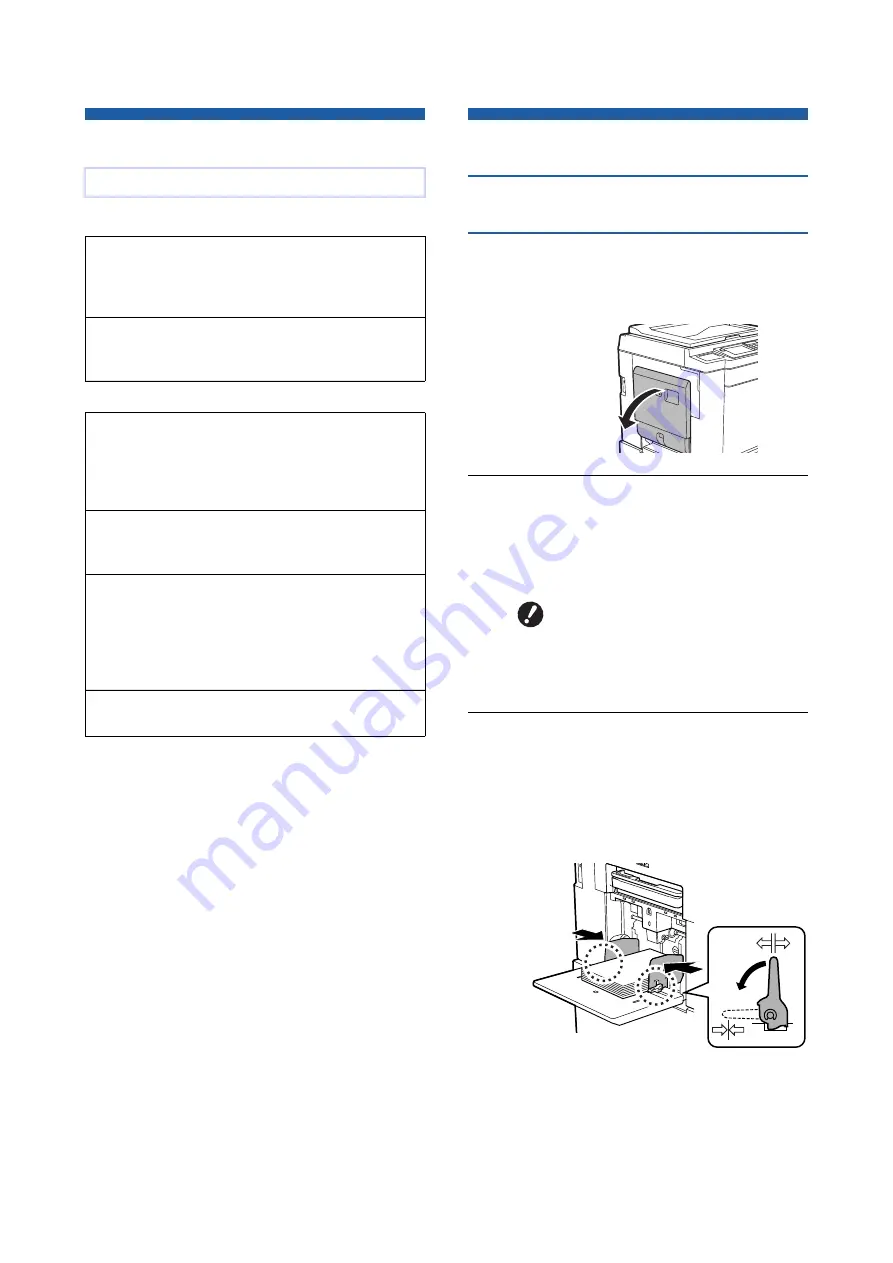
1
Open the paper feed tray.
While holding the paper feed tray with your
hand, open it until it stops.
2
Place the paper on the paper feed
tray.
Place the paper with the printing side facing up.
Use the same orientation as that of the original.
(
3
Adjust the feed-tray paper guides.
Raise the lock levers on both sides of the feed-
tray paper guides so that you can slide the
feed-tray paper guides by hand.
Tightly fit the feed-tray paper guides to the
paper, and then push down the lock levers on
both sides to lock the guides.
This chapter describes the following procedures.
Describes the procedure to set up the paper feed
tray and paper, and the procedure to set up the
paper receiving tray.
Describes the procedure to place originals on the
glass platen and the optional auto document feeder.
Describes the procedure to scan and print paper
originals.
• Dual-color printing (
Describes the procedure to print original data from a
computer connected to this machine.
Saving paper originals as data (
Describes the procedure to scan paper originals
using this machine’s scanner, and then saving it as
original data.
Also describes the procedure to install the memory
card in order to save original data to this machine.
Printing saved original data (
Describes the procedure to print saved original data.
B
Do not use inappropriate paper or
mix paper of different sizes. It
may cause a paper jam or dam-
age your printer.
(
Summary of Contents for MH 9350
Page 21: ...Chapter 1 19 1 About This Machine ...
Page 31: ...29 2 Chapter 2 Basic Operations ...
Page 53: ...51 3 Chapter 3 Functions for Master Making ...
Page 97: ...95 4 Chapter 4 Functions for Printing ...
Page 109: ...107 5 Chapter 5 Useful Functions ...
Page 130: ...Chapter 5 Useful Functions 128 ...
Page 131: ...129 6 Chapter 6 Functions for Scanning ...
Page 137: ...135 7 Chapter 7 Setting the Operation Conditions ...
Page 159: ...157 8 Chapter 8 RISO Console ...
Page 165: ...163 9 Chapter 9 Replacing Consumables ...
Page 177: ...175 10 Chapter 10 Maintenance ...
Page 181: ...179 11 Chapter 11 Troubleshooting ...
Page 205: ...203 12 Chapter 12 Appendix ...
Page 215: ...Chapter 12 Appendix 213 12 V View edit 48 W WAKE UP key 23 Z Zoom 71 ...


