Chapter 3 Functions for Master Making
66
11
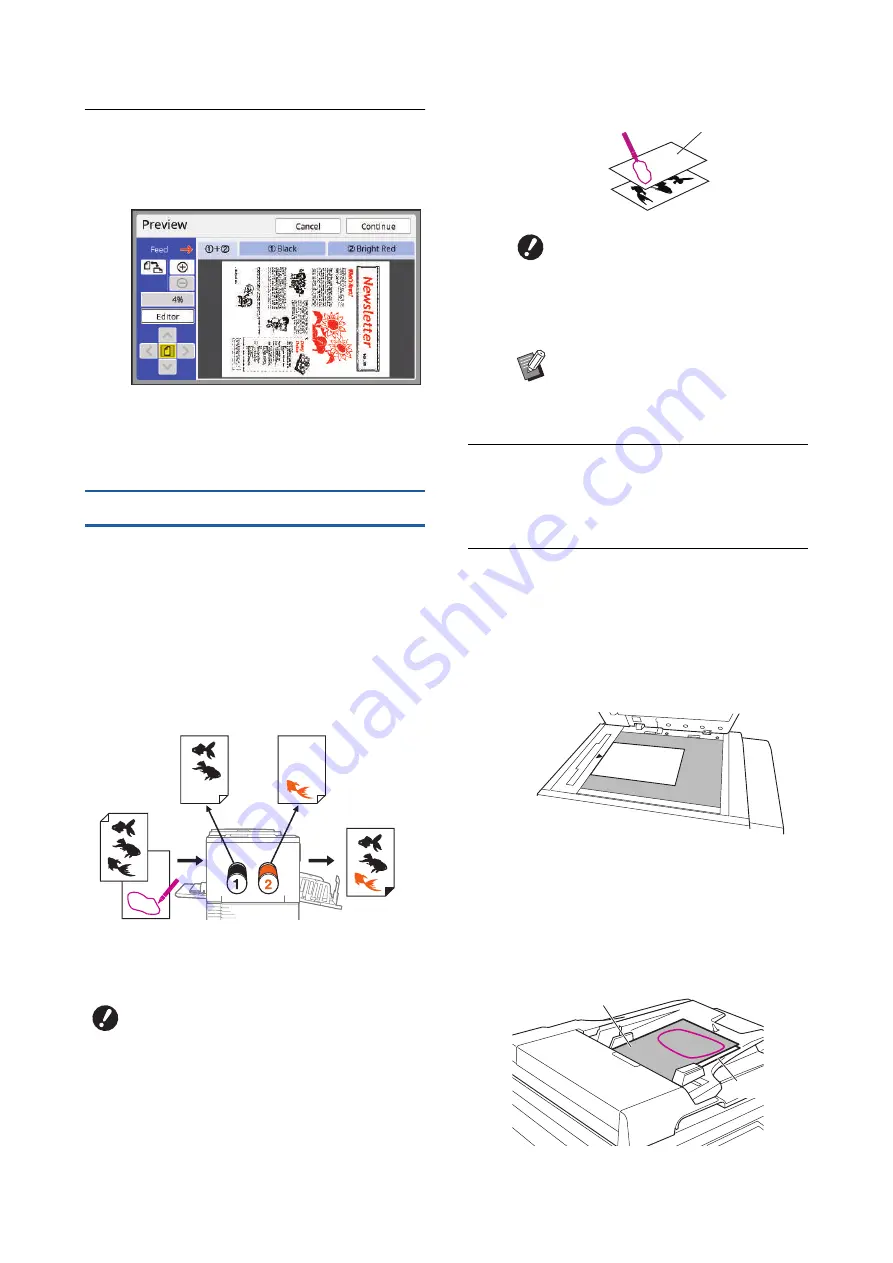
Check if separation is performed
as intended.
scanning the original.
• Touch [Continue] to start master making.
• Touch [Editor] to move to the [Editor] editing
screen. You can use the touch panel to
change the areas that you want to separate.
[Separation Sheet]
Select this option for originals that contain photos.
On the original, lay a white sheet (tracing paper) of the
same size. Using a commercially available red marker
pen, draw pen frames to enclose the areas that you
want to separate.
A range of 1 mm to 3 mm (3/64 inch to 1/8 inch) is
available for the pen width.
This method is useful when you cannot write on the
original.
The original is separated into inside and outside of the
specified area.
1
On the original, lay a sheet of trac-
ing paper and draw pen frames to
enclose the areas that you want to
separate.
Use a white sheet as a tracing paper that has
the same size as the original.
2
Display the master making basic
screen for dual-color mode.
24), touch [
m
Dual-
Color].
3
Place the tracing paper.
■
When using the glass platen
Place the tracing paper with the scanning side
(the side on which pen frames are drawn) fac-
ing down and align the center of the tracing
paper with the [
H
] mark. Then, close the platen
cover.
■
When using the auto document
feeder
You can place the original and the tracing paper
together.
In this case, place the tracing paper over the
original. Place the tracing paper and the origi-
nal with their scanning side facing up.
B
When using [Separation Sheet], you
cannot select [Auto] under [Contrast].
Print drum (cylinder) 1
(Outside the areas)
Tracing paper
Print drum (cylinder) 2
(Inside the areas)
Print result
Original
B
Draw pen frames using a com-
mercially available red marker
pen. For more information on
how to draw pen frames, see step
1 (
B
Using a light table or window glass
helps with the drawing because the
original becomes visible through the
tracing paper.
Tracing paper
Tracing paper
Original
Summary of Contents for MH 9350
Page 21: ...Chapter 1 19 1 About This Machine ...
Page 31: ...29 2 Chapter 2 Basic Operations ...
Page 53: ...51 3 Chapter 3 Functions for Master Making ...
Page 97: ...95 4 Chapter 4 Functions for Printing ...
Page 109: ...107 5 Chapter 5 Useful Functions ...
Page 130: ...Chapter 5 Useful Functions 128 ...
Page 131: ...129 6 Chapter 6 Functions for Scanning ...
Page 137: ...135 7 Chapter 7 Setting the Operation Conditions ...
Page 159: ...157 8 Chapter 8 RISO Console ...
Page 165: ...163 9 Chapter 9 Replacing Consumables ...
Page 177: ...175 10 Chapter 10 Maintenance ...
Page 181: ...179 11 Chapter 11 Troubleshooting ...
Page 205: ...203 12 Chapter 12 Appendix ...
Page 215: ...Chapter 12 Appendix 213 12 V View edit 48 W WAKE UP key 23 Z Zoom 71 ...


