Riso ComColorExpress IS700C Setup Manual Download Page 10

Safety Precautions

8

Notice about Safety and Handling (Uk)

Safety Precautions

This section describes the precautions to be observed for the safe use of this unit. Be sure to read this section.

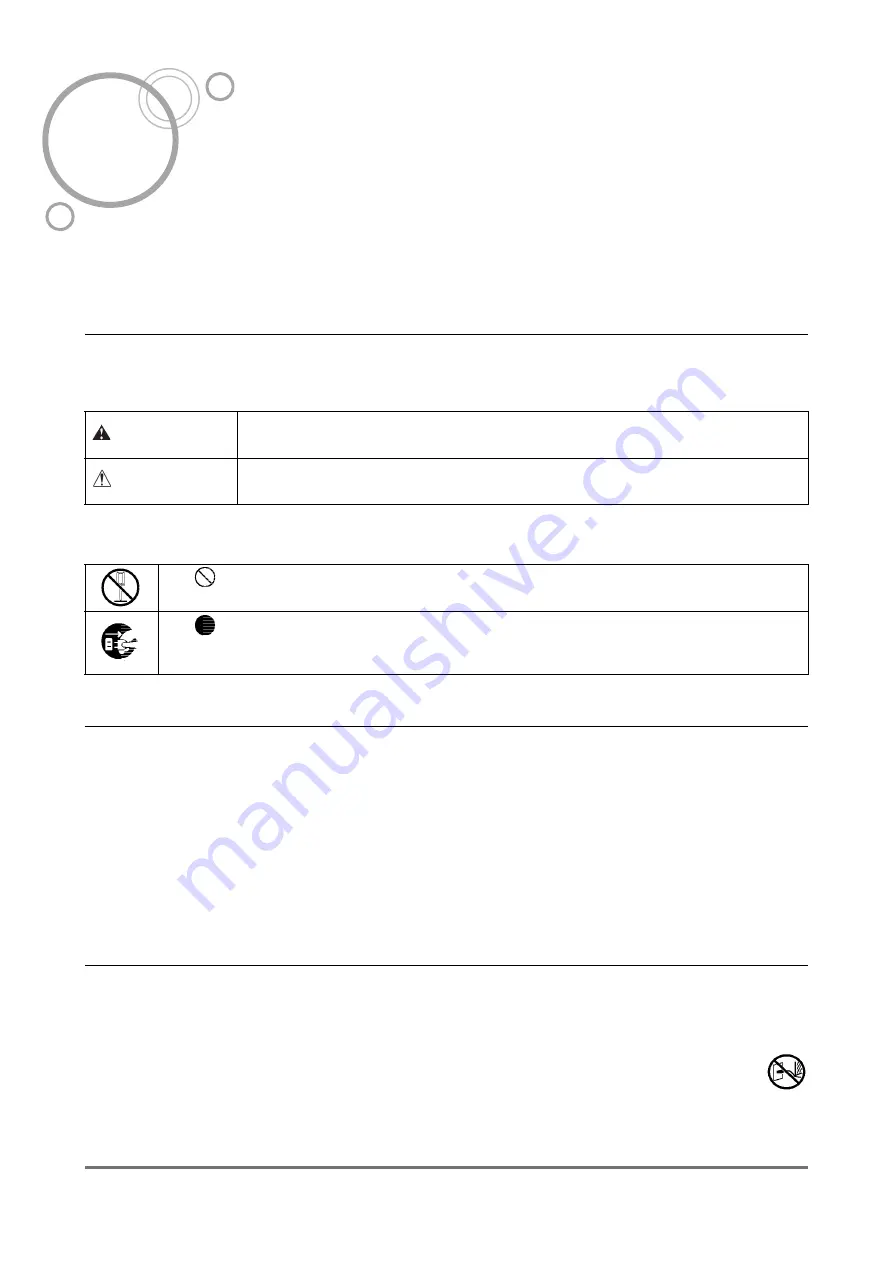
Warning Symbols / Icons

To use the unit properly and to prevent human injury and damage to property, the following warning symbols are 
used. Make sure you have a full understanding of the definitions of these symbols before reading the manual.

Example of icons

Installation Locations

B

Caution:

• Place the unit on a flat and stable surface.

Failure to observe this may result in injury owing to the unit tilting or falling over.

• The unit is equipped with ventilation holes. Install the unit more than 150 mm (5

 7

/

8

”) away from the wall. If the ven-

tilation holes are blocked, heat is not dissipated and a fire might occur.

• Do not place the unit in a dusty or humid location.

Failure to observe this may result in the outbreak of fire or electric shocks.

• Do not place the unit in a location that is subject to water leaks or water splashes. Failure to observe this may result 

in the outbreak of fire or electric shocks.

Power Connection

A

WARNING:

• Use the specified method of installing the power supply. Failure to observe this may result in the outbreak of fire 

or electric shocks.

• Do not damage or modify the power cord. Placing heavy objects on the cord or using excessive force to 

pull or bend it may result in damage, leading to the outbreak of fire or electric shocks.

• The power cord supplied with this product can be used only for this unit. Using the cord with other electric 

products may result in the outbreak of fire or electric shocks.

• Do not plug or unplug the power cord with wet hands. Failure to observe this may result in electric shocks.

WARNING:

Indicates that incorrect handling by ignoring this symbol may cause death or serious 
human injury.

Caution:

Indicates that incorrect handling by ignoring this symbol may cause human injury or 
damage to property.

The 

 symbol indicates a prohibited action. A detailed icon of the action prohibited is shown in the 

symbol or near the symbol. (The left figure shows prohibition of disassembly.)

The 

 symbol indicates a forced action or an instruction.

A detailed icon of the recommended instruction is shown in the symbol. (The left figure shows an 
instruction to remove the power plug from the electrical outlet.)

Summary of Contents for ComColorExpress IS700C

Page 1: ......

Page 2: ......

Page 3: ...talled and used in accordance with the instructions may cause harmful interference to radio communications However there is no guarantee that interference will not occur in a particular installation I...

Page 4: ...there is something you do not understand while using it Content of Instruction Manuals Notes 1 Unauthorised reproduction of all or part of this manual is strictly prohibited 2 Since there may be impro...

Page 5: ...3...

Page 6: ...mes and Functions 13 Front side 13 Rear side 14 Test button 15 Reset button 15 Specifications 16 Hinweise zur Sicherheit und Behandlung Du 18 Vorwort 18 Sicherheitsvorkehrungen 19 Warnungssymbole 19 A...

Page 7: ...ling the RISO IS700C Software 37 Communication settings 39 Printer Installation 41 Uninstalling the RISO IS700C Software 43 Installing on Macintosh Mac OS X 44 Installing the RISO Management Tool 44 C...

Page 8: ...escribes items where there is particularly helpful information and ones where there is something that should be known indicates the title and page of an item that should be referred to and thoroughly...

Page 9: ...Icons Used in This Manual 7...

Page 10: ...k of fire or electric shocks Power Connection AWARNING Use the specified method of installing the power supply Failure to observe this may result in the outbreak of fire or electric shocks Do not dama...

Page 11: ...sult in the outbreak of fire or electric shocks Do not place candles are any other naked flame near the unit Do not insert or drop any metallic material or flammable substances into the unit through a...

Page 12: ...autions 10 Warning Labels The following warning labels are attached to the unit for safety purposes Read these instructions carefully Never peel off or soil the labels If the labels are not attached t...

Page 13: ...t be handled in ways other than those stipulated in this manual Do not place heavy objects on or apply shocks to the unit Wait at least ten seconds between switching off the power supply and switching...

Page 14: ...ttached to each item of software must be satisfied 3 Software for which transferal to third parties is prohibited must be deleted prior to transferal of the unit Disposal of Consumables and the Unit F...

Page 15: ...used to turn the power on and off Important Do not keep pressing the main power switch to termi nate the operation forcedly This may cause improper operation of the controller 2 ERROR indicator orang...

Page 16: ...h off the power to both the IS700C and the other device prior to connecting them together Failure to observe this may result in malfunctions or failures The permissible voltage for all input output co...

Page 17: ...ng down the Reset button when the unit is idle until you hear one beep 2 Stop holding down the Reset button within 2 seconds of hearing the beep You will hear one more beep and after the IS700C reboot...

Page 18: ...ower consumption 100 240V AC 50 60Hz 2 5 1 8A or more Maximum 300W Dimensions mass W x D x H 180 mm 7 1 16 x 405 mm 15 15 16 x 359 mm 14 1 8 approximately 10kg 22lb PDL page description language Adobe...

Page 19: ...number of pages copies Sample page function Detail settings print Font list print PS PCL Security print function Password setting Job name is hidden Web Console Function Monitoring Function Informatio...

Page 20: ...Produkts oder wenn Sie w hrend der Benutzung auf Fragen oder Probleme sto en Inhalt der Handb cher Hinweise 1 Die unerlaubte Vervielf ltigung dieses Handbuchs oder von Teilen davon ist strengstens un...

Page 21: ...in kann ein Brand sowie elektrische Schl ge verursacht werden Spannungsanschluss AWARNUNG Installieren Sie die Spannungsversorgung wie vorgeschrieben Andernfalls kann ein Brand oder elektrische Schl g...

Page 22: ...er oder ein Metallobjekt ins Innere eindringt kann dies zu einem Brand oder elektrischen Schl gen f hren Stellen Sie keine offenen Feuerquellen wie z B eine Kerze auf die Einheit Lassen Sie keinerlei...

Page 23: ...angebracht um einen sicheren Betrieb zu gew hrleisten Lesen Sie die Hinweise zum sicheren Betrieb sorgf ltig Entfernen oder verschmutzen Sie die Etiketten niemals Falls die Eti ketten nicht angeklebt...

Page 24: ...nde auf die Maschine und setzen Sie sie keinen Schl gen aus Wenn der Hauptschalter der Maschine aus und dann wieder eingeschaltet wird warten Sie mehr als 10 Sekunden vor dem Einschalten Wenn ein Kabe...

Page 25: ...erwendung der Software die jeder Software beiliegen m ssen erf llt werden 3 Software deren Transfer nicht gestattet ist muss vor bergabe der Einheit gel scht werden Entsorgung von Verbrauchsmaterial u...

Page 26: ...lter der sich auf dem Bedienfeld am Geh use des HC5500 befindet Wichtig Benutzen Sie nicht den Hauptspannungsschalter um den Betrieb zwangsweise zu beenden Dies kann Funktionsst rungen im Kontrollger...

Page 27: ...en sind der IS700C sowie das anzuschlie ende Ger t auszuschalten Wird der Anschluss bei eingeschalteter Spannung vorgenommen kann eine St rung auftreten Die zul ige Spannung f r alle Ein Ausgangsansch...

Page 28: ...knopf so lange gedr ckt bis Sie einen Piepton h ren 2 Lassen Sie den R ckstellknopf innerhalb von 2 Sekunden los nachdem Sie den Piepton geh rt haben Sie h ren einen weiteren Piepton und nach dem Neus...

Page 29: ...rgung maximaler Strombedarf 100 240V AC 50 60Hz 2 5 1 8A oder mehr max 300W Abmessungen Gewicht B x T x H 180 mm x 405 mm x 359 mm ca 10kg PDL Page Description Language Adobe PostScript 3TM PDF PCL PJ...

Page 30: ...Detaillierte Druckeinstellungen Schriftlistendruck PS PCL Funktion Sicherheitsdruck Passworteinstellung Jobname ist verborgen Netzwerkkonsolenfu nktion berwachungsfunktion Information ber verschieden...

Page 31: ...Hinweise zur Sicherheit und Behandlung Du Technische Daten 29...

Page 32: ...at the front panel LED indicators The IS700C features a safety design that automatically enters into system shutdown procedures when the power switch is pressed for shut down Printer Driver This prod...

Page 33: ...ncluding the Create new queue function that reduces the time taken to set printing conditions and the Hold queue function that enables quick printing by simply calling up data uploaded in advance For...

Page 34: ...missing contact your service representative Important If the IS700C package was exposed to extreme temperature conditions wait a few hours before opening the plas tic bag packing the IS700C unit Othe...

Page 35: ...Before Using the ComColorExpress IS700C Checking Your ComColorExpress IS700C Package 33...

Page 36: ...llation of the ComColorExpress IS700C Computer Connections Connect the IS700C and computer to the network Connecting multiple computers Connecting to one computer Note Use a commercial STP cable Shiel...

Page 37: ...sary for you to install this software and set the IP address for the IS700C before installing the printer driver Note The IP address for the IS700C can also be set using the optional Touch Panel Displ...

Page 38: ...RISO Management Tool enables you to set the IP address for the IS700C and also enables you to perform the monitoring and wake up processes for the IS700C Confirm the IP address with your network admi...

Page 39: ...own before installing the software 1 Insert the RISO IS700C Software CD ROM in your computer s CD ROM drive The installer starts and the Installer Language dialog box is displayed Note If the installe...

Page 40: ...nagement Tool if you want to use the RISO Management Tool Confirm the IP address with your network administrator Manuals These are manuals for the IS700C 6 Confirm the destination for installa tion an...

Page 41: ...controller and click Dis play 3 Configure the IS700C Communica tion settings RIP name Enter the controller name using only alphanu meric characters and hyphens within 63 char acters Note Enter an alp...

Page 42: ...Then install the printer driver See Printer Instal lation p 41 Note Network setting details can be changed from Communication settings on the RISO con sole or optional Touch Panel Display For details...

Page 43: ...arts Note You can also start the Printer Installer by dou ble clicking the RISO Printer Driver icon on your computer s desktop 2 Click the Next button Note When the New printer driver from disk dia lo...

Page 44: ...o the separate manual Com ColorExpress IS700C Utility Guide 6 Select the printer name and click the Next button Note If the manufacturer and the printer model are not displayed click the Have Disk but...

Page 45: ...ed 2 Select the icon for the printer you want to delete 3 Press the computer s Delete key The printer deletion confirmation dialog box is displayed Note The printer can also be deleted by right clicki...

Page 46: ...RISO IS700C Software CD ROM in your computer s CD ROM drive 2 Double click on RISO Management Tool pkg on the CD ROM The installer starts 3 Click the Continue button 4 Read the End User License Agree...

Page 47: ...tton 8 Enter the Name and Password on the Authenticate dialog box and click the OK button Note Confirm the Name and Password with your network administrator Installation begins 9 Complete the installa...

Page 48: ...lick Dis play 4 Configure IS700C Communication settings RIP name Enter the controller name using only alphanu meric characters and hyphens within 63 char acters Note Enter an alphabetic character as t...

Page 49: ...he printer driver See Printer Instal lation p 48 Note Network setting details can be changed from Communication settings on the RISO Con sole or optional Touch Panel Display For details refer to the s...

Page 50: ...ouble click on IS700C PD pkg on the CD ROM The installer starts 3 Click the Continue button 4 Read the End User License Agree ment and click the Continue but ton 5 Click the Agree button Note If you d...

Page 51: ...available the There are no usable printers available dia log box will be displayed In this case click the Add button and display the Printer List dialog box 13Select the queues you want to install in...

Page 52: ...processed in accordance with the queue set tings registered by the administrator For details refer to the separate manual Com ColorExpress IS700C Utility Guide 14Select RISO ComColorExpress IS700C G v...

Page 53: ...Setup and Installation of the ComColorExpress IS700C Installing on Macintosh Mac OS X 51...

Page 54: ...are the same as the RISO console which is conducted from your computer s browser For details about the Touch Panel Display refer to the separate manual ComColorExpress IS700C Utility Guide The option...

Page 55: ...ion other than the If you fail to calibrate the touched position correctly you can display the Touch Panel Calibration Screen on the Touch Panel Display by entering http Controller s IP address tp_cal...

Page 56: ...ration screen 2 Scan Displays the scanning function operation screen 3 Job manager Displays the IS700C job manager screen 4 Printer Displays the printer status screen 5 RIP Displays the IS700C managem...

Page 57: ...ing Down the ComColorExpress IS700C You can reboot and turn off the IS700C from the Touch Panel Display 1 Touch the button on the Start Menu screen 2 Touch either RIP reboot or RIP shutdown Note Touch...

Page 58: ...power is ON for the IS700C and printer Confirm that the IS700C and computer and the IS700C and printer are connected correctly Computer Connections p 34 Cannot install the printer driver The IP addres...

Page 59: ...Appendix Font list 57 Font list...

Page 60: ...Appendix Font list 58...

Page 61: ...Appendix Font list 59...

Page 62: ...Appendix Font list 60...

Page 63: ...Appendix Font list 61...

Page 64: ...Appendix Font list 62...

Page 65: ...Appendix Font list 63...

Page 66: ...Appendix Font list 64 101 36013 004...

Page 67: ......

Page 68: ......

Reviews: