background image


Rinnai I

-

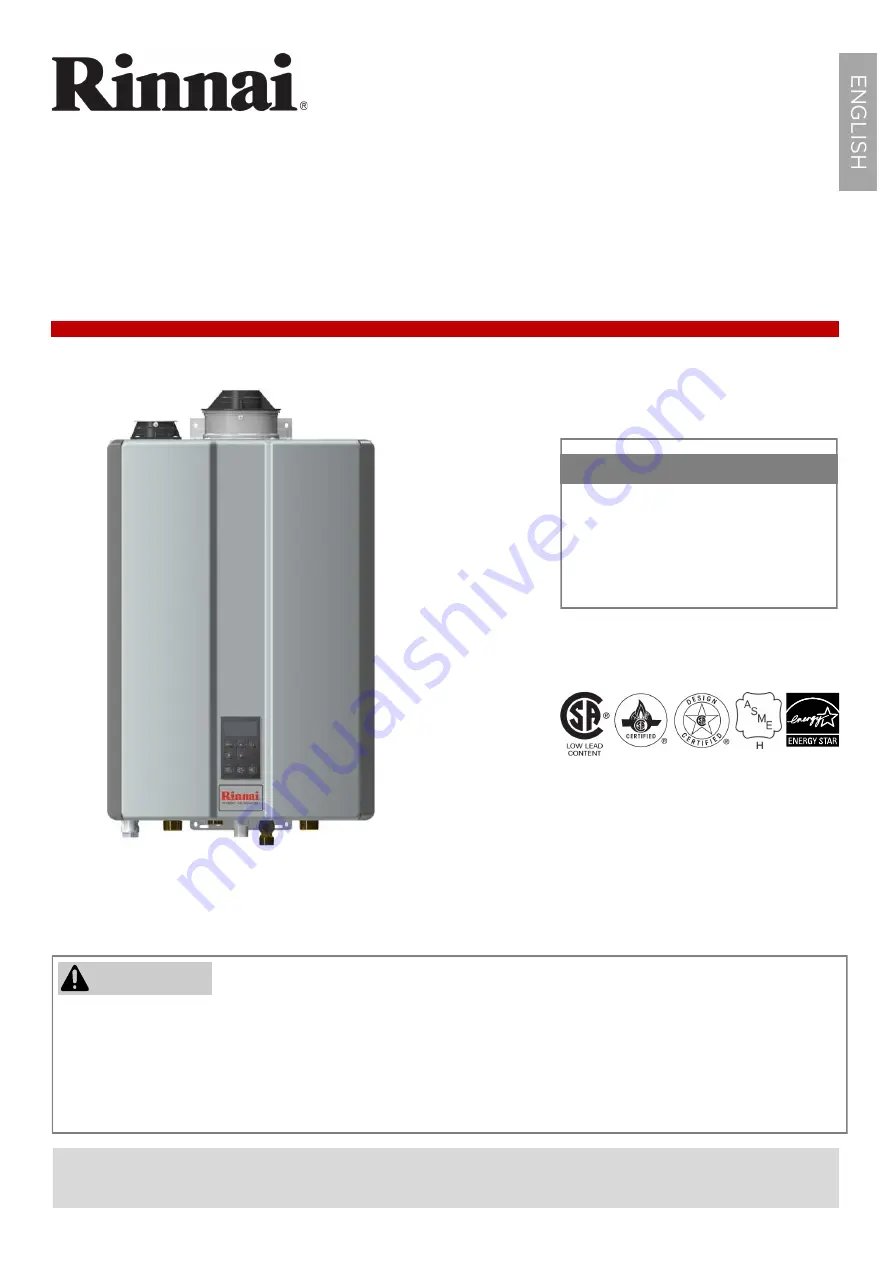
Series Condensing Boiler Combi Manual


Central Heating and Domestic Hot Water


INSTALLATION AND OPERATION MANUAL


I

-

Series Condensing Boiler 


Wall

-

Mounted, Gas

-

Fired Combi Boiler


Certified to ANSI Z21.13 

and CSA 4.9


COMBI MODELS


i060C


(REB

-

A1847FF

-

US)


i090C 


(REB

-

A2647FF

-

US)


i120C 


(REB

-

A3558FF

-

US)


READ AND SAVE THIS MANUAL


If the information in these instructions are not followed exactly, a fire or explosion may 
result causing property damage, personal injury, or loss of life.


• 

Do not store or use gasoline or other flammable vapors and liquids in the vicinity of this or any other appliance.


• 

WHAT TO DO IF YOU SMELL GAS


− 

Do not try to light any appliance.


− 

Do not touch any electrical switch; do not use any phone in your building.


− 

Immediately call your gas supplier from a neighbor

s phone. Follow the gas supplier

s instructions.


− 

If you cannot reach your gas supplier, call the fire department.


• 

Installation and service must be performed by a qualified installer, service agency or the gas supplier.


WARNING


Summary of Contents for I Series

Page 1: ... explosion may result causing property damage personal injury or loss of life Do not store or use gasoline or other flammable vapors and liquids in the vicinity of this or any other appliance WHAT TO DO IF YOU SMELL GAS Do not try to light any appliance Do not touch any electrical switch do not use any phone in your building Immediately call your gas supplier from a neighbor s phone Follow the gas...

Page 2: ... 22 5 3 Termination Considerations 22 5 4 PVC Venting Safety Switch 23 5 5 Venting Options 25 6 Gas Supply 46 6 1 Connect the Gas Supply 46 6 2 Gas Operating Instructions 47 6 3 Gas Pipe Sizing Reference Tables 48 7 DHW System Piping 50 7 1 Guidelines 50 7 2 Instructions 50 7 3 Piping Diagram for a Basic DHW Installation 51 8 CH System Piping 52 8 1 Guidelines 52 8 2 Instructions 52 8 3 Common CH ...

Page 3: ...ion 98 12 8 Diagnostic Codes 100 12 9 Forced Hi Low Fire Modes 105 13 Maintenance 106 13 1 Owner Maintenance 106 13 2 Licensed Professional Maintenance 107 13 3 Test the Ignition Safety Shut Off Device 110 14 Appendices 111 14 1 Approved Cleaners Inhibitors and Antifreezes 111 14 2 Flush the CH Plumbing System 112 14 3 Flush the DHW Heat Exchanger 113 14 4 System Application Examples 114 14 5 Gas ...

Page 4: ...lypropylene PRV Pressure Relief Valve PSI Pounds per square inch W C Inches water column For Your Records Dealer Name Located on left side of unit 1 A trained and qualified professional must install the boiler inspect it and leak test it before use The warranty will be voided due to any improper installation The trained and qualified professional should have skills such as Gas line sizing Connecti...

Page 5: ... or any other appliance Combustible construction refers to adjacent walls and ceiling and should not be confused with combustible or flammable products and materials Combustible and or flammable products and materials should never be stored in the vicinity of this or any gas appliance Always check the water temperature before entering a shower or bath 2 If the information in these instructions is ...

Page 6: ...er Immediately call a licensed professional to inspect the appliance and replace any part of the control system and any manual gas control valve which has been under water Do not use substitute materials Use only parts certified for the appliance Should overheating occur or the gas supply fail to shut off turn off the manual gas control valve to the appliance It is strongly recommended that you us...

Page 7: ... providing heating and domestic hot water For complete boiler information refer to the Rinnai I Series Condensing Boiler Installation Manual supplied with the boiler or visit rinnai us Topics in this section Front View Bottom View Components Specifications Dimensions Accessories 3 Controller Vent Connections Piping Connections ...

Page 8: ...y to CH System Return from CH System Primary Secondary Heating Kit CH Pressure Relief Valve supplied with boiler CH Supply Condensate Drain Domestic Hot Water Domestic Cold Water Gas CH Return Domestic Hot Water Pressure Relief Valve Central Heating Pressure Gauge Gas Shut Off Valve All items are field supplied unless otherwise noted ...

Page 9: ...ated Venturi Gas Valve Heat Exchanger Silencer Pressure Sensor Integrated Pump Diverter Valve Burner Assembly Ignition Unit PC Board Cover PC Board Removed Control Panel Air Intake Flue Gas Exhaust Flow Sensor Air Vent Plate Heat Exchanger Water Flow Servo Valve Bypass Servo Valve Condensate Trap ...

Page 10: ... GPM 1 0 L min Maximum Flow Rate 7 9 GPM 30 L min 9 8 GPM 37 L min Flow Rate at 70 F 39 C rise 4 1 GPM 15 L min 5 1 GPM 19 L min Temperature Setting CH Minimum Maximum 104 F 180 F 40 C 82 C DHW Minimum Maximum 98 F 140 F 37 C 60 C Water Content CH 0 75 gal 0 75 gal 0 88 gal DHW 0 05 gal 0 05 gal 0 05 gal Water Pressure CH Minimum 13 PSI 90 kPa Maximum 45 PSI 310 kPa Recommended 17 26 PSI 117 180 k...

Page 11: ...Rinnai I Series Condensing Boiler Combi Manual 11 Measurements in mm Vent Connection 2 in 51 mm nominal PVC Polypropylene or 3 in 5 in Concentric ...

Page 12: ...eturn Central Heating Supply Domestic Hot Water Gas Domestic Cold Water Condensate Drain Connection Connection Size Gas 3 4 in NPT DWH In Cold Inlet 3 4 in NPT DHW Out Hot Outlet 3 4 in NPT CH In CH Return 1 in NPT CH Out CH Supply 1 in NPT Condensate Outlet 1 2 in NPT ...

Page 13: ...ER Neutralizes the condensate generated by the boiler SCALECUTTER Filters and reduces the amount of scale entering the boiler allowing for greater boiler longevity SCALECUTTER REFILL CARTRIDGE Refill cartridge for the ScaleCutter filter assembly ISOLATION VALVE KIT For quick isolation of the boiler DHW connections PRIMARY SECONDARY HEATING KIT MC 601 CONTROLLER ...

Page 14: ...tle 24 CFR Part 3280 and or CAN SCA Z240 MH Series Mobile Homes The appliance when installed must be electrically grounded in accordance with local codes or in the absence of local codes with the National Electrical Code ANSI NFPA 70 or the Canadian Electrical Code CSA C22 1 The appliance and its main gas valve must be disconnected from the gas supply piping system during any pressure testing of t...

Page 15: ...s and the ASME standard Low loss header or closely spaced tee Expansion tank for a closed heating system Isolation valve kit or equivalent components for quick isolation of the boiler for service and or maintenance Air separator Standard tools for central heating gas fitting plumbing and electrical wiring Digital manometer capable of reading both positive and negative pressure Digital multimeter c...

Page 16: ... Air Supply Filter Integrated Items Refer to section 3 3 Components for a complete list of integrated parts WALL MOUNTING BRACKET PRESSURE RELIEF VALVE For Central Heating Systems OUTDOOR TEMPERATURE SENSOR VENT SCREENS Vent screens x2 and vent screen screws x2 The vent screen prevents debris and other objects from entering the terminal One vent screen is for the intake the other is for the exhaus...

Page 17: ...lines Unsuitable heating system water can cause the formation of scale or sludge which affects system efficiency It can also cause corrosion and reduce life of the heat exchanger Never use water that has been treated by a reverse osmosis deionized or distilled water to soften the water to fill the heating system For Domestic Hot Water systems if you install the boiler in an area that is known to h...

Page 18: ...in from vent components Bottom Ground 12 in 305 mm Front 6 in 152 mm Clearance for servicing is 24 in 610 mm in front of boiler Back 0 in Sides Left and Right 2 in 51 mm Vent 0 in The boiler is not exposed to corrosive compounds in the air The boiler location complies with the required clearances The planned combustion air and exhaust termination locations meet the required clearances The water su...

Page 19: ...level Use four screws to secure the wall mounting bracket to the wall two screws on far left side and two screws on far right side Use the appropriate screws for the wall construction to secure the mounting bracket to the wall between two studs You Will Need Rinnai Condensing Boiler Wall Mounting Bracket Level Wall Mounting Bracket Insert the top bracket into the wall mounting bracket Make sure th...

Page 20: ...be installed in an upright and level position Do not install the boiler upside down or on its side IMPORTANT The condensate collector must be filled with water prior to installing the vent system Pour approximately 10 ounces 1 25 cups of water directly into the boiler s exhaust port do not remove the 2 in PVC adapter prior to this Before operation of the boiler the condensate collector must be fil...

Page 21: ...mber of pipe fittings For manufactured vent systems vent connections must be firmly pressed together so that the connections form an air tight seal Follow the venting manufacturer s instructions Refer to the Schedule 40 PVC CPVC manufacturer for appropriate fittings solvents or joining methods If venting reassembly is needed follow the steps for installing the venting in the following sections Mak...

Page 22: ...ion piece elbow Secure vent screen to the elbow with screw The vent for this appliance shall not terminate Over public walkways Near soffit vents or crawl space vents or other area where condensate or vapor could create a nuisance or hazard or cause property damage Where condensate or vapor could cause damage or could be detrimental to the operation of regulators pressure relief valves or other eq...

Page 23: ...sing property damage personal injury or death DO NOT adjust boiler settings to allow higher exhaust temperatures when venting with PVC Press and Hold Red Button for Five Seconds This product is equipped with safety devices to control the exhaust temperature which allows for a variety of venting materials to be used in its final installation The boiler is set up from the factory to be installed wit...

Page 24: ...elect button 8 The boiler is now set to allow higher exhaust temperatures To exit parameter settings and enter normal operation mode press the Mode button 9 Replace the boiler s front panel by reinserting the four screws that secure the panel 7 Press the Up or Down arrows until A2 appears in the display Then press the Select button 01 A A2 A Select button A2 Select button ...

Page 25: ... while combustion air enters through the outer pipe Twin Pipe Combustion air and exhaust vent directly through separate penetrations See the Direct Vent section for complete details Direct Vent Concentric and Twin Pipe Option 1 Option 2 Exhaust Combustion air Combustion air Exhaust Combustion air Non Direct Vent Room Air See the Non Direct Vent section for complete details Room air is used for com...

Page 26: ...raVent 800 835 4429 www duravent com Royal 800 232 5690 www royalbuildingproducts com ECCO Manufacturing 877 955 4805 www eccomfg com DiversiTech 800 995 2222 www diversitech com Z FLEX 603 669 5136 www z flex com 2 in 4 in CONCENTRIC VENT TERMINATIONS 229011NPP 229012NPP 229013NPP 2 4 Condensing Horizontal Termination Kit 8 7 in 2 4 Condensing Horizontal Termination Kit 12 in 2 4 Condensing Horiz...

Page 27: ...4 in Vertical Termination Cap Kit Concentric 20 2PPS HKL 2 in x 4 in Horizontal Termination Kit Concentric 20 190288 2 in x 4 in Concentric Horizontal Termination 5 190295 2 in x 4 in Concentric Vertical Termination 5 CVENT 2 2 in x 4 in Concentric Horizontal Termination 20 2ZDCTH24 2 in x 4 in Concentric Horizontal Termination 5 2ZDCTV24 2 in x 4 in Concentric Roof Termination 5 ROYAL CENTROTHERM...

Page 28: ...Kit 3 in x 20 in 20 196106 197107 FGV Concentric Vent Kit 3 in x 32 in 20 196116 197117 FGV Concentric Vent Kit 3 in x 44 in 20 52CVKGVS6503 PVC 52CVKGVSF9003 CPVC PVC CPVC Concentric Vent Kit 3 in x 20 in 20 52CVKGVS6503 32 PVC 52CVKGVSF9003 32 CPVC PVC CPVC Concentric Vent Kit 3 in x 32 in 20 52CVKGVS6503 44 PVC 52CVKGVSF9003 44 CPVC PVC CPVC Concentric Vent Kit 3 in x 44 in 20 SC03HT Horizontal...

Page 29: ...20 3PPS HKL 3 in x 5 in Horizontal Termination Kit Concentric 20 190388 3 in x 5 in Concentric Horizontal Termination 5 190395 3 in x 5 in Concentric Vertical Termination 5 CVENT 3 3 in x 5 in Concentric Horizontal Termination 20 2ZDCTH35 3 in x 5 in Concentric Horizontal Termination 5 2ZDCTV35 3 in x 5 in Concentric Roof Termination 5 METAL FAB DURAVENT Manufacturer Manufacturer Part Number Produ...

Page 30: ...tion 10 2PPS HSTL 2 in Single Horizontal Termination 6 2PPS TBL 2 in Black UV Resistant Tee 5 196984 FGV PVC Low Profile Termination Kit 5 081216 FGV PVC Wall Termination Kit 16 52SWVKGVS6502 PVC Side Wall Vent Kits 5 52WTVKGVS6502 PVC Wall Vent Kits 16 HVENT 2 2 in Low Profile Horizontal Vent Kit 5 CENTROTHERM DURAVENT Manufacturer Manufacturer Part Number Product Description Diagram Horizontal V...

Page 31: ...tion 10 3PPS HSTL 3 in Single Horizontal Termination 5 3PPS TBL 3 in Black UV Resistant Tee 6 196985 FGV PVC Low Profile Termination Kit 5 081219 FGV PVC Wall Termination Kit 16 52SWVKGVS6503 PVC Side Wall Vent Kits 5 52WTVKGVS6503 PVC Wall Vent Kits 16 HVENT 3 3 in Low Profile Horizontal Vent Kit 5 CENTROTHERM DURAVENT Manufacturer Manufacturer Part Number Product Description Diagram Horizontal V...

Page 32: ...D2564 CPVC Schedule 40 ANSI ASTM F493 PVC Vent Screens Termination Vent Screens Polyethylene 2 in Vent Screens included in carton box IPEX Part Number 196050 3 in Vent Screens IPEX Part Number 196051 Exhaust piping must be of solid core material Refer to the PVC CPVC manufacturer for appropriate fittings solvents or joining methods Manufacturer Vent Material Ubbink PVC Outer Vent Polypropylene Inn...

Page 33: ...let to a maximum vertical distance of 15 ft 4 m J Clearance to non mechanical air supply inlet to building or the combustion air inlet to any other appliance 36 in 91 cm 12 in 30 cm K Clearance to a mechanical air supply inlet 6 ft 1 83 m 3 ft 91 cm above if within 10 ft 3 m horizontally L Clearance above paved sidewalk or paved driveway located on public property 7 ft 2 13 m 1 M Clearance under v...

Page 34: ...0 elbow is equivalent to 6 ft 2 m All terminations horizontal and or vertical must terminate 12 in 0 30 m above grade or anticipated snow level 12 in 0 30 m Between terminals at same level 60 in 1 52 m Between terminals at different levels Note 24 in 0 61 m to wall or parapet Inside Corner 12 in 0 30 m 12 in 0 30 m 60 in 1 52 m vertically between terminals ...

Page 35: ... concentric vent Ensure it is properly seated Secure the vent pipe to the concentric flue connection with the supplied screw Horizontal Wall Terminations Vertical Roof Terminations 2 in x 4 in and 3 in x 5 in 2 in x 4 in and 3 in x 5 in Install the venting termination according to the diagrams and instructions in this manual Slope the venting 1 4 in per foot toward the appliance according to the v...

Page 36: ...0 m 150 ft 46 m 45 elbow is equivalent to 3 ft 1 m 90 elbow is equivalent to 6 ft 2 m ACCEPTABLE ACCEPTABLE NOT ACCEPTABLE 90 Elbows Long Sweep 90 Elbows Short Sweep 90 Elbows Close Turn Vent length includes the additional venting fittings and terminations Tee Sidewall 12 4 Combustion Air Exhaust 8 Horizontal Vent and Combustion Air Piping Intake vent installation not permitted in shaded area 60 i...

Page 37: ...se instructions may result in property damage personal injury or death Remove and discard the screw from the combustion air vent connection Remove and discard the combustion air vent cap Install the combustion air vent pipe Ensure it is properly seated Secure the combustion air vent pipe to the combustion air vent connection with the supplied screw Install the exhaust vent pipe Ensure it is proper...

Page 38: ... CPVC Snorkel Termination Configuration 2 in or 3 in Schedule 40 PVC CPVC Standard Upside Down U Vertical Termination Configuration 2 in or 3 in Schedule 40 PVC CPVC Elbow or Tee Side Wall Termination Configuration 2 in or 3 in Schedule 40 PVC CPVC Tee Vertical Termination Configuration 2 in or 3 in PVC Low Profile Termination Configuration This configuration requires the use of a Concentric Vent ...

Page 39: ... line of the regulator vent outlet to a maximum vertical distance of 15 ft 4 m J Clearance to non mechanical air supply inlet to building or the combustion air inlet to any other appliance 36 in 91 cm 4 ft 1 2 m below or to side of opening 1 ft 300 mm above opening K Clearance to a mechanical air supply inlet 6 ft 1 83 m 3 ft 91 cm above if within 10 ft 3 m horizontally L Clearance above paved sid...

Page 40: ...oom Air Applications Exhaust Roof 12 in 0 30 m minimum 12 in 0 30 m above grade or anticipated snow level 60 in 12 in 12 in 0 30 m Inside Corner 1 52 m Vertically between terminals IMPORTANT Installation of Room Air must use listed Category IV venting All terminations horizontal and or vertical must terminate 12 in above grade or anticipated snow level ...

Page 41: ... in PVC 2 in 60 mm PP 3 in PVC 3 in 80 mm PP Vent Lengths 65 ft 20 m 150 ft 46 m 45 elbow is equivalent to 3 ft 1 m 90 elbow is equivalent to 6 ft 2 m ACCEPTABLE ACCEPTABLE NOT ACCEPTABLE 90 Elbows Long Sweep 90 Elbows Short Sweep 90 Elbows Close Turn Vent length includes the additional venting fittings and terminations For applications containing corrosive indoor air this appliance must be instal...

Page 42: ...er room s in the building the total volume of the room s must be of adequate volume greater than 50 cubic feet per 1000 Btu hr Combustion air openings between joining rooms must have at least 1 square inch of free area for each 1000 Btu hr but not less than 100 square inches each Using Outdoor Air For Combustion Outdoor air can be provided to a confined space through two permanent openings one com...

Page 43: ... space Openings must be positioned as to never be obstructed 12 in 300 mm 10 in 250 mm Verify all combustion air opening sizes are correct Ensure that the Combustion Air Requirements are followed that will provide sufficient combustion air for the appliance DO NOT use room air for combustion in applications where the indoor air is corrosive Verify that adequate combustion air is available for all ...

Page 44: ...or room air screen inside elbow and secure with the supplied screw Use the room air screen for environments where room air is dusty Notes 2 in vent screen supplied with boiler Room air screen is available as an accessory Glue elbow to the combustion air PVC vent pipe per manufacturer s instructions Install the exhaust vent pipe Ensure it is properly seated Secure the exhaust vent pipe to the exhau...

Page 45: ...de Wall Termination Configuration 2 in or 3 in Schedule 40 PVC CPVC Tee Vertical Termination Configuration PP Flex Venting B Vent Pipe 4 in 102 mm Ubbink flexible venting approved for vertical non direct vent room air applications only Refer to the flex vent manual for further details Rinnai cautions against installing the boiler in applications with venting in different pressure planes It is poss...

Page 46: ...ications with all gas appliances operating 3 Before placing the appliance in operation all joints including the heater must be checked for gas tightness by means of soap gas leak detector solution or an equivalent nonflammable solution as applicable Since some leak test solutions including soap and water may cause corrosion or stress cracking the piping shall be rinsed with water after testing unl...

Page 47: ...d to replace any part of the control system and any gas control which has been under water 1 Set the temperature controller to the lowest setting 2 Turn off all electric power to the appliance if service is to be performed 3 Turn the manual gas control valve located at gas inlet of appliance clockwise to the OFF position TO TURN OFF GAS TO APPLIANCE 1 STOP Read the safety information above on this...

Page 48: ... as an example The appropriate table from the applicable code must be used Schedule 40 Metallic Pipe Inlet Pressure Less than 2 psi Specific Gravity 0 60 Information in table obtained from NFPA 54 ANSI Z223 1 2015 Pressure Drop 0 5 in w c Nominal Pipe Size in 1 2 3 4 1 1 1 4 Length in ft meters Capacity in Cubic Feet of Gas per Hour 10 3 172 360 678 1 390 20 6 118 247 466 957 30 9 95 199 374 768 4...

Page 49: ...138 289 544 1 120 100 30 131 273 514 1 060 Information in table obtained from NFPA 54 ANSI Z223 1 2015 Information in table obtained from NFPA 54 ANSI Z223 1 2015 Intended use Initial supply pressure of 8 0 in w c or greater Schedule 40 Metallic Pipe Inlet Pressure 11 in w c Specific Gravity 1 50 EXAMPLE Rinnai Model Gas Input Additional Appliance total Gas Input Heating Value of Gas Cubic Feet Pe...

Page 50: ...onnect the Pressure Relief Valves DHW and Central Heating for more information Plumb the cold water supply line to the DHW cold inlet connection on the bottom of the boiler To connect the water supply follow the instructions below For standard installations refer to the Piping Diagram for Basic DHW Installation on the next page Plumb the hot water supply line to the DHW hot outlet connection on th...

Page 51: ...not as a replacement for professional engineering project drawings This drawing is not intended to describe a complete system It is up to the contractor or engineer to determine the necessary components and configuration of the particular system to be installed The drawing does not imply compliance with local building code requirements It is the responsibility of the contractor or engineer to ensu...

Page 52: ...w rates through a single zone when the other zone valves are closed To connect the water supply follow the instructions below For standard installations refer to the Piping Diagram for Basic Central Heating Installation in this chapter Plumb the heating return line to the heating return connection on the bottom of the boiler Topics in this section Guidelines Instructions Common CH Components Pipin...

Page 53: ... 207 kPa and a maximum of 45 PSI 310 kPa A 30 PSI 207 kPa PRV is supplied with the boiler A port for the central heating PRV is present in the Primary Secondary Heating Kit accessory offered by Rinnai Oxygen Elimination The boiler may only be installed in a pressurized closed loop heating system free of air and other impurities If using oxygen permeable tubing in the central heating system a plate...

Page 54: ...supplied with boiler Dirt Trap Backflow preventer Fill valve with pressure gauge Expansion tank Air separator Pressure Gauge Low Water Cut Off if required by local code Ball valve System Supply System Return CH System Common Components Diagram Primary Secondary Heating Kit ...

Page 55: ...nd configuration of the particular system to be installed The drawing does not imply compliance with local building code requirements It is the responsibility of the contractor or engineer to ensure the installation is in accordance with all local building codes Confer with local building officials before installation IMPORTANT This schematic shows an example of a simple single zone system without...

Page 56: ...installed The drawing does not imply compliance with local building code requirements It is the responsibility of the contractor or engineer to ensure the installation is in accordance with all local building codes Confer with local building officials before installation Heat Emitter Thermostat Outdoor Sensor Optional Low Water Cut Off LWCO This schematic shows an example of a simple single zone s...

Page 57: ...ure and multi zone systems Examples of Hydraulic Separation Closely spaced tees and low loss headers are common examples of hydraulic separators and can be used to separate the boiler loop from the central heating loop Low Loss Header Distance no more than four pipe diameters IMPORTANT For closely spaced tee installations the separation at the header is to be no more than four pipe diameters Close...

Page 58: ... 10 20 15 25 30 10 5 0 Water Flow GPM Pressure Loss Feet of Head 11 12 55 50 45 40 35 i120C i060C and i090C Model Available Pressure Drop i060C 15 ft at 3 2 GPM1 i090C 8 5 ft at 4 8 GPM1 i120C Not Applicable2 1 If the pressure drop of the system exceeds the available pressure the use of primary secondary piping is necessary 2 Rinnai requires the use of primary secondary piping with the use of this...

Page 59: ...mm above drains where discharge will be clearly visible An ASME 30 psi safety pressure relief valve is included with the boiler and must be fitted before any shut off valve in the system DO NOT plumb the pressure relief valve with the condensate drain both must be plumbed independently to drain DO NOT plug the pressure relief valve and do not install any reducing fittings or other restrictions in ...

Page 60: ...side hole on the condensate drain pipe connection If a floor drain is not available or the drain is above the level of the condensate drain a condensate pump should be installed A condensate neutralizer kit is available from Rinnai The kit allows condensate to flow through neutralizing media that raises the pH of the condensate to a level that will help prevent corrosion of the drain and public se...

Page 61: ... to break IMPORTANT The steps in this section must conform with local codes and the guidelines established by the National Electrical Code NEC 4 Select an appropriate length of wire 18 AWG or greater and strip the insulation off the ends Follow the wiring guidelines established by the National Electrical Code NEC 5 With wire nuts or other approved wire connectors connect the To Condensate Pump wir...

Page 62: ...ate Pump Safety Switch Wires Installer Supplied Wires Safety Switch Wires Condensate Pump installer supplied Includes internal safety switch and power cord Power cord must be plugged into power source NC NO COM Safety switch wires connect to the NO and COM contacts on the safety switch NO Normally Open NC Normally Closed COM Common Neutral ...

Page 63: ...quipped with a three prong grounding plug for your protection against shock hazard The plug should be plugged directly into a properly grounded three prong receptacle Do not cut or remove the grounding terminal from this plug Disconnect incoming power to the boiler by removing the three prong plug before Performing repairs or installation to internal components or accessories Making wiring connect...

Page 64: ... T T 2 Connection LWCO High Limit or Other Safety Switch Included Jumper from Factory Outdoor Temperature Sensor 24V AC for External Output Max 0 7 A Rinnai recommends the use of spade connectors or similar components for wiring to the screw terminals Ensure that the insulation of the wire is not exposed to contact any other components besides the terminal If exposed wiring contacts to any other e...

Page 65: ... 5 Check the pressure on the controller and or pressure gauge Fill the boiler to a minimum of 20 PSI 138 kPa water pressure and a maximum of 30 PSI 207 kPa 6 An E430 diagnostic code will be present until the boiler senses at least 13 PSI 90 kPa 7 Check the heating system for leaks 8 Begin the deaeration process shown in the next section 10 3 Deaeration Process Work on the boiler must be carried ou...

Page 66: ...process is complete 6 On the PC Board press the black button again to resume normal operation mode 7 Operate the domestic hot water or central heating to ensure the boiler operates properly 8 Close the air vent on the pump After approximately one week all air in the system should be eliminated via the air separator in the piping system DIP Switches PC Board Note Alternately on initial installation...

Page 67: ... and hold the top left black button on the PC Board shown below DIP Switches PC Board Deaeration is an effective method of purging air from the boiler after the system has been filled or serviced While the boiler is running the deaeration process the Maintenance Required icon see right image appears on the controller display Do not bypass deaeration during commissioning or if the system pressure h...

Page 68: ...t exchanger Have you verified that no toxic chemicals were introduced to the potable water Did you drain the boiler if not intended to be used immediately Have water quality issues if any been addressed Have you performed the leak and pressure test for the boiler and plumbing system Are the isolation valves installed for DHW systems only CONDENSATE DRAIN YES NO If the condensate pump is installed ...

Page 69: ...ystem PRV rated to 30 PSI Is the discharge from the PRV piped to the ground or into a drain system as per local codes Is the discharge line from the PRV pitched downward and does it terminate 6 in 152 mm above the drains Is the discharge end of the line plain unthreaded and a minimum of 3 4 in diameter Is the discharge line material suitable for at least 180 F water Did you take measures to protec...

Page 70: ...e during this period therefore additional water is necessary to maintain proper pressure in the heating system Water pressure needed for operation The boiler is in normal operation between 17 26 PSI Below 7 3 PSI the boiler will have an error code E430 diagnostic code will be present on the controller display and will not operate Increasing the heating system water pressure is necessary for operat...

Page 71: ...ng assistance Adjustments must be made by a trained and qualified professional for this mode to operate correctly Domestic Hot Water On Press to run the boiler in Domestic Hot Water mode Switching Operation Mode Press to change the display between DHW and CH for temperature setting Select Button Press to select the option in the display window Display Window Displays boiler status information See ...

Page 72: ...onnected Freeze Protection Active Eco Setting Active Eco maintains temperature in the primary heat exchanger to provide quicker delivery of hot water to fixtures Domestic Hot Water Mode Active Priority Control Unit of Measurement for Pressure Note Pressure and temperature are alternately displayed on the controller Setpoint Temperature Current Temperature or Current Pressure Note Pressure and temp...

Page 73: ... If the LED above the DHW button is illuminated proceed to Step 2 Press the Switch Operation Mode button until the DHW Active icon appears on the home screen Adjust the temperature with the Up and Down arrows until the appropriate temperature is displayed Press the Select button to confirm the temperature This temperature setting is displayed for a few seconds and then returns to standby mode 104 ...

Page 74: ...ler is in operation pressure and temperature are alternately displayed on the controller Press the Switch Operation Mode button until the Central Heating Active button appears on the home screen Adjust the temperature with the Up or Down arrows until the appropriate temperature is displayed Press the Select button to confirm the temperature This temperature setting is displayed for a few seconds a...

Page 75: ...onger time to provide hot water to the hot water fixtures Comfort Mode The boiler maintains the primary heat exchanger temperature to quickly deliver hot water to the plate heat exchanger This selection provides the quickest delivery of hot water to hot water fixtures but uses more energy By default Eco mode is enabled turned on To enable turn on comfort mode press the Eco button on the controller...

Page 76: ...n the control panel click sound on or off follow the steps below Press the Up or Down arrows to select a unit F U S Measurements F PSI C Metric C bar Press the Mode button 1 F Press the Select button 1 F 2 On Press the Select button 2 Off Press the Mode button twice 2 on should appear on the display Press the Up or Down arrows to select ON or OFF ...

Page 77: ...e controller this occurs only if DIP switch 2 is set to the ON position See section 12 3 8 PC Board DIP Switches for more information If using multiple controllers Child Lock can be set only on the controller that has priority If a button is pressed when the Child Lock function is engaged LOC will be displayed on the controller IMPORTANT Press the Mode button three times 3 off should appear on the...

Page 78: ...e time Press and hold the Down button for two seconds Use the Up and Down buttons to scroll to the desired performance data number described in the Performance Data Table in this section To exit performance data While continuing to hold the Down button press and hold the Domestic Hot Water button press and hold both buttons down at the same time 120 F no 01 no 02 6 8 The data for the performance n...

Page 79: ...en 2 Closed 14 Bypass Flow Control Position Degrees of Opening 15 3 Way Valve Control Position 0 Mid 1 DHW 2 CH 16 3 Way Valve Control Cycles x100 17 Venturi Position 0 Closed 1 Open 18 Venturi Cycles x100 20 Pump Cycles x100 21 Pump Hours x10 Hours 22 Pump for Boiler 0 OFF 1 ON 23 Pump for System Pump 1 0 OFF 1 ON 24 Pump for System Pump 2 0 OFF 1 ON 31 Outdoor Temperature F C 32 Additional Contr...

Page 80: ...on 2 Deaeration Mode Refer to section 10 Commissioning 3 Button 3 Data Transfer Mode This is for transferring PCB data when replacing the PCB Refer to the instructions included in the replacement parts 4 Button 4 Red Button Parameter Settings Refer to section 12 4 Parameter Settings 5 Dip Switch Dip Switch Settings Refer to section 12 3 8 PC Board DIP Switches DIP Switches PC Board ...

Page 81: ...HW recirculation ON Pump 2 connection for DHW Pump 4 Simultaneous Central Heating and Domestic Hot Water Enables simultaneous operation between Central Heating and Domestic Hot Water Domestic Hot Water Priority Simultaneous Central Heating and Domestic Hot Water Permitted 5 Gas Valve Solenoid Shuts down the integrated solenoid gas valve manually Normal Operation Fixed Closed 6 Altitude Setting Dep...

Page 82: ... DIP switches on the PC Board see below 4 Adjust DIP switches 6 and 7 to on or off based on the altitude settings in the table below ALTITUDE DIP Switch 6 DIP Switch 7 0 2 000 ft 0 610 m Default OFF OFF 2 001 5 400 ft 610 1 646 m ON OFF 5 401 7 700 ft 1 646 2 374 m OFF ON 7 701 10 200 ft 2 347 3 109 m ON ON When a DIP switch is adjusted it is not necessary to adjust the gas pressure setting for hi...

Page 83: ...moving the four screws that secure the panel 2 Locate the PC Board lower left side of unit Locate the DIP switches on the PC Board see below 3 Adjust DIP switch 2 to one of the following positions ON Central Heating ON button used Boiler fires based on return water temperature OFF Default Thermostat Used 4 Press the CH button on the controller display The boiler is now in CH mode Central Heating b...

Page 84: ...5 Press the Mode button on the controller 6 Press the Up or Down arrows to select a parameter setting number Then press the Select button 8 To exit parameter settings and enter normal operation mode press either the red button on the PC Board or the Mode button on the controller 7 Press the Up or Down arrows to change the selection for the setting number such as 11 A or 11 b Then press the Select ...

Page 85: ...sensor detects higher outdoor temperatures than expected 03 Maximum Outdoor Temperature the Boiler will Fire in CH Mode No Maximum 77 F 25 C This parameter is available when DIP switch 1 is in the OFF default position This sets the maximum outdoor temperature the boiler will fire in CH mode This can prevent the boiler from firing in warm outdoor temperatures 10 Maximum DHW Set Point Temperature 12...

Page 86: ...Way Valve position to open the CH side more for when the flow of the CH side is reduced due to DHW demand This may restrict the DHW capacity 16 LC Check Available No Detection This setting enables the boiler to check for lime scale conditions in the DHW side of the plate heat exchanger When detecting lime scale an LC error code will appear on the display Once lime scale is removed by flushing the ...

Page 87: ...s the linked operation between the main boiler pump and CH pump 1 For example when the main pump is on pump 1 is also on When DIP switch 2 is in the OFF position the pumps are automatically linked 42 Main Pump Runs When the Target Temperature is Achieved Continuously Intervals This selects the mode of the main pump running when the target setpoint is achieved This setting is for whether running on...

Page 88: ...id Propane For selecting gas type when conducting gas conversion A1 Not Available Not Available A2 Vent Material Used PVC Material other than PVC CPVC PP Other This selects the venting material used The boiler is set from the factory to be installed in a PVC venting system If CPVC PP or other approved venting is used this may be adjusted See section 5 4 PVC Venting Safety Switch for more informati...

Page 89: ... boiler parameters The outdoor ambient temperature is observed via the provided outdoor temperature sensor The outdoor temperature sensor should be mounted on a North facing wall of the house below an eave to avoid direct sunlight to prevent obtaining a false reading of the outdoor temperature The sensor should also be mounted away from any vent duct or other device that may create an artifi cial ...

Page 90: ...l by removing the four screws that secure the panel 2 Locate the PC Board lower left side of unit 3 Connect the outdoor sensor to the terminals shown below using minimum 18 AWG wiring to the two terminals provided in the enclosure 4 Locate the DIP switches on the PC Board see below Ensure that DIP switch 1 is in the OFF Default position this ensures the boiler will operate based on the outdoor tem...

Page 91: ...r Setting temperature on the controller 36 F 20 C Custom curve based on customer input see graph on next page The boiler has four outdoor reset heating curves which are different target temperature lines dependent on the outdoor temperature The selected curve should be based off of the type of heat emitter and the target temperature desired The heating curves are described below 190 F 88 C 180 F 8...

Page 92: ...eset curve access the parameters as shown in section 12 4 Parameter Settings and select parameter 01 Then select the desired curve Parameter Number Setting Description Selection A C 01 Outdoor reset curve 1 2 3 4 Select Reset Curve 114 F 46 C 104 F 40 C 190 F 88 C 180 F 82 C 170 F 77 C 160 F 71 C 150 F 66 C 140 F 60 C 130 F 54 C 120 F 49 C 110 F 43 C 100 F 38 C 20 F 10 F 0 F 10 F 20 F 30 F 40 F 50...

Page 93: ...is 51 F and supply temperature is 140 F When the boiler continues operating with firing for 30 minutes the target supply temperature will rise toward 180 F This control continues until shut down 80 100 120 140 160 180 200 0 10 20 30 40 50 60 70 80 0 F 18 C 20 F 7 C 40 F 4 C 80 F 27 C Outdoor Temperature Supply Temperature Example 180 F 82 C 140 F 60 C 51 F 11 C Curve 1 The maximum outdoor temperat...

Page 94: ... house potentially cooling down the boiler will operate in simultaneous operation between DHW and CH as long as the DHW recirculation is taking place If the output target temperature for the CH system is higher than the temperature needed to heat the DHW the CH supply temperature will not be affected The CH supply temperature will continue to be the target temperature set for CH If the output targ...

Page 95: ...ing simultane ous DHW and CH operation This can prevent unintentionally supplying high temperature DHW to low temperature CH applications During simultaneous operation supply temperature may be up to 180 F When selecting NO limitation ensure that the CH system and heating application is designed for this temperature 15 3 Way Valve Position During Simultaneous Operation Normal Additional CH This pa...

Page 96: ...imum flow rate 0 5 GPM 2 L min is needed for the boiler to operate correctly maximum current 2 Amps Select the proper pump size based on the crossover valve and DHW system pressure loss Note The maximum current permissible to connect to the DHW_Pump connection is 2 Amps Timer Connects to T T 2 Terminal Cross Over Valve Cold Water Supply Line Gas Supply Building Outlets Hot Water Supply Line DHW Re...

Page 97: ...to T T 2 Building Return Line Cold Water Supply Line Gas Supply Building Outlets Hot Water Supply DHW Recirculation Pump Timer IMPORTANT The target flow rate for DHW recirculation is from 1 3 GPM 5 L min to 4 GPM 15 L min If the flow rate is less than 0 8 GPM 3 L min the DHW recirculation pump will operate and an E631 diagnostic code will display on the controller If the DHW recirculation pump flo...

Page 98: ...n 12 4 Parameter Settings and adjust parameter 14 to b In this scenario there is the potential to have higher temperature water being supplied to the central heating system Ensure that the central heating system is designed for this high supply water temperature If it is desired to have more capacity delivered to central heating during simultaneous operation adjust parameter 15 to b as shown in se...

Page 99: ...omestic hot water flow is desired it is recommended to not use the simultaneous operation feature IMPORTANT Parameter Number Setting Description Selection A b 14 Simultaneous central heating and domestic hot water temperature limit Domestic Hot Water Priority Domestic Hot Water Temperature Limited 15 3 way valve position during simultaneous operation Normal Additional Central Heating ...

Page 100: ...ard Ensure the flame rod wire is connected Ensure the igniter is operational Ensure the venting is installed in accordance to this manual Check that the surface of the electrode and flame rod are clean Check gas solenoid valves for open or short circuits Verify gas orifice installed is correct for the gas system the unit is installed in Check flame rod voltage to ground during ignition 120 Flame F...

Page 101: ...t 250 Condensate Pump Accessory Boiler will operate for 60 seconds Confirm wire connections and harnesses are good Ensure the condensate reservoir is empty and condensate pump is operational 341 Inlet Thermistor Check sensor wiring for damage Measure the resistance of the sensor Replace if necessary 353 Supply Thermistor Check sensor wiring for damage Clean the surface of the sensor Measure the re...

Page 102: ... combustion fan spins freely See Electrical Diagnostics on Technical Data Sheet located on inside front cover of boiler 631 DHW Recirculation Pump Ensure the DHW recirculation matches the Parameter 12 setting Ensure the dedicated return line is properly installed Ensure the inlet water filter and bypass filter are clean and free of debris Ensure the DHW recirculation pump is connected to the DHW P...

Page 103: ...mum flow rate required to fire the boiler is seen Measure the resistance of the flow control sensor Clean the inlet water supply filter On new installations ensure the hot and cold water lines are not reversed Confirm the inlet water temperature is not too high Ensure the integrated boiler pump operates properly Ensure the DHW operation switch is on No Code Decreasing or fluctuating DHW water flow...

Page 104: ...or reset temperature settings Ensure the DHW inlet temperature is not too hot Ensure the heating load for DHW and CH are within limits to handle both simultaneously No Code Cannot change the DHW set point temperature When DHW is being produced the temperature setting can only be adjusted between 98 F and 110 F No Code Supply temperature is different from the setting temperature on the controller D...

Page 105: ...plays normal operation mode This section should be performed by a licensed professional Consumers should never attempt any action that they are not qualified to perform 1 Remove the boiler s front panel by removing the four screws that secure the panel 2 Locate the PC Board lower left side of unit 3 Press and hold the right side black button 4 The controller displays FL the boiler is now in forced...

Page 106: ... Ignition Safety Shut Off Device If you encounter a problem that is difficult to solve stop the operation and immediately contact a licensed professional MONTHLY Boiler Area Verify the area is free of combustible materials gasoline and other flammable vapors and liquids Verify the area is clean from dust and obstructions Verify the air intake area is free of any contaminants listed in the boiler I...

Page 107: ...r at the DHW inlet Be sure to close the shut off valves on the DHW pipes under the boiler Expansion Tank Perform annual checks as recommended by the manufacturer to ensure proper operation Condensation Trap Check if the trap contains sediment To remove sediment unplug the bottom of the condensate trap Remove the sediment and then return the plug Do not use a wrench to tighten the condensate drain ...

Page 108: ...hould be for multi metallic components Reference section 14 1 Approved Cleaners Inhibitors and Antifreezes in the Appendix for an approved list of system cleaners inhibitors and antifreezes Check that the system fluid is correct for the glycol concentration and inhibitor level The system should be tested at least once a year and as recommended by the producer of the glycol solution The allowed max...

Page 109: ...th a lint free towel dry the air filter YELLOW OR GREEN FLAME Freeze Protection Operation When the boiler detects low outdoor ambient temperatures the boiler will begin its freeze protection operation The freeze protection operation can protect the boiler from freezing down to as low as 22 F 30 C outdoor temperature When freeze protection is in operation the pump may circulate water and or the boi...

Page 110: ... Reconnect the wiring connection to the flame rod Be careful not to touch the inside of the wiring connection To reset the error press the DHW button The boiler starts up 1 Ensure the boiler is not currently firing and the flame rod is not hot 2 Remove the boiler front panel 3 Disconnect the wiring connection from the flame rod located on front of the boiler under the burner 7 Replace the boiler f...

Page 111: ...r RhoGard Mutli Metal AL safe Sentinel X500 Below is a list of approved system cleaners inhibitors and antifreezes for use in hydronic plumbing systems utilizing Rinnai boilers IMPORTANT If replacing a boiler add system cleaners while the old boiler is installed and operate the old boiler for heating for several days to most effectively clean the system The Rinnai boiler must be closed off valved ...

Page 112: ...stem with water 2 Isolate the boiler from the CH system 3 Fill the CH system with an approved cleaner and circulate through the system 4 If the installation is a zone system utilizes multiple zones flush out each zone individually 5 Flush the CH system with water again ensuring all zones have been flushed 6 Clean out the dirt trap per manufacture s instructions 7 The boiler and system may now be f...

Page 113: ...olution 7 Open both service valves V1 and V2 on the hot water and cold water lines 8 Operate the pump and allow the vinegar to circulate through the boiler for at least 1 hour at a rate of four gallons per minute 15 1 liters per minute 9 Turn off the pump 10 Rinse the vinegar from the boiler as follows a Remove the free end of the drain hose H3 from the pail Place in sink or outside to drain b Clo...

Page 114: ...ing applications When using external pumps Large zoned systems High flow applications Systems with high differential pressures Systems with high pressure drops For pressure curve information refer to the following sections in the Appendix 14 8 CH Pressure Drop and Flow Curve 14 9 DHW Pressure Drop and Flow Curve This picture illustrates a suggested arrangement Some of the fittings are optional ...

Page 115: ...Rinnai I Series Condensing Boiler Combi Manual 115 Pump Thermostat PC Board Wiring for the above application example External pump connection 1 T T 1 Connection Purge Station Thermostat Optional LWCO ...

Page 116: ...116 Rinnai I Series Condensing Boiler Combi Manual Zone Control Thermostat 1 Pump Thermostat 2 PC Board Wiring for the above application example T T 1 Connection ...

Page 117: ...es Condensing Boiler Combi Manual 117 Pump 1 Thermostat 1 Thermostat 2 External pump connection 1 T T 1 Connection T T 2 Connection PC Board Wiring for the above application example External pump connection 2 Pump 2 ...

Page 118: ...eries Condensing Boiler Combi Manual Zone Control Pump 1 Pump 2 Pump 3 Thermostat 1 Thermostat 2 Thermostat 3 PC Board Wiring for the above application example Wires To End Switch on Zone Controller T T 1 Connection ...

Page 119: ...ng Boiler Combi Manual 119 Pump PC Board Wiring for the above application example External pump connection 1 For this application ensure Parameter 41 is set to b for linked operation between the main boiler pump and CH pump 1 ...

Page 120: ...flect the gas type The gas supply shall be shut off prior to disconnecting the electrical power before proceeding with the conversion CAUTION Do not touch any other areas on the PC board other than the described buttons while power is supplied to the appliance Parts of the PC board are supplied with 120 volts AC CAUTION Do not touch the areas at or near the heat exchanger or hot water lines These ...

Page 121: ... 1 7 Remove the plastic orifice from the housing Figure 2 8 Install the new inner and outer gaskets onto the new orifice Figure 2 9 Install new orifice into housing check the gas type displayed on the orifice Red orifice is LPG Blue orifice is NG 10 Confirm gasket is correctly in place the groove side of gasket must be facing outwards Figure 2 11 Reinstall the orifice cover plate using the three s...

Page 122: ...ess the Mode button on the controller 5 Scroll to parameter AOand press the Select button 6 Press the Up or Down arrows to select the appropriate gas type Select A for Natural Gas NG Select for Propane LP Then press the Select button 7 Parameter settings are complete To enter normal operation mode press the Mode button Figure 3 PC Board Press and Hold Red Button for Five Seconds NATURAL GAS PROPAN...

Page 123: ... fan will begin to run if water is flowing and the spark will ignite the main burner b This boiler has an automatic ignition system When the main burner has lit the In Use lamp will glow red and the spark will stop 2 Visual inspection of flame a Check that the burner flames are operating normally The flame can be seen through the circular window above the burner When operating normally the burner ...

Page 124: ...124 Rinnai I Series Condensing Boiler Combi Manual ...

Page 125: ...Rinnai I Series Condensing Boiler Combi Manual 125 ...

Page 126: ...126 Rinnai I Series Condensing Boiler Combi Manual 0 1 2 3 4 5 6 7 8 9 10 20 15 25 30 10 5 0 Water Flow GPM Pressure Loss Feet of Head 11 12 55 50 45 40 35 i120C i060C and i090C ...

Page 127: ...Rinnai I Series Condensing Boiler Combi Manual 127 Water Flow GPM Pressure Loss Feet of Head 70 60 50 0 10 20 30 40 0 1 2 3 4 5 6 7 8 9 10 i060C and i090C i120C 11 ...

Page 128: ...ximum cable length from each temperature controller to the boiler depends on the total number of wired controllers connected to the boiler Number of Wired Controllers Maximum Cable Length for Each Controller to Boiler 1 N A Included on Boiler 2 164 Ft 50 m 3 65 Ft 20 m Turn the power off Do not attempt to connect the temperature controllers with the power on Although the controller is a low voltag...

Page 129: ...ed for a boiler or bank of boilers including the controller built into the boiler Connect the controller cable to the mating terminal at the bottom of the PC Board Use the connecter included for wiring to remote controller Wire the connecter and remote controller and insert the connecter on remote controller ...

Page 130: ...urn on any exhaust fans such as range hoods and bathroom exhausts so they will operate at maximum speed Do not operate a summer exhaust fan Close fireplace dampers 4 Place in operation the appliance being inspected Follow the lighting instructions Adjust thermostat so appliance will operate continuously 5 Test for spillage at the draft hood relief opening after five minutes of main burner operatio...

Page 131: ... property owner to secure the services of qualified licensed professionals for the installation of hard wired carbon monoxide detectors A In the event that the side wall horizontally vented gas fueled equipment is installed in a crawl space or an attic the hard wired carbon monoxide detector with alarm and battery back up may be installed on the next adjacent floor level B In the event that the re...

Page 132: ...w extends to the original purchaser and subsequent owners but only while the product remains at the site of the original installation This Limited Warranty only extends to the first original installation of the product and terminates if the product is moved or reinstalled at a new location Parts replaced during recommended maintenance procedures are not covered by this Limited Warranty What Will R...

Page 133: ...ter the heating system Use in or around areas where chemical agents are used such as but not limited to chlorine hair spray or hair dyes Damage or failure caused by contaminated air including but not limited to sheetrock particles plasterboard particles dust dirt or lint entering the boiler or any of its components Incorrect sizing A failure of any component in the Hydronic system not supplied by ...

Page 134: ...134 Rinnai I Series Condensing Boiler Combi Manual ...

Page 135: ...Rinnai I Series Condensing Boiler Combi Manual 135 ...

Page 136: ...136 Rinnai I Series Condensing Boiler Combi Manual 800000111 3 2019 ...

Reviews: