20170392
24
GB
Installation
6.12
Pump
6.12.1 Technical data
Tab. J
6.12.2 Priming pump
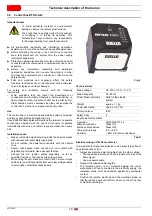
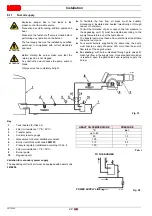
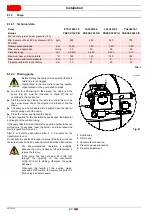
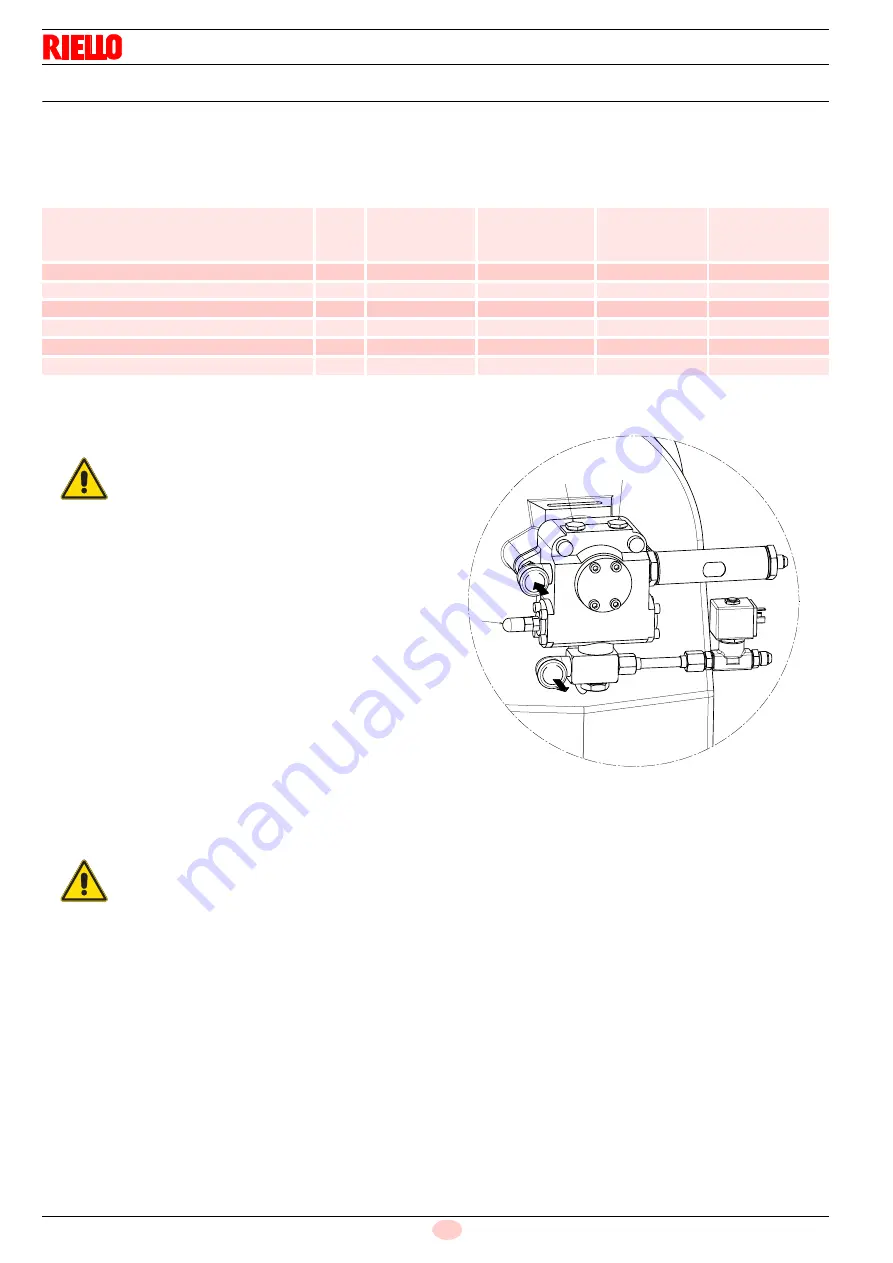
In order for self-priming to take place, the cap 4) on the
pump (Fig. 22) must be loosened to bleed off the air
contained in the suction line.
Start the burner by closing the remote controls. As soon as
the burner starts, check the direction of rotation of the fan
blade.
The pump can be considered to be primed when the light oil
starts coming out of the cap 4).
Close the burner and tighten the cap 4).
The time required for this operation depends upon the diameter
and length of the suction tubing.
If the pump fails to prime at first start-up and the burner locks out,
wait approx. 15 seconds, reset the burner, and then repeat the
start-up operation. And so on.
After 5 or 6 starting operations allow 2 or 3 minutes for the
transformer to cool.
Do not light the photocell in order to prevent the burner lockout;
the burner locks out in any case about ten seconds after its start.
Pump
E7NC1069-5P
TA2C4010-5
TA3C4010-5
TA4C4010-7
Burner
PRESS 140 P/N
PRESS 200 P/N
PRESS 300 P/N
PRESS 4500 P/N
Min. delivery rate at 30 bar pressure (140)
Min. delivery rate at 40 bar pressure (200-
300-450)
kg/h
235
350
540
730
Delivery pressure range
bar
14-30
7-40
7-40
7-40
Max. suction depression
cm Hg
30
30
30
30
Viscosity range
cSt
2.8-800
4-800
4-800
4-75
Maximum heavy oil temperature
°C
120
140
140
140
Max. suction and return pressure
bar
3.5
5
5
5
Pressure calibration in the factory
bar
30
25
25
25
ATTENTION
Before starting the burner, make sure that the tank
return line is not clogged.
Obstructions in the line could cause the sealing
organ located on the pump shaft to break.
ATTENTION
The above-mentioned operation is possible
because the pump is already full of fuel when it
leaves the factory.
If the pump has been drained, fill it with fuel
through the opening on the vacuometer
3)(Fig. 22) prior to starting; otherwise, the pump
will seize.
Whenever the length of the suction piping
exceeds 20-30 meters, the supply line must be
filled using a separate pump.
1
Suction line
2
Return line
3
Vacuometer connection
4
Pressure gauge connection
5
Pressure adjustment
1
2
3
4
5
20172792
Fig. 22
Summary of Contents for PRESS 140 P/N
Page 2: ...Translation of the original instructions...
Page 57: ...55 20170392 GB Appendix Electrical panel layout 0 1 2 2 2 0 DIRECT START UP...
Page 58: ...20170392 56 GB Appendix Electrical panel layout 0 1 1 1 STAR TRIANGLE START UP...
Page 59: ...57 20170392 GB Appendix Electrical panel layout 0 1 0...

