background image

Operation

24

1

Standard Printing

A

Set the Drum Unit.

Reference

 p.7 “Setting the Drum Unit”

B

Make sure that the machine is ready
for printing.

C

Make sure that there are no previ-
ous settings remaining.

Note

To clear any previous settings,
press the 

{

Clear Modes

}

.

D

Set the paper

Reference

 p.10 “Loading Paper”

E

Select the Paper type

Reference

 p.27 “Printing onto Various

Kinds of Paper”

F

Set your desired settings.

G

Press the 

{

Proof

}

 Key.

Note

If the Image position is not cor-
rect, adjust it by using 

{

Whole

}

or 

{

Drum 2

}

 p.30 “Adjusting

the Position of Printed Images”.

If the image density is slightly
dark or light, adjust the image
density, using 

{W}


{V}

 Speed

keys. 

 p.32 “Changing the

Printing Speed”.

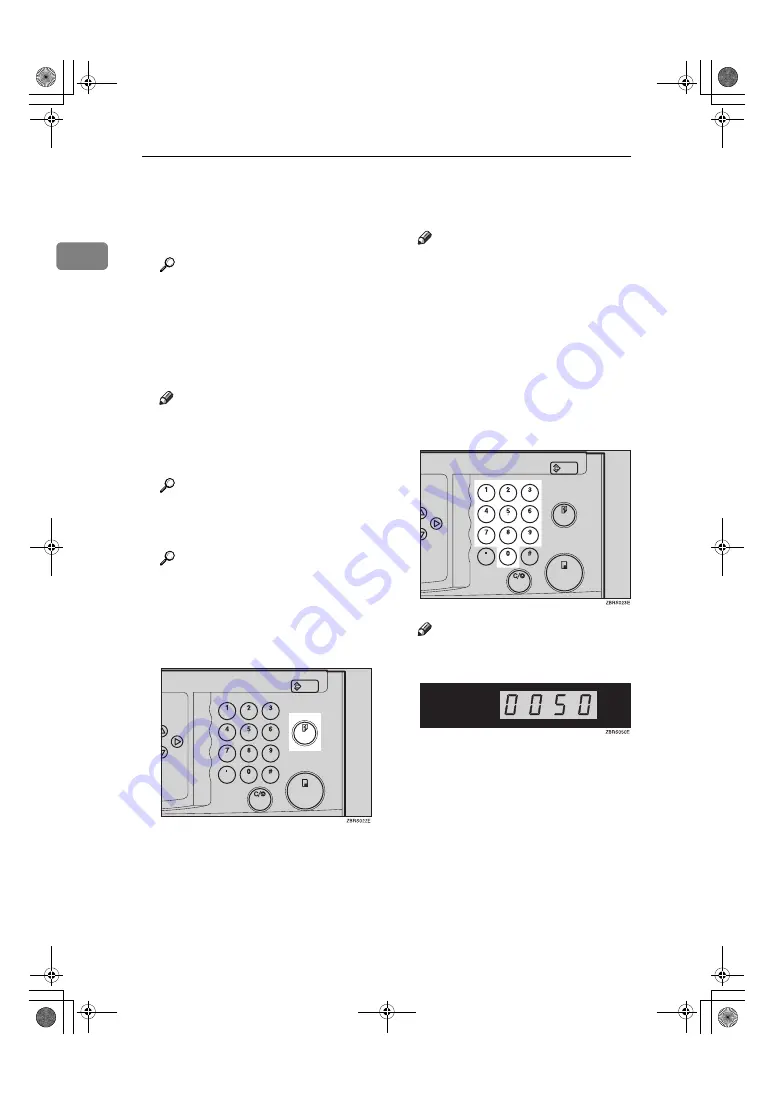
H

Enter the number of prints re-
quired with the number keys.

Note

The counter shows the number
of prints you set.

To change the number entered,
press the 

{

Clear/Stop

}

 key and

enter the new number.

C6398601_HQOPAL-GB.book  Page 24  Monday, June 27, 2005  2:26 PM

Summary of Contents for HQ Opal

Page 1: ... IIR Operating Instructions TC IIR Operating Instructions Read this manual carefully before you use this machine and keep it handy for future reference For safe and correct use be sure to read the Safety Information in this manual before using the machine Operation User Tools Troubleshooting Remarks Specifications 1 2 3 4 5 Printed in Japan GB GB C639 8601 ...

Page 2: ...ction This manual contains detailed instructions and notes on the operation and use of this machine For your safety and benefit read this manual carefully before using the machine Keep this manual in a handy place for quick reference Notes Some illustrations in this manual might be slightly different from the machine Certain options might not be available in some countries For details please conta...

Page 3: ...nnect the power plug by pulling the plug not the cable if the power cable or plug becomes frayed or otherwise damaged To avoid hazardous electric shock do not remove any covers or screws other than those specified in this manual Turn off the power and disconnect the power plug by pulling the plug not the cable if any of the following occurs You spill something into the machine You suspect that you...

Page 4: ...t household waste collection points Disposal can take place at an authorized dealer When disposing of a used ink container reattach the cap to prevent ink from splattering Be careful not to get ink on your clothes when replacing an ink container Ink stains on clothes are hard to remove Be careful not to cut yourself on any sharp edges when you reach inside the machine to remove misfed sheets of pa...

Page 5: ...ION Labels This machine has labels for RWARNING and RCAUTION at the positions shown below For safety please follow the instructions and handle the machine as indicated AKT013S C6398601_HQOPAL GB book Page iii Monday June 27 2005 2 26 PM ...

Page 6: ... sure to read the instructions all of which are described in the Safety Information section The statements above are notes for your safety Important If this instruction is not followed paper might be misfed originals might be damaged or data might be lost Be sure to read this Preparation This symbol indicates the prior knowledge or preparations required before op erating the machine Note This symb...

Page 7: ...or more information Standard Printing p 24 Standard Printing Adjusting the Print Image Position p 30 Adjusting the Position of Printed Images 1 Paper feed direction 1 Paper feed direction 2 Image of Drum 2 Changing the Printing Speed p 32 Changing the Printing Speed C6398601_HQOPAL GB book Page v Monday June 27 2005 2 26 PM ...

Page 8: ... 14 Turning On the Power 15 Loading Paper 16 Preparing the LCOT for Printing 17 Uninstalling the LCIT 19 Print Paper 21 Recommended for the LCIT 23 Recommended for the LCOT 23 Standard Printing 24 Removing Prints 25 Auto Reset 25 Auto Off 26 Printing onto Various Kinds of Paper 27 Printing onto Thick Paper 27 Printing onto Standard Paper 27 Printing onto Special Kinds of Paper 27 Paper Supply Adju...

Page 9: ...Feed Section 51 Paper Misfeed in the Paper Feed Section 52 Paper Wrapped around the Drum 53 Paper Misfeed in the Paper Exit Section 55 When Paper Misfeeds in the LCIT 56 MWhen the Open Cover Unit Indicator Lights 57 Poor Printing 58 Dirty Background 58 When the Press Roller is Dirty 59 Faint Prints 59 When Prints Are Not Delivered in a Neat Stack 60 When Printing on Small Size Paper 60 When Multip...

Page 10: ...viii C6398601_HQOPAL GB book Page viii Monday June 27 2005 2 26 PM ...

Page 11: ...key Press to lower the Paper feed tray 4 Paper feed side plates Prevent paper being fed skewed 5 Paper feed tray Set paper here 6 Paper feed side plates knob Use to move the side plates 7 Paper feed side plates knob lock lever Fix to the paper feed side plates knob AKT015S C6398601_HQOPAL GB book Page 1 Monday June 27 2005 2 26 PM ...

Page 12: ... Use to adjust the buffer fins 7 Drum Unit 2 The master is wrapped around this unit 8 Drum Unit 1 The master is wrapped around this unit 9 Ink holder Set the ink cartridge in this holder 10 Drum unit lock lever B1 Lower to unlock and pull out the drum unit 11 Trailing edge guides Swing out these guides when you use A4L 8 1 2 11 L paper 12 Buffer fins Use to stack prints neatly 13 Paper delivery en...

Page 13: ... guide adjustment knob 3 Down button 4 Up button 5 Side guide screw 6 Feeding pressure lever 7 Side guides 8 Input tray 9 Power switch 10 Cover release lever 11 Cover 12 Intermediate feeding section 13 LCIT release lever AKT012S C6398601_HQOPAL GB book Page 3 Monday June 27 2005 2 26 PM ...

Page 14: ...stem LCS Large capacity output tray LCOT 1 Side guide adjustment knob 2 End plate screw 3 End plate 4 Output tray 5 Side guides 6 Up button 7 Down button AKT014S C6398601_HQOPAL GB book Page 4 Monday June 27 2005 2 26 PM ...

Page 15: ...d back ward right or left p 5 Keys p 30 Adjusting the Position of Printed Imag es Also use to highlight items you wish to select on the panel display 8 Clear Stop key Press to stop printing 9 q key Use to enter data in selected modes 10 Print key Press to start printing 11 Proof key Press to make proof prints 12 Clear Modes Energy Saver key Press to clear any previously entered job settings 13 Num...

Page 16: ... 3 Counter Displays the number of prints entered While printing it shows the number of prints remaining 4 Speed Indicators These indicators show the printing speed that is selected 5 Drum set indicator The green indicator lights when the drum unit is ready to pull out If not ready the red indicator lights C6398601_HQOPAL GB book Page 6 Monday June 27 2005 2 26 PM ...

Page 17: ...olour prints a separate drum unit is necessary for each colour Insert the same kinds of drum unit for both Drum 1 and Drum 2 colour Drum Type 50S 80S 90 A4 is not available for this machine A4 size master cut drum is not avail able for this machine Setting the Drum Unit A Make sure that you select either Drum 1 or Drum 2 before set ting the drum unit Note Make sure that the indicator is lit B Open...

Page 18: ... to step 1 Make sure that the drum unit lock lever B1 is released D Insert the drum unit along the guide rail E Slide in the drum unit until it locks in position Note Insert the same kinds of drum unit for both Drum 1 and Drum 2 F Lift drum unit lock lever B1 G Close the front door Note If you want to set another drum unit go back to step 1 Make sure that the Open Cover Indicator turns off AKT019S...

Page 19: ...ut drum unit handle B2 slow ly F Lift upper drum stay B3 a little to unlock the drum unit then pull out the drum unit while holding drum unit handle B2 and upper drum stay B3 Important Be careful not to let the drum unit fall G Insert the colour drum unit along the guide rail H Lower drum unit lock lever B1 of the inserted drum I Slide in the drum unit until it locks in position J Lift drum unit l...

Page 20: ... then grasp the side plate knob and adjust the side plate to match the paper size Important Always adjust the position with the lock lever for the paper feed side plates in the raised position lock released D Place the paper on the paper feed tray Note Correct the paper curl before loading the paper If you cannot do so stack the paper with the curl face down Reference p 21 Print Paper C6398601_HQO...

Page 21: ...l dis play correspond with the actual paper size and direction set on the paper feed tray Setting Up The Paper Delivery Tray Note When using the optional LCOT see p 14 Using the LCIT and LCOT A Raise the paper delivery tray slight ly and then gently lower it with your hand B Lift the paper delivery side plates and adjust them to match the pa per size C Lift the paper delivery end plate and adjust ...

Page 22: ...ast speed paper jams C may occur in the paper exit area If this happens do the following Decrease print speed See p 32 Changing the Printing Speed Lower the paper alignment wings Push the end plate toward the paper delivery tray edge When the paper alignment wings are raised prints may not be deliv ered neatly stacked depending on paper type If this happens lower the wings Paper alignment wings Ad...

Page 23: ... and B5 size paper Raise the paper alignment wings to about 45 degrees B Slide the chocks up When printing on thin paper 52 3 g m2 13 9 lb or thinner A Raise the paper alignment wings to about 45 degrees B Slide the chocks down Using the trailing edge guides When printing on A4L 81 2 L B5Lsize paper swing out the guides as shown below Turning on the Main Power A Make sure that the power cord is fi...

Page 24: ...st slightly above the tray surface even when they are folded Do not push them down forcefully C Lower the side plats D Hold the handle and unfold the intermediate feeding section of the LCIT Note Do not release the handle E Lift the end of the intermediate feeding section and put it down placing the wheeled support bar onto the paper feed tray AKT001S AKT023S ABQ004S AKT002S C6398601_HQOPAL GB boo...

Page 25: ...into the socket located at the bot tom of the back of the LCIT Turning On the Power Turning On the Power A Check that the LCOT connection cord is connected to the LCIT B Make sure that the power cord is firmly plugged into the wall out let C Turn the power switch on The green indicator blinks Turning Off the Power A Turn the power switch off ABQ006S ABQ007S ABQ011S ABQ012S C6398601_HQOPAL GB book ...

Page 26: ...ing section The green indi cator lights E At the machine adjust the side guides of the paper feed tray to the paper size set for the LCIT and check that the paper size is displayed on the control panel Note Make sure that the paper size at the machine the side guides of the paper feed tray and paper size displayed on the control panel matches the size of the paper loaded on the LCIT Oth erwise the...

Page 27: ...details see p 10 Loading Paper Preparing the LCOT for Printing A Press the up button The output tray goes up B Turn the side guide adjustment knob to adjust the side guides to the paper size Note Align the inside of the side guides with the appropriate mark on the output tray C Loosen the screw for the end plate adjust it to the paper size and then tighten the screw to lock the end plate Note Alig...

Page 28: ...er A Lower the paper alignment wings Note Depending on the type of paper that you are using you might not be able to use the full capac ity 3000 sheets of the LCOT when the wings are lifted Lift the paper alignment wings when B5 JISL prints are deliv ered curled up Printing on Sizes Smaller than A4 or 81 2 11 L Paper A Swing out the guides as shown in the illustration AKT007S AKT008S ABQ023S AKT02...

Page 29: ... original positions Note Lower the end plate arm com pletely before releasing it Uninstalling the LCIT A Turn both the main switch of the machine and power switch of the LCIT off and then unplug the power cord from the wall outlet B Unplug the LCOT connection cord C Move the side guides of the paper feed tray of the machine to the widest position AKT009S ABQ027S ABQ037S ABQ008S C6398601_HQOPAL GB ...

Page 30: ...old the handle of the intermediate feeding section when you detach the LCIT When using in off line mode do not move the LCIT further than the LCOT connection cord can reach E Fold the intermediate feeding sec tion ABQ009S ABQ010S C6398601_HQOPAL GB book Page 20 Monday June 27 2005 2 26 PM ...

Page 31: ...grain paper Thin paper that has low stiffness Paper that is prone to generate a lot of paper dust Grained paper loaded with the direction of the grain perpendicular to the feed direction Certain types of long thin envelopes e g international mail envelopes The following types of envelopes Paper Size Paper Weight Metric Inch Paper feed tray A3 L B4 L A4 L B5 L Others Vertical 70 297mm Horizontal 25...

Page 32: ...ng master Important Correct curls in the paper before placing it in the machine When you cannot correct the paper curl stack the paper with the curl face down or face up as shown in the illustration If paper is curled it might wrap around the drum or stains might appear C6398601_HQOPAL GB book Page 22 Monday June 27 2005 2 26 PM ...

Page 33: ...igh quality 80 g m2 20 lb paper The number of sheets shown is approximate Paper size Paper weight Tray capacity Metric version Inch version Maximum 297 432 mm 325 447 mm 1 Minimum 128 182 mm Maximum 11 6 17 0 12 7 17 5 1 Minimum 5 1 7 1 47 1 209 3 g m2 12 5 55 61 lb 3000 sheets 80 g m2 20 lb Paper stack height Less than 320mm 12 5 Paper size Paper weight Tray capacity Metric version Inch version M...

Page 34: ...Kinds of Paper F Set your desired settings G Press the Proof Key Note If the Image position is not cor rect adjust it by using Whole or Drum 2 p 30 Adjusting the Position of Printed Images If the image density is slightly dark or light adjust the image density using W V Speed keys p 32 Changing the Printing Speed H Enter the number of prints re quired with the number keys Note The counter shows th...

Page 35: ...e paper delivery tray and close the paper delivery side plate Auto Reset The machine returns to its initial con dition automatically after your job is finished This function is called Auto Reset p 36 User Tools Note You can change the time the ma chine can wait before Auto Reset mode starts The machine will not automatical ly enter Auto Reset mode in the following cases If there is no ink If paper...

Page 36: ...nk from inside the machine and then turn itself off This function is called Auto Off Limitation Quality Standby mode does not available when you use colour Drum Type 50S 80S 90 A4 Note You can change the time the ma chine can wait before Auto Off modes starts p 36 User Tools C6398601_HQOPAL GB book Page 26 Monday June 27 2005 2 26 PM ...

Page 37: ...to 209 3g m2 34 to 55 6 lb or heavier paper perform the following steps A Press the Ppr Type key B Select 2 THICK with key C Press the q key Printing onto Standard Paper A Press the Ppr Type key B Make sure that 1 STD is selected C Press the q key Printing onto Special Kinds of Paper A Press the Ppr Type key B Select 3 SPL with key PAPER TYPE 1 STD 2 THICK 3 SPL PAPER TYPE 1 STD 2 THICK 3 SPL PAPE...

Page 38: ...it slants up slightly Paper Supply Adjustment If paper misfeeds occur frequently you can adjust the paper feeding ratio and paper separation ratio A Press the Ppr Supply Adj key B Press or the number keys to adjust the paper feeding ratios and the paper sepa ration ratios C Press q key If the machine does not feed enough paper A Change the paper feeding ratio setting as follows Default GRENVE0E ZD...

Page 39: ...he machine feeds too much paper A Change the paper separation ra tio setting as follows Default Paper type Paper feed separation ratio Normal 4 6 3 Thick 3 4 2 Special kinds of Paper 3 4 1 C6398601_HQOPAL GB book Page 29 Monday June 27 2005 2 26 PM ...

Page 40: ...g unit Changing the print speed There are two kinds of image adjust ment as follows Overall Image Adjustment You can adjust the mixed image position of Drum1 and Drum2 1 Paper feed direction Drum2 Image Adjustment You can adjust the image position of Drum2 1 Paper Feed Direction 2 Image of Drum2 Note When the main switch is turned off the image returns to the default position A Press the Whole or ...

Page 41: ... A You can change the overall im age position of both Drum 1 and 2 Use keys to shift the image each way in 0 5mm 0 02 steps Drum 2 image adjustment A You can change the image posi tion of Drum 2 Use keys to shift the image each way in 0 125mm 0 005 steps C Press the Enter key D Press the Proof key to check the image position Up Down Right Left 10mm 0 4 or 10mm 0 4 15mm 0 6 or 15mm 0 6 Up Down Righ...

Page 42: ...Note The following speeds are avail able Setting 1 default 90 sheets minute Setting 2 105 sheets minute Setting 3 120 sheets minute The faster the printing speed be comes the lighter the printing density is and vice versa If you change the print speed while printing a print shadow might appear When the machine is used in low temperature conditions the image density might decrease In this case use ...

Page 43: ...1 When you use paper longer than 432mm 17 0 completed prints will not be delivered to the paper delivery tray properly so lower the paper delivery end plate and receive completed prints by hand A Press the Skip Feed key B If necessary select the number of rotations of the drum per sheet of paper fed with the keys Note You can also select the number of rotations with the Number keys You can select ...

Page 44: ...Operation 34 1 C6398601_HQOPAL GB book Page 34 Monday June 27 2005 2 26 PM ...

Page 45: ...ed user tool number with the key Using the number keys A Enterthedesiredusertoolnumber with theNumber keys B Change the settings by following the instructions on the panel dis play Then press the q key C Press the User Tools key to return to the standby display Note The settings are not canceled even if the main switch is turned off or the Clear Modes key is pressed C6398601_HQOPAL GB book Page 35...

Page 46: ...nts 6 Buzzer Off Turns the beeper on or off Note Default STD standard Available settings 0 KEY OFF When you press a key the beeper does not sound When warning messages appear on the panel dis play the beeper sounds 1 ON The beeper sounds when you press a key or when warning messages appear on the panel display 2 OFF The beeper does not sound when you press keys or when warning messages appear on t...

Page 47: ...ower the pa per delivery end plate and receive completed prints by hand 11 Skip Number of Time Specifies the number of drum rotations in Skip Feed mode when the power is turned on You can also select whether you can change the number of drum rotations temporarily when you press the Skip Feed key p 33 Skip Feed Printing Note Default Number of Skip Feed 2 12 Skip Display On Mode When you press Skip ...

Page 48: ... 0 No 1 Yes Auto Reset time 0 No 1 5 minutes 17 UC Count Displays the number of prints made in each user code 18 Clear UC Count Clears each user code counter Note Default 0 Adjustment value 0 No 1 Yes 19 Total UC Count Displays the total number of prints for all the 200 user codes 20 Clear Total UC Count Clears the total user code counter Note Default 0 Adjustment value 0 No 1 Yes No Mode Descript...

Page 49: ...3 134 145 156 167 178 189 190 201 212 223 234 245 256 267 278 289 290 301 312 323 334 345 356 367 378 389 390 401 412 423 434 445 456 467 478 489 490 501 512 523 534 545 556 567 578 589 590 601 612 623 634 645 656 667 678 689 690 701 712 723 734 745 756 767 778 789 790 801 812 823 834 845 856 867 878 889 890 901 912 923 934 945 956 967 978 989 990 Note To prevent unauthorized users from accessing ...

Page 50: ...as expired How to Check the User Code Counter 17 Reference If you want to check the total mas ters and prints made under all user codes see p 41 How to Check the Total Number of Masters and Prints Made Under All User Codes 19 A Press the User Tools key B Enter 17 with the number keys and press the key The number of masters and prints made under the user code 382 will be displayed in the guidance d...

Page 51: ...ser Tools How to Check the Total Number of Masters and Prints Made Under All User Codes 19 A Press the User Tools key B Enter 19 with the number keys and press the key The total number of prints made under all user codes will be dis played in the guidance display C Press the User Tools key to leave User Tools How to Clear the User Code Total Counter 20 A Press the User Tools key B Enter 20 with th...

Page 52: ...User Tools 42 2 C6398601_HQOPAL GB book Page 42 Monday June 27 2005 2 26 PM ...

Page 53: ... can change the maximum number of prints that can be made in one operation with the user tools p 36 User Tools DRUM1 SET COMPLETELY Slide in the drum until it clicks Make sure that the drum is completely set in position SC TEL CALL SERVICE Turn the main switch off and on If the message appears again contact your service representative COLD DRUM NOT TO USE 3RD SPEED Slow down the printing speed and...

Page 54: ... speed Scratches appear on the print image Sharp edges in the machine may have scratched your prints Increase the print speed Set thick paper The images of drum 1 and 2 do not mix well together If the image density is too high the background colour might appear strong Switch drum 1 and 2 Use the image of drum 1 for background 2nd printing with another drum is unsatisfactory The 1st print image is ...

Page 55: ...to the master making unit and then remake the mas ter with economy mode or quality start mode UseQuality Standbymode by pressing the clear mode key for more than 3 sec onds When you make master make a few trial prints and then return the drum units to this machine Reference Refer to the master making unit operating instruc tions Problem Cause Action C6398601_HQOPAL GB book Page 45 Monday June 27 2...

Page 56: ...oaded in the input tray Load paper A sheet of paper remains in the intermediate feeding sec tion Remove the paper The cover release lever is not locked Lock the cover release lever If the input tray does not move after 15 seconds after eliminat ing the causes above contact your service representative The red indicator is lit Turn the power off and then back on If the red indicator is still lit con...

Page 57: ...ht ap pear Reference For available paper sizes p 21 Print Paper A Load the paper in the Paper feed tray Note Correct any paper curl before loading the paper B Adjust the paper feed side plate to match the paper size Loading Paper into LCIT If paper runs out while printing the green indicator blinks and the input tray goes down Replenish paper in the input tray A Load paper Note The leading edge of...

Page 58: ...ng 48 3 B Press the up button The input tray goes up and a sheet of paper is fed into the intermedi ate feeding section The green indi cator lights AKT004S C6398601_HQOPAL GB book Page 48 Monday June 27 2005 2 26 PM ...

Page 59: ...flat surface A Open the front door B Pull out the ink holder C Remove the used ink cartridge D Remove the cap of the new ink car tridge E Insert the new cartridge into the ink holder Note Always supply ink of the same colour If ink comes into contact with your eyes rinse immediately in running water For other symp toms consult a doctor Keep the ink or ink container out of reach of children If ink ...

Page 60: ...ing 50 3 F Return the ink holder to its origi nal position until it clicks G Close the front door The machine will start idling to supply ink to the drum C6398601_HQOPAL GB book Page 50 Monday June 27 2005 2 26 PM ...

Page 61: ...sfed paper To prevent paper misfeeds Check the following before restarting the printing run Did you select an appropriate pa per type with the Ppr Type key Are the side pads in the correct po sitions To print on thin paper 52 3g m2 13 9 lb slide the levers behind the paper feed side plates in the direc tion of the arrow see illustration When paper is curled correct the curl as shown Be careful not...

Page 62: ...p erly adjusted When you load pa per on the paper feed tray make sure that the paper edge touches the back fence and paper is placed on the proper paper size scale Only use paper where the leading edge has two right angle corners Paper Misfeed in the Paper Feed Section A Open the front door B Lower drum unit lock lever B1 C Take out the drum Note For how to take out the drum unit p 9 Changing the ...

Page 63: ...sethefront door To prevent paper misfeeds p 51 Paper Misfeed in the Paper Feed Section Paper Wrapped around the Drum When paper is wrapped around the drum A Open the front cover B Lower drum unit lock lever B1 C Take out the drum Note For how to take out the drum unit p 9 Changing the Drum Unit DRUM1 PAPERFED SKEW REMOVE PAPER C6398601_HQOPAL GB book Page 53 Monday June 27 2005 2 26 PM ...

Page 64: ...and close the front door When paper is misfed inside the machine A Open the front cover B Lower drum unit lock lever B1 C Take out the drum Note For how to take out the drum unit p 9 Changing the Drum Unit D Remove the misfed paper from the inside as shown in the illus tration DRUM1 DELIVERY JAM REMOVE PAPER C6398601_HQOPAL GB book Page 54 Monday June 27 2005 2 26 PM ...

Page 65: ...want to know more details about leading edge margin refer to the master making unit s operat ing instructions Paper Misfeed in the Paper Exit Section A Slowly but firmly pull out the mis fed paper To prevent paper misfeeds When a thin paper misfeed in the pa per exit section occurs reduce the printing speed with the W V Speed keys p 32 Changing the Printing Speed If you cannot re duce the printing...

Page 66: ...nd causing an injury When small size paper is misfed and cannot be removed detach the LCIT and then remove the paper C Close the cover and then move the cover release lever back to the original position The red indicator goes off Note If a paper misfeed message ap pears on the machine remove the paper misfed in the machine also D Press the up button The input tray goes up and a sheet of paper is f...

Page 67: ...e where the doors covers are not properly closed Front door Close the front door completely Optional LCIT Unit A Close the LCIT Unit cover B Move the cover release lever back to the original position Optional LCOT Unit Lower the end plate arm AKT027S AKT028S AKT030S AKT029S C6398601_HQOPAL GB book Page 57 Monday June 27 2005 2 26 PM ...

Page 68: ...eed mode to dry the ink on the prints A Open the front cover B Pull out the drum unit Note For how to take out the drum unit p 9 Changing the Drum Unit C While pressing the drum lock turn the drum until you can see the trail ing edge of the master If ink comes into contact with your eyes rinse immediately in running water For other symp toms consult a doctor Keep the ink or ink container out of re...

Page 69: ...ints is dirty the Press Roller might be dirty A Make several prints until clear im age appears Note If the print is still dirty contact your service representative Faint Prints If the machine is not used for a long period of time or you change the col our drum unit the ink on the drum might dry causing print quality to de teriorate To solve this problem set back your drum unit to the Master making...

Page 70: ... end plate to raise the screw B Adjust the angle of the end plate by turning the screw clockwise or counterclockwise When paper sides do not stack neatly Adjust the paper delivery side plates to a size a little larger than the paper size ZADH110J ABL034S ABL046S C6398601_HQOPAL GB book Page 60 Monday June 27 2005 2 26 PM ...

Page 71: ...e lever is set to Standard set the feeding pres sure lever to Thin If paper is not fed at all when the feeding pressure lever is set to Thin set the feeding pressure lever to Standard Paper heavier than 127 9 209 3 g m2 34 0 55 6 lb is catego rized as thick paper However for B5 paper heavier than 127 9 g m2 34 0 lb set the feeding pressure lever to Standard B If the problem still persists take the...

Page 72: ...Troubleshooting 62 3 C6398601_HQOPAL GB book Page 62 Monday June 27 2005 2 26 PM ...

Page 73: ...edge touches the image of prints on the paper delivery tray Print ink on the paper delivery tray might stick to the back side of the next print Press the Proof key to perform a test print as the image density of the first few prints might be light When the machine is on and the power source is less than 90 of the spec ified amount printing quality will decrease Therefore make sure the sup ply from...

Page 74: ... out from the edges of the master especially under high temperature and when printing in two or more colours In this case make a new master Large uneven solid image wrinkles the master and you may not print as you want C6398601_HQOPAL GB book Page 64 Monday June 27 2005 2 26 PM ...

Page 75: ...ong light more than 1500 lux Locations directly exposed to cool air from an air conditioner or heated air from a heater sudden temperature changes might cause condensation within the machine Places where the machine might be subjected to frequent strong vibration Dusty areas Areas with corrosive gases Keep the machine away from humidity and dust Otherwise a fire or an elec tric shock might occur D...

Page 76: ...rd Only connect the machine to the power source described in this man ual Do not damage break or make any modifications to the power cord Do not place heavy objects on it Do not pull it hard nor bend it more than necessary These actions could cause an electric shock or fire Unplug the power cord from the wall outlet before you move the machine While moving the machine you should take care that the...

Page 77: ...benzene If they get into the ma chine or melt plastic parts a failure might occur Do not clean parts other than those specified in this manual Such parts should be cleaned by your service representative Cleaning the Main Frame Cleaning the paper feed roller A Wipe off the paper dust on the pa per feed roller with a damp cloth then wipe it with a dry cloth Paper Feed Tray LCIT Note If you do not cl...

Page 78: ...Remarks 68 4 C6398601_HQOPAL GB book Page 68 Monday June 27 2005 2 26 PM ...

Page 79: ... Master Making Unit s Operating Instructions Print Paper Weight 52 3 209 3g m2 13 9 55 6 lb Print Speed 90 105 120cpm 3 steps colour Printing Drum unit replacement system Image Position Paper Size and Paper Capacity 1 000 sheets 80g m2 20 lb Paper Delivery Tray Capacity 1 000 sheets 80g m2 20 lb Up Down Right Left Overall Image Adjustment 10mm 0 4 or 10mm 0 4 15mm 0 5 or 15mm 0 5 Drum2 Image Adjus...

Page 80: ... at the position of the operator Power Consumption Printing 0 55kW Max Width Depth Height Stored 940 mm 37 0 630 mm 24 8 590 mm 23 2 Set up 1 620mm 63 8 630 mm 24 8 555 mm 21 9 Printing Speed Noise Emission During printing 90cpm 78dB A 105cpm 80dB A 120cpm 82dB A Stand by 47dB A Printing Speed Noise Emission During printing 90cpm 65dB A 105cpm 68dB A 120cpm 69dB A C6398601_HQOPAL GB book Page 70 M...

Page 81: ...n the image position is set to 0 mm 0 Print paper weight 47 1 209 3 g m2 12 5 55 61 lb Feed tray capacity 3000 sheets 80 g m2 20 lb Paper stack height Less than 320 mm 12 5 Output tray capacity 3000 sheets 80 g m2 20 lb Paper stack height Less than 345 mm 13 5 Print speed Corresponds to the machine specification Power consumption Dimensions W D H LCIT 968 545 778 mm 38 1 21 4 30 6 LCOT 560 512 778...

Page 82: ...Specifications 72 5 Other Option Drum unit Colour Drums A3 11 17 Note Specifications are subject to change without notice C6398601_HQOPAL GB book Page 72 Monday June 27 2005 2 26 PM ...

Page 83: ...Black 1 000ml pack Environmental conditions 5 to 40 C 10 95 RH Ink Red 1 000ml pack Ink Blue Ink Green Ink Brown Ink Purple Ink Yellow Ink Navy Ink Maroon Ink Teal Ink Orange Ink Gray Ink Violet Ink Hunter green Ink Burgundy Ink Gold Ink Reflex Blue C6398601_HQOPAL GB book Page 73 Monday June 27 2005 2 26 PM ...

Page 84: ...ironment 65 F Feeding pressure lever 3 61 front door 1 I Indicators 3 ink 49 73 ink holder 2 Input tray 3 Installing the LCIT 14 Intermediate feeding section 3 J Jump Table 37 K keys 5 L Large capacity input tray 3 Large capacity output tray 4 Large Capacity System 3 4 LCIT 3 Uninstalling the LCIT 19 LCIT release lever 3 LCOT 4 Preparing the LCOT for Printing 17 LCS 3 Loading Paper 10 16 loading p...

Page 85: ...arks 63 Resettable Count 36 S Safety Information i service call 43 Setting and Changing the Drum Unit 7 Setting up the paper delivery tray 11 Side guide adjustment knob 3 4 Side guides 3 4 Side guide screw 3 Skip Feed key 5 Skip Feed printing 33 Skip Number of Time 37 Special kinds of Paper 27 specifications 69 standard paper 27 standard printing 24 System 36 T thick paper 27 Total Counter 36 trai...

Page 86: ...76 GB GB C639 8601 MEMO C6398601_HQOPAL GB book Page 76 Monday June 27 2005 2 26 PM ...

Page 87: ...ction This manual contains detailed instructions and notes on the operation and use of this machine For your safety and benefit read this manual carefully before using the machine Keep this manual in a handy place for quick reference Notes Some illustrations in this manual might be slightly different from the machine Certain options might not be available in some countries For details please conta...

Page 88: ... IIR Operating Instructions TC IIR Operating Instructions Read this manual carefully before you use this machine and keep it handy for future reference For safe and correct use be sure to read the Safety Information in this manual before using the machine Operation User Tools Troubleshooting Remarks Specifications 1 2 3 4 5 Printed in Japan GB GB C639 8601 ...

Reviews: