SP1100SF/Aficio SP1100SF
- 58 -
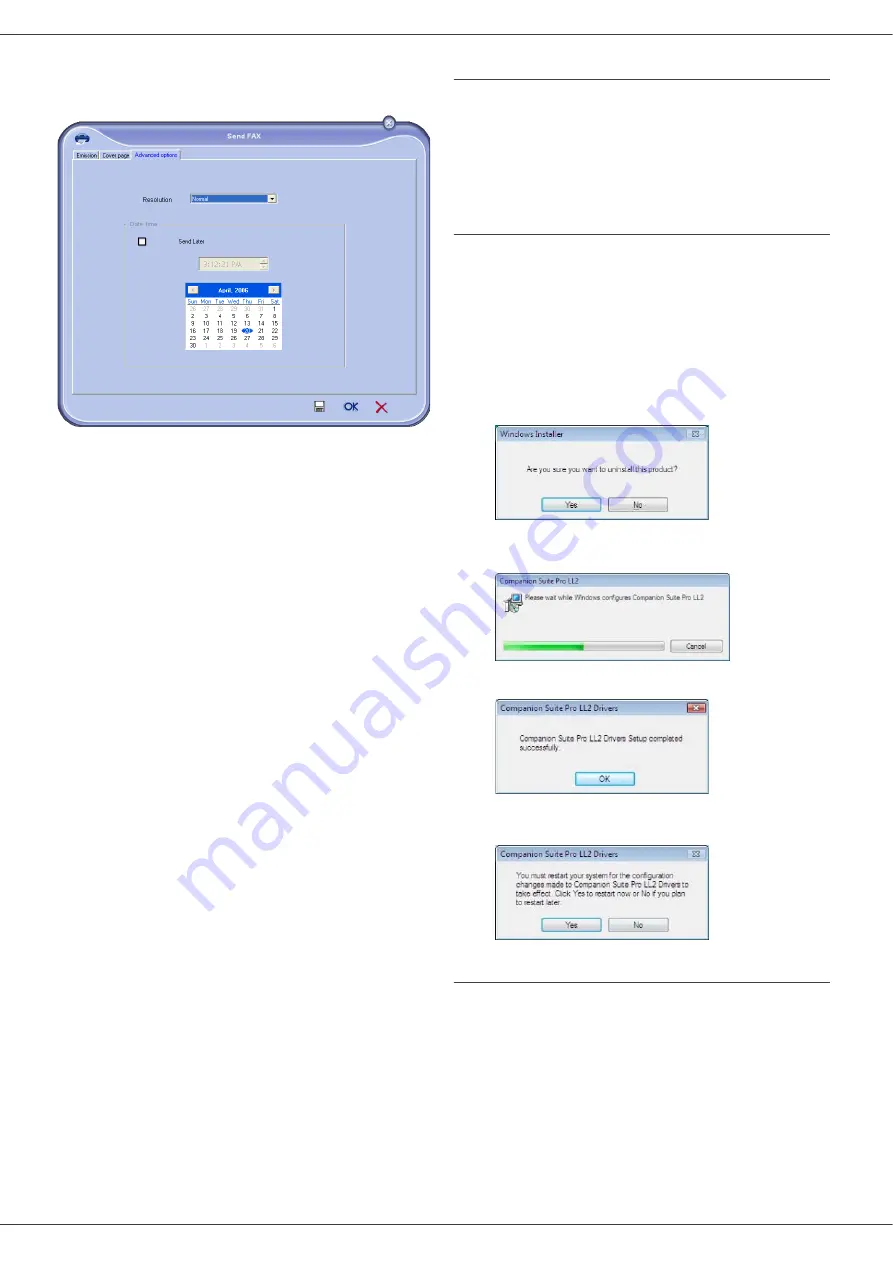
Add any recipient to the recipient list, click on the tab
A
DVANCED
O
PTIONS
, select resolution
N
ORMAL
as shown
below:
Finally click on the button
S
AVE
AS
DRAFT
in the lower right
corner (this is the button with the floppy disk icon). The
background image is created in the directory C:\Program
Files\Companion Suite Pro LL 2\Documents\FAX\Tempo
rary and has the file extension .fax.
Whether you choose Option
A
or
B
, you end up with a
background image with extension .fax, which is located in
C:\Program Files\Companion Suite Pro LL 2\Documents\
FAX\Temporary.
You can now proceed to the second step right
below.
For the second step:
Now that the background image is created in directory in
C:\Program Files\Companion Suite Pro LL 2\Documents\
FAX\Temporary, you can add the fields on top of the
background image.
Please follow the procedure below:
(a) Launch
MFM
ANAGER
, select
N
EW
F
AX
, click on the tab
C
OVER
P
AGE
, and check the check box named
W
ITH
THE
COVER
PAGE
.
(b) Click on the button
N
EW
, this displays a new window
with the title
C
REATION
OF
THE
COVER
PAGE
.
(c) Press the button
O
PEN
in the toolbar, change the file
format to *.fax and browse to the directory C:\Program
Files\Companion Suite Pro LL 2\Documents\FAX\Temp
orary that contains the background image that you have
created in the
First step
.
(d) Click on the button
F
IELDS
in the toolbar, a window
pops up allowing you to add the fields on top of the
background image.
(e) Click on the button
S
AVE
to save the Cover Page
template and exit this window.
(f) The window
N
EW
F
AX
is displayed, you can now
choose the Cover Page template that you want to use.
When you double click the preview image in the lower
right corner, another window pops up giving you a
preview of the cover page with the fields filled with the
recipient's information.
Software Uninstallation
This section describes the following procedures:
•
full uninstallation of the Companion Suite Pro
software,
•
uninstallation of the drivers only.
Uninstall the software from your PC
Turn your PC on. Open an account session with the
administration rights.
Run the programs removal from the menu
S
TART
>A
LL
P
ROGRAMS
>C
OMPANION
S
UITE
> C
OMPANION
S
UITE
P
RO
LL2 > U
NINSTALL
.
1
A confirmation screen appears. Click on the
Y
ES
button to continue the Companion Suite Pro
program removal.
2
The uninstall program is launched. You can cancel
the removal by clicking on
C
ANCEL
.
3
Click on the
OK
button.
4
You need to restart your system at the end of the
procedure. Click on the
Y
ES
button.
Uninstall the drivers from your PC
Turn your PC on. Open an account session with the
administration rights.
Depending on the installation mode used, select the
required uninstallation mode:
•
If you have installed the drivers with the Companion
Suite Pro software, see paragraph Uninstall the
drivers using the Companion Suite Pro software.
•
If you have installed the drivers manually, see
paragraph Uninstall the drivers manually.
Î


