Chapter 2 Print from Windows Vista/Server 2008/7/Server 2008 R2
2-13
OG
A
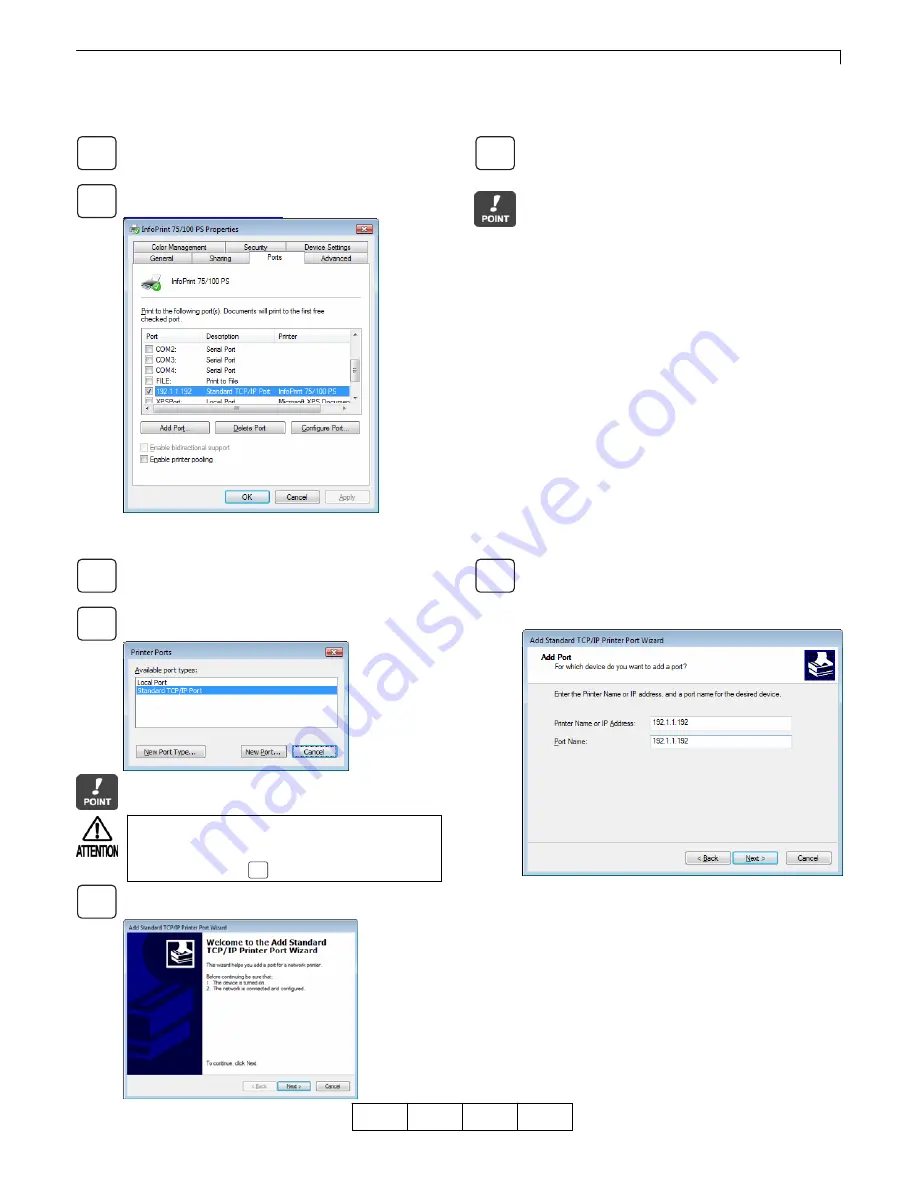
2.6 Changing Print Port
If you need to change the printer destination due to a change in IP address or something similar, or you save data
generated by a printer driver in a file, use the following steps to change the printer connection port.
Log on with the user name with Administrator
privileges.
Display [Ports], following the steps outlined in
"2.4 Displaying Properties"
Select the connection port from the [Print Port] list
and click the [OK] button to close properties.
To save printing data generated by the printer driver
in a file, select [FILE]. To add a new connection port,
click [Add Port].
2.6.1 Adding New LPR Port
Click [Add Port] under [Port] properties.
Select [Standard TCP/IP Port], and then click the
[New Port] button.
Even if [LPR Port] is displayed in the list, be sure
to select [Standard TCP/IP Port].
Click the [Next] button.
Enter the printer’s IP address in the [Printer Name or
IP Address] field, and then click the [Next] button.
Under [Port Name], you can also change to any
name.
01
1
2
3
1
2
3
4
When the port cannot be added, after licking
[Change Sharing Option] on the [Sharing] tab,
and then return to again.
1


