
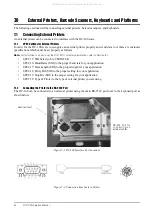


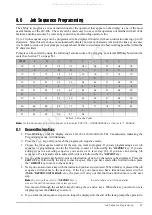


Job Sequence Programming
57
8.0
Job Sequence Programming
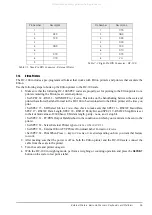
The ability to program a series of instructions for the operators that appear on the display is one of the most
useful features of the DC-100. The scale can be made easy to use even for operators not familiar with all of its
features, ensuring accuracy by increasing consistency and avoiding operator error.
Up to 10 job sequence steps can be programmed to be displayed in order, with each instruction having up to 22
characters. Since this screen does not automatically display how many characters remain in the line as you enter,
it is helpful to write out your prompts on paper ahead of time to determine the best wording possible within the
22 character limit.
Prompts can be entered by using the following Teraoka codes or by plugging an external IBM keyboard into the
scale (See Section 7.3 on page 54).
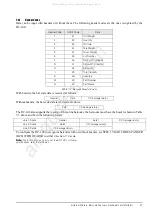
Table 8-1. Teraoka Codes
Note:
For the job sequence prompts to appear on the display, SPEC 13 – JOB SEQUENCE must be set to “1: ENABLE”.
8.1
General Instructions
1. Press
MODE
key until the display shows
ITEM CODE PROGRAMMING
. The
S
annunciator, indicating the
Programming mode, will illuminate
2. Press the
+
or
-
key until you reach the program job sequence mode.
3. Choose the job sequence number for the step you want to program. If you are programming a new job
sequence or programming one for the first time, to enter a
1
followed by the
* REPRINT
key. If you are
adding steps to an existing sequence you can start at a later step. (Ex. If you have an existing job
sequence of 5 steps and want to add a sixth, enter a
6
followed by the
* REPRINT
key.)
4. Use the alphanumeric keyboard to enter an instruction of up to 22 characters to be displayed. Press the
SHIFT UP
key followed by the
Q
key to insert a space. Once you have entered the first instruction, press
the
* REPRINT
key to move to the next step.
5. Next you can associate a key with the instruction you have just entered. When this key is pressed the job
sequence will advance to the next step. If the key you choose also has a function associated with it
(
TARE, * REPRINT, UNIT WEIGHT,
etc.), the scale will carry out that function and then move to the next
step.
Note:
Do not use the
+
(plus) or
* REPRINT
keys to
move to the next job sequence step unless you want
to print a label as part of the operation.
You can scroll through the available keys by using the
<<
and
>>
keys. When the key you want to use is
displayed, press the
CODE
key to store it.
6. If you want the job sequence steps to no longer be displayed at the end of the task, prompt the operator to
SPACE
A
B
C
D
E
F
G
H
I
00
01
02
03
04
05
06
07
08
09
J
K
L
M
N
O
P
Q
R
S
10
11
12
13
14
15
16
17
18
19
T
U
V
W
X
Y
Z
,
.
-
20
21
22
23
24
25
26
27
28
29
0
1
2
3
4
5
6
7
8
9
30
31
32
33
34
35
36
37
38
39
@
!
“
#
$
%
&
/
(
)
40
41
42
42
44
45
46
47
48
49
‘
<
>
+
:
*
À
Â
È
Ê
50
58
59
69
72
73
77
78
79
80
É
Ô
Ç
?
→
←
81
82
83
96
97
98
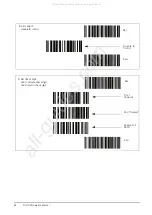
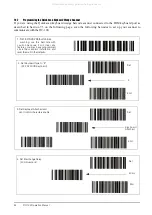
All manuals and user guides at all-guides.com
all-guides.com


