background image

34

120 Plus Digital Weight Indicator Technical Manual

2. Press the 

 key to show the 

EDIT

 submenu.

3. Press the 

 key again to show the print format string. 

4. Use the 

 key and the 

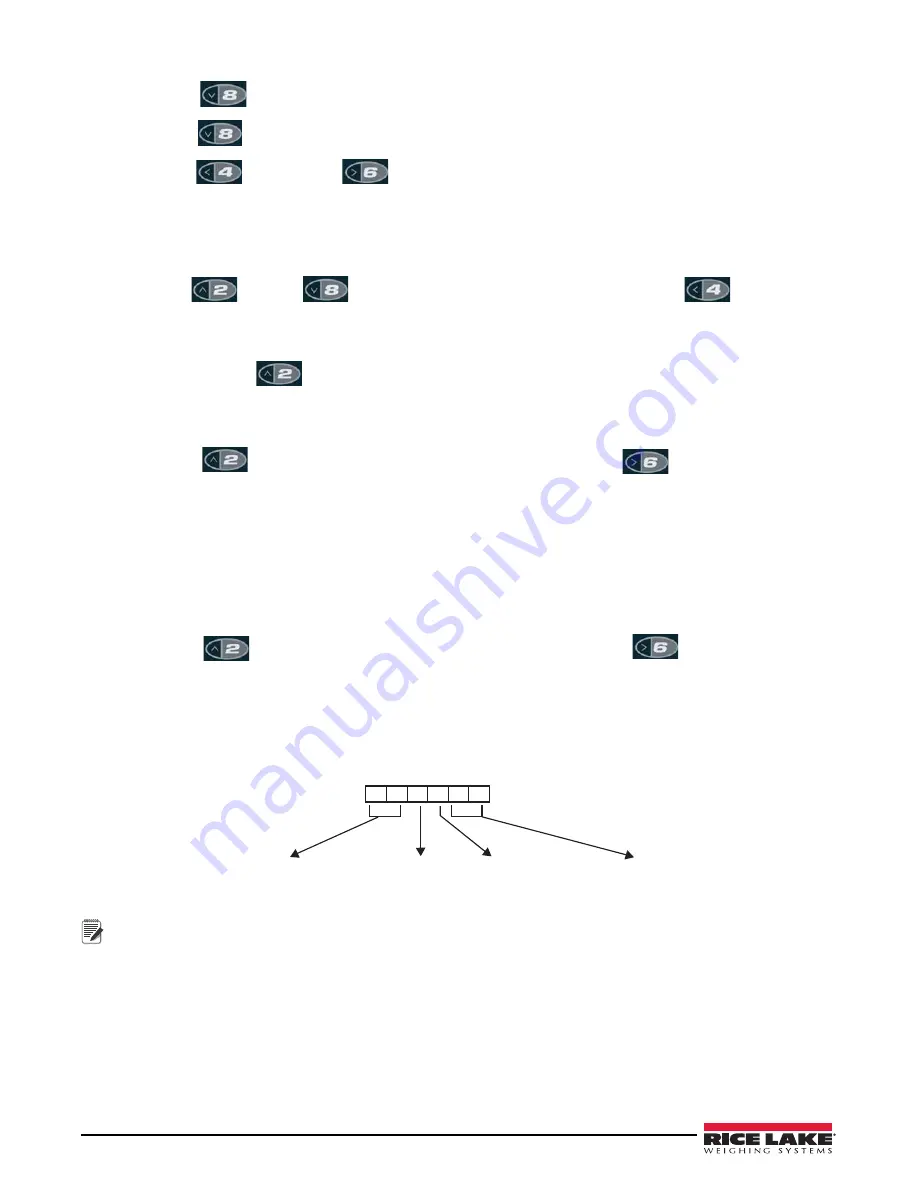
 key to scroll through the format. The number position of each 

character is shown in the two digits at the left of the display.

To Edit a Character:

1. Press the 

ENTER

 key while the character is displayed. The right most digit blinks, indicating that it can be 

changed. 

2. Use the 

 key and 

 keys to increase or decrease the value, or use the 

 key to move to 

the next digit. 

3. Press the 

ENTER

 key to save any changes and advance to the next character in the string.

4. If done, press the 

 key to return to the 

EDIT

 submenu.

To Insert One of More Characters:

1. Move the cursor to the character after which new characters are to be inserted.

2. Press the 


key to return to the 

EDIT

 submenu, and then press the 

 key to show the 

INSERT

parameter.

3. Press the 

ENTER

 key to insert one character; press repeatedly to add more characters. Each press of the 

ENTER

 key adds a character at the location last shown under 

EDIT

 submenu and shifts all subsequent 

characters to the right. Inserted characters are assigned hex value 00 (null). To edit inserted characters, 
return to the EDIT submenu and make changes as described in this section “To edit a character.”

To Delete One of More Characters

1. Move the cursor to the character to be deleted.

2. Press the 

 key to return to the 

EDIT

 submenu, and then press the 

 key twice to show the 

DELETE 

parameter.

3. Press 

ENTER

 key to delete one character; press repeatedly to delete more characters. Each press of the 

ENTER

 key deletes a character, starting at the location last shown under 

EDIT

 submenu, and then moving 

left to preceding characters. Each deletion shifts all subsequent characters to the left.

The format of the characters to be entered is shown.

0

1

N

4

E

Location of the character

Blank

Visible ASCII Char

ASCII in HEX code

Figure 6-1. Print Format

Note

• EDP or Electronic Data Processing refers to a PC or a terminal that can enter ASCII characters using a keyboard and   a 

screen via the EDP interface of the 120 Plus.

• Some characters cannot be displayed on the 120 Plus front panel (See the ASCII character chart in Appendix C - ASCII 

Set and Specifications and Appendix E - Front Panel Display Characters on pages 44 and 48.) and are shown as blanks. 
The 120 Plus can send or receive any ASCII character; the character printed depends on the particular ASCII character 
set implemented for the receiving device.

Summary of Contents for 120 Plus

Page 1: ...120 Plus Digital Weight Indicator Software Version 5 00 Technical Manual PN 105914 Rev B ...

Page 2: ......

Page 3: ...on 19 3 4 Serial Menu 20 3 5 Program Menu 22 3 6 Print Format Menu 24 3 7 Set Points Menu 25 3 8 Time Menu 27 3 9 Date Menu 28 3 10 Version Menu 28 4 0 Test Mode Operations 29 5 0 Panel Mode Operations 31 6 0 Print Formatting 33 6 1 Print Format Commands 33 6 2 Using Any Editor Through EDP 33 6 3 Using Front Panel Editing 34 7 0 Setpoint Operation 35 8 0 Appendix 36 8 1 Electronic Data Processing ...

Page 4: ...and REGULAT Parameter 40 8 2 Conversion Factors and Continuous Output Format 41 8 2 1 Conversion Factors 41 8 3 ASCII Set and Specifications 42 8 3 1 Continuous Output Stream Format 44 8 3 2 Extended Format 44 8 4 Error Messages 45 8 5 Front Panel Display Characters 45 8 6 Gravity Compensation 46 8 8 120 Plus Specifications 47 120 Plus Limited Warranty 48 Rice Lake continually offers web based vid...

Page 5: ...he indicator front panel consists of a backlit six digit 7 segment LCD display and a set of keys The prominent features of the 120 Plus include Large 0 82 six digit LCD display Powered either by an internal rechargeable battery or an external 5VDC wall adapter Built in battery charging circuit Drives up to four 350 ohm or eight 700 ohm load cells Supports 4 to 6 wire load cell connections EDP Port...

Page 6: ...e warnings could result in injury or death Contact any Rice Lake Weighing Systems dealer for replacement manuals Proper care is your responsibility General Safety Failure to heed may result in serious injury or death Some procedures described in this manual require work inside the indicator enclosure These procedures are to be performed by qualified service personnel only DO NOT allow minors child...

Page 7: ...us keypad See Section 3 0 on page 13 for information about using the front panel keys in configuration mode 1 2 3 4 5 6 7 9 8 Figure 1 1 120 Front Panel The key functions are described in the following table Table 1 2 120 Plus Key Functions Number Name Function 1 Power Zero Turns indicator on or off Secondary use it provides zero function 2 Tare Acquire the weight of the scale as tare 3 Preset Tar...

Page 8: ... the gross weight is within 0 25 graduation of zero 5 Standstill The icon shows that the scale is at a standstill or within the specified motion band Some operations including tare function and printing can be done only when the standstill symbol is displayed 6 Hold The HOLD icon indicates that hold is active 7 Units The Lb Oz Kg t and g icons indicate the units of the displayed value Lb pound Oz ...

Page 9: ... Indicator bottom Figure 1 4 Setup Switch Location The setup switch can only be activated by using a thin object to press it as shown in Figure 1 4 The setup switch is used for entering configuration and calibration modes In this mode different parameters of the weight indicator can be configured and calibrated Note This operation should be performed only by a qualified technician calibration of t...

Page 10: ...red correctly the tare weight is stored and the display shows the net weight Note The keyed tare must be 0 1 8 5 Store Preset Tare 1 In order to program a tare value hold PT Preset Tare for two seconds Then the 120 Plus will display ProPt x 2 Press a numeric key This is the memory to be programmed 3 The 120 Plus will recall the preset tare and display it Then enter the preset tare value and press ...

Page 11: ...old before placing an item on the scale Averaging will begin when the load has stabilized via setting MOTBAND Auto Hold Mode 1 While the net weight is within the zero band the indicator shows the current weight Press TARE in NTEP mode or ZERO to clear any residual weight and return the scale to the zero state 2 Press HOLD Hold to enter the Auto Hold Mode The current weight displays and alternately...

Page 12: ...ble details the power connector pin functions 1 2 3 Pin Designation Function 1 DC Power Source 2 DC Power Source 3 Earth Power Return Table 2 1 Power Connection Pin Outs 2 2 Serial Print Connector Table 2 2 details the serial pin connector functions Table 2 2 Serial Connector Port Pin Designation Function EDP Port 2 EDP TxD RS 232 Transmit Data 6 EDP RxD RS 232 Receive Data 12 EDP GND RS 232 Groun...

Page 13: ...cally be wired into terminal strips or connectors The following table illustrates the wiring colors Table 2 3 Digital I O Interface Cable Colors DB 15 Pin Outs Wire Color DB 15 Pin Outs Wire Color 1 Black 9 Grey 2 Brown 10 White 3 Red 11 Pink 4 Orange 12 Light Blue 5 Yellow 13 Light Green 6 Green 14 Red Black 7 Blue 15 White Black 8 Purple 2 3 Load Cell Connections The following table shows the lo...

Page 14: ...e a keypad function The keypad function can be set in the SETPNT menu the external device must provide a normally open N O momentary switch contact The remote switch input requires a voltage free contact between RSW input and GND HDB15 7 15 14 13 RSW1 RSW2 RSW3 120 Plus Figure 2 5 Connect Remote Switcher Inputs to an External Input Device The following table displays the pins and port functions of...

Page 15: ...upply It is recommended that fly back diodes or transient suppressors be fitted across relay coils to limit switching noise See Figure 2 6 HDB15 4 10 5 Power 12 24V DC Max 50V OUT1 OUT2 Input 1 Input 2 COM PLC Negative Supply 120 Plus Figure 2 6 Connect Setpoints Outputs to Drive PLC The voltage applied to the COM terminal appears on the output lines i e OUT1 and OUT2 when the outputs are active e...

Page 16: ...near room temperature Never expose batteries to temperatures below 10ºC 14ºF or above 45ºC 113ºF It is normal for batteries to gradually wear down and require longer charging times If you notice a change in your battery life it is probably time to purchase a new battery New batteries are shipped partially charged Some batteries perform best after several full charge discharge cycles The battery ma...

Page 17: ...imary and secondary units Multiplier and decimal point location Rate at which the display is refreshed Calibration Menu Used for calibrating the indicator Serial Menu Configures the parameters of the serial ports Program Menu Sets the power up mode shut down method back light keyboard lock and consecutive number values Print Format Menu Sets the print format used for print tickets Set Points Menu ...

Page 18: ...16OUT 32OUT 64OUT 128OUT NONE 2DD 5DD 10DD 20DD 100 DIGITAL FILTER STAGE 2 DIGITAL FILTER STAGE 3 DIGITAL FILTER SENSITIVITY DIGITAL FILTER THRESHOLD INITIAL ZERO RANGE OFF 8 20 50 32 64 128 32 64 128 10000 number OFF 0 5D 1D 3D 1 9 100 1D 2D 3D 5D 10D 20D 50D OFF FS 2 FS 1D FS 9D FS GRADUATIONS ZERO TRACKING BAND ZERO RANGE MOTION BAND OVERLOAD REGULATORY MODE NTEP OMIL CANADA NONE 100DD 200DD 50...

Page 19: ...ll exit a stable condition motion condition If motion is not detected for more than 1 second the stability annunciator lights The motion band value must satisfy local regulations Overload FS 2 FS 1D FS 9D FS FS full scale Defines the point of overload or underload The display indicates when the point of overload is reached The maximum or minimum legal value varies depending on legal regulations Di...

Page 20: ... OZ T KG LB RU0 W 3UL0 U 6 QGU G 3QW G63GLY 8QLW6 G 3QW G63GLY 8QLW6 G63U W LU 6 Figure 3 4 Format Menu Initial zero range OFF 8 20 50 100 Defines the range within which the scale will be zerod upon application of power Each range is a plus or minus value For example 8 means 8 around the calibrated zero point for a total range of 16 Regulatory mode NTEP OIML Canada None Specifies the regulatory ag...

Page 21: ...units used for the secondary units Decimal point 88888 8 888888 8 88888 88 8888 888 888 8888 88 Decimal Point Location defines the location of the decimal point The value set should be consistent with local legal requirements Display divisions 5D 1D 2D 10D 20D 50D 100D 200D 500D Display Divisions defines the minimum division size for the weight displayed by the secondary units Units KG kilogram G ...

Page 22: ...Enter while displaying WSPAN will perform the span calibration Ensure test weight is equal to the value entered in as the Weight Value are in place on the scale before pressing Enter Rezero None Removes an offset value from the zero and span calibrations Use this setting only after WZERO and WSPAN have been set Latitude 0 90 The latitude in degrees at the place of calibration Elevation 9999 to 999...

Page 23: ...ibration Figure 3 6 Calibration Process NOTE 1 Place test weights NOTE 2 Use arrow keys see Figure 3 2 on page 13 to set the maximum weight value NOTE 3 Optional use only when hooks or chains were used during calibration To recalibrate zero remove these and the test weights from the scale 3 3 3 EDP Command Calibration To calibrate the indicator using EDP commands the indicator EDP port must be con...

Page 24: ...NSMISSION PORT STREAM OFF 6 UL ELECTRONIC DATA PROCESSING G3 3ULQW LANGUAGE Q X GGU 6 R W UP ELW6 E 8G EDP PRN EDP 2SEC 8SEC 4SEC STMSTA W 0RQE W 6WP6W LQ6WU 6WPG 6WU P 3UQG 6 BAUD 1200 38400 4800 19200 9600 2400 BITS 8NONE 70DD 7EVEN 7SPACE TERMINATION CR CR LF W UP ELW6 E 8G 15SEC NONE ON OFF OFF Figure 3 7 Serial Menu Parameter Options Description Electronic Data Processing EDP Baud Bits Term E...

Page 25: ... the termination character for data sent from the printer port Language ENGLIS GERMAN Ticket language Selects the language for the printer tickets English German Gross Brutto Net Netto Tare Tara Height Groesse Print Destination EDP PRN Print destination Selects the port for data transmission when the PRINT key is pressed or the KPRINT EDP command is sent Stream OFF EDP PRN Selects the serial port ...

Page 26: ...ription Power Up Mode GO DELAY Power up mode In GO mode the indicator goes into operation immediately after a brief power up display test In DELAY mode the indicator performs the power up display test and enters a 60 second warm up period Delay mode is terminated either at the end of the warm up period or when the predefined temperature is reached If motion is not detected during the warm up perio...

Page 27: ...EC 2SEC 3SEC 5SEC 6SEC 8SEC 12SEC 14SEC 16SEC Timer for hold function to average raw data or time limited according to the HOLDMD setting See Section 1 8 9 on page 7 for details Hold Timer 2MIN 1MIN 3MIN 4MIN 5MIN 6MIN 8MIN 10MIN Defines how long to hold the weight on the display See Hold function section for details BMIJUD OFF ON BMI automatic judge function works only with the BMI key Key Lockou...

Page 28: ...t Format Menu The following table describes the various print format options Table 3 7 Print Format Options Parameter Options Description EDIT NONE Edits the print format INSERT NONE Inserts a new character initialized to 00 at the end of the value edited using the previous EDIT option This shifts all data after it to the right by one position After insertion the user can edit the value DELETE NON...

Page 29: ...N N CLOSE CONTACT 20 number WEIGHT VALUE TIMER HYSTERESIS DELAY NORMAL STABLE 0 2 5 10 OFF DISPLA NET GROSS NONE 250MS 4 0SEC 5 0SEC 500MS 3 0SEC 1 5SEC 750MS NONE 250MS 4 0SEC 5 0SEC 500MS 3 0SEC 1 5SEC 750MS REMOTE SWITCH OF OF OF UN TA ZO PR TA ZO ABSNET ABSNET OFF BUZZER OFF BUZZER ON ON CONDITION 6 W3W6 6 W3W LQG RQ7 W RQGLW Y WL0 U G K 6W U EX H5 6 W3W NLQ RQ7 W RQGLW Y WL0 U G K 6W U EX H5 ...

Page 30: ...nly after the weight exceeds the setpoint value AND has become stable STABLE Weight Value 10 or 20 0 999999 Sets weight thresholds for set point Output active if load over this weight load wval Timer NONE 250MS 500MS 750MS 1 5SEC 3 0SEC 4 0SEC 5 0SEC Disables output after a specified time Delay NONE 250MS 500MS 750MS 1 5SEC 3 0SEC 4 0SEC 5 0SEC Time delay before the output is enabled Hysteresis 0 ...

Page 31: ...hour HH Sets hour using 24 hour format Minute minute MM Sets minute Second second SS Sets second Remote Switch OF OF OF PR TA ZO UN TA ZO 3 2 1 Specifies the function activated by remote switch inputs 1 2 and 3 OF OF OF disable all remote switches PR TA ZO provides the same functions as the front panel keys Remote switch 1 be ZERO key Remote switch 2 be TARE key Remote switch 3 be Print Enter key ...

Page 32: ... SHOW Displays current date in YY MM DD DD MM YY or MM DD YY format YEAR year YY Set year two digits 00 99 MONTH month MM Set month MM DAY day DD day DD DATFRM DDMMYY MMDDYY YYMMDD Specifies the date format DDMMYY day month year MMDDYY month day year YYMMDD year month day 3 10 Version Menu The VERS menu is used to check the software version model name and serial number installed in the indicator T...

Page 33: ...D TEST Displays A D Test Press the ENTER key to display the raw count value from A D converter TEST LCD Press ENTER to light all the segments on the LCD display I O Display digital input Remote Switch and output Set Point status 0 0 0 0 0 OUT2 OUT1 RSW3 RSW2 RSW1 BATTERY VOLTAGE Display battery voltage in V BATTERY CURRENT Display battery charging current in A DEFAULT Default parameters Press the ...

Page 34: ...rrow once until the indicator displays READY Then press the ENTER key on the front panel This displays the value received from serial port on the front panel The format of the data displayed by the ECHO R command is shown as shown 0 1 N 4 E Received character order Blank Visible ASCII Char ASCII in HEX code Parameter Description Table 4 1 Test Mode Option Parameters ...

Page 35: ...vel above The pictorial representation of the panel menu is as follows 2 1 4 8 16 32 64 128 DIGITAL FILTER STAGE 1 2 1 4 8 16 2 1 4 8 16 2OUT 4OUT 8OUT 16OUT 32OUT 64OUT 128OUT DIGITAL FILTER STAGE 2 DIGITAL FILTER STAGE 3 DIGITAL FILTER SENSING 32 64 128 32 64 128 NONE 2DD 5DD 10DD 20DD DIGITAL FILTER THRESHOLD 100DD 200DD 250DD FILTER SERIAL PROGRAME PRINT FORMT SET POINTS See Section 3 4 See Se...

Page 36: ...more information PRINT FORMAT EDIT INSERT DELETE Enters the Print Format menu See Section 3 6 on page 24 for more information SET POINTS SETPT1 SETPT2 RSWDEF Enters the Set Point menu See Section 3 7 on page 25 for more information TEST Enters the Test mode See Section 4 0 on page 29 for more information TIME SHOW HOUR MINUTE SECOND Sets the time See Section 3 8 on page 27 for more information DAT...

Page 37: ... T A8 190 0 5 1 1 N N M B8 260 0 3 3 7 100 B G P1 First place a WWPF 0 in the first line to indicate that the following is a print format file Place printer parameters in the beginning of each line as required and then use double quotes to contain the text that you want to print on the ticket see table above Note in the above example N AxxxxN B and P1 are printer specific parameters for the Eltron...

Page 38: ...are assigned hex value 00 null To edit inserted characters return to the EDIT submenu and make changes as described in this section To edit a character To Delete One of More Characters 1 Move the cursor to the character to be deleted 2 Press the key to return to the EDIT submenu and then press the key twice to show the DELETE parameter 3 Press ENTER key to delete one character press repeatedly to ...

Page 39: ... ON Extend 1 format see below Figure 7 1 Continuous Output Format 7 2 Extended Format Extend 1 If CINSTR ON SPACE EXTEND 2 TIME SPACE DATE ASCII 02 decimal Time 8 digits hh mm ss hh 00 24 mm 00 59 ss 00 59 Date 10 digits yyyy mm dd if DATFRM YYMMDD dd mm yyyy if DATFRM DDMMYY mm dd yyyy if DATFRM MMDDYY yyyy 2000 2009 mm 01 12 ss 01 31 Extend 2 format see below ASCII 02 decimal Figure 7 2 Continuo...

Page 40: ...0 do the following grads 5000 Press Enter on the keyboard OK The indicator responds with OK OK means the setting was valid and the indicator was in a mode that allowed the setting to be made To retrieve parameter values send the parameter name For example To retrieve the GRADS graduations value do the following grads Press Enter on the keyboard 5000 The indicator responds with 5000 This means the ...

Page 41: ...sents the sum of the values for the standstill annunciator 128 net mode annunciator 32 and the lb units annunciator 1 BAT Battery voltage and charging current ADS A D converter memory map IO List status of digital input Remote Switch and output Set Point 0 0 0 0 0 OUT2 OUT1 RSW3 RSW2 RSW1 DEFAULT Reset default parameter values RS Software reset 8 1 2 Configuration Commands Table 8 2 Configuration ...

Page 42: ...W Set span coefficient value LAT CAL Latitude degrees at point of calibration 0 90 ELEV CAL Elevation meters at point of calibration 9999 9999 8 1 5 Serial Commands Table 8 5 Serial Commands Command Description Values EDP BAUD EDP port baud rate 1200 2400 4800 9600 19200 38400 EDP BITS EDP port data bits parity 8NONE 7EVEN 7ODD and 7SPACE EDP TERMIN EDP port termination character CR LF CR EDP ECHO...

Page 43: ... Print Format Commands Table 8 7 PFROMT Commands Command Description Values WWPF Print format strings in ASCII characters See Print Formats WPF Print format strings in ASCII hex code See Print Formats 8 1 8 Set Points Commands Command Description Values S1 KIND Kinds of Operation mode for set point 1 OFF GROSS NET DISPLA ABSNET S1 CONTACT Contact status below the set point 1 value N CLOSE N OPEN S...

Page 44: ...ONTACT Contact status below the set point 2 value N CLOSE N OPEN S2 CONDITI Output enabled only after the weight reading has stabilized NORMAL STABLE S2 WAVL Set weight thresholds for set point 2 Output 2 active if load over this weight load wval 0 999999 S2 HYSTER Set weight thresholds for set point 2 Output 2 deactive if load under this weight load wval x hysteresis 0 2 5 and 10 S2 TIMER The out...

Page 45: ...clear tare zero and clear tare positive no tare zero yes tare zero and clear tare NONE zero or negative no tare zero yes clear tare positive no tare yes clear tare Note ZERO if in Standstill ZERO if Weight is within ZRANGE No action if weight is outside of ZRANGE CLEAR TARE or ZERO force indicators into gross mode TARE force indicator into net mode 8 2 Conversion Factors and Continuous Output Form...

Page 46: ...02 66 Ctrl G BEL 07 07 39 27 G 71 47 g 103 67 Ctrl H BS 08 08 40 28 H 72 48 h 104 68 Ctrl I HT 09 09 41 29 I 73 49 i 105 69 Ctrl J LF 10 0A 42 2A J 74 4A j 106 6A Ctrl K VT 11 0B 43 2B K 75 4B k 107 6B Ctrl L FF 12 0C 44 2C L 76 4C l 108 6C Ctrl M CR 13 0D 45 2D M 77 4D m 109 6D Ctrl N SO 14 0E 46 2E N 78 4E n 110 6E Ctrl O SI 15 0F 47 2F O 79 4F o 111 6F Ctrl P DLE 16 10 0 48 30 P 80 50 p 112 70 ...

Page 47: ...140 8C 1 4 172 AC 204 CC 236 EC ì 141 8D 173 AD 205 CD 237 ED Ä 142 8E 174 AE 206 CE 238 EE Å 143 8F 175 AF 207 CF 239 EF É 144 90 176 B0 208 D0 240 F0 æ 145 91 177 B1 209 D1 241 F1 Æ 146 92 178 B2 210 D2 242 F2 ô 147 93 179 B3 211 D3 243 F3 ö 148 94 180 B4 212 D4 244 F4 ò 149 95 181 B5 213 D5 245 F5 û 150 96 182 B6 214 D6 246 F6 ù 151 97 183 B7 215 D7 247 F7 ÿ 152 98 184 B8 216 D8 248 F8 Ö 153 99...

Page 48: ...OW A D over negative range Check scale for binding or damage AD HI A D over positive range Check scale for binding or damage EE SUM Parameter or calibration check sum error Recalibration is needed contact Rice Lake Weighing Systems service WW WR EEPROM write error Contact Rice Lake Weighing Systems service PM SUM Internal program checksum error Contact Rice Lake Weighing systems service HOFSET Loa...

Page 49: ...he LATITD and ELEVTN parameters Gravity is greater at the poles than at the equator and decreases with increase in altitude The effect of gravity at any given location can be calculated using the following formula gCAL 9 80632 0 0258Cos 0 0349065850ØCAL 0 00003Cos 0 00698131701Ø 0 00000293hCAL EQ 1 gOpa 9 80632 0 0258Cos 0 0349065850ØOPA 0 00003Cos 0 00698131701Ø 0 00000293hOPA EQ 2 Where Ø degree...

Page 50: ...ps Printer Port Output only RS 232 or active 20mA current loop Transmission Rate 9600 4800 2400 1200 bps Environmental Operating Temperature 10ºC to 40ºC 14ºF to 104ºF Storage Temperature 25ºC to 70ºC 13ºF to 158ºF Relative Humidity 0 95 Display and Keyboard Display 6 digit 7 segment LCD 21 2 mm Status annunciators No motion Center of Zero Net units used lb kg g oz t Battery Set Points Hold HI OK ...

Page 51: ... by accident misuse neglect alteration improper installation improper repair or improper testing RLWS shall be the sole judge of all alleged non conformities Such equipment has not been modified altered or changed by any person other than RLWS or its duly authorized repair agents RLWS will have a reasonable time to repair or replace the defective equipment Buyer is responsible for shipping charges...

Page 52: ...48 120 Plus Digital Weight Indicator Technical Manual ...

Page 53: ......

Page 54: ... USA U S 800 472 6703 Canada Mexico 800 321 6703 International 715 234 9171 Europe 31 0 26 472 1319 www ricelake com www ricelake mx www ricelake eu www ricelake co in m ricelake com Rice Lake Weighing Systems 05 13 2015 PN 105914 Rev B ...

Reviews: