


RG B
C H A P T E R 1
I n t r o d u c t i o n
6
QuadView UHDx/UHDx KVM User Guide
350-12245-01 – updated December, 2019
1.3.3
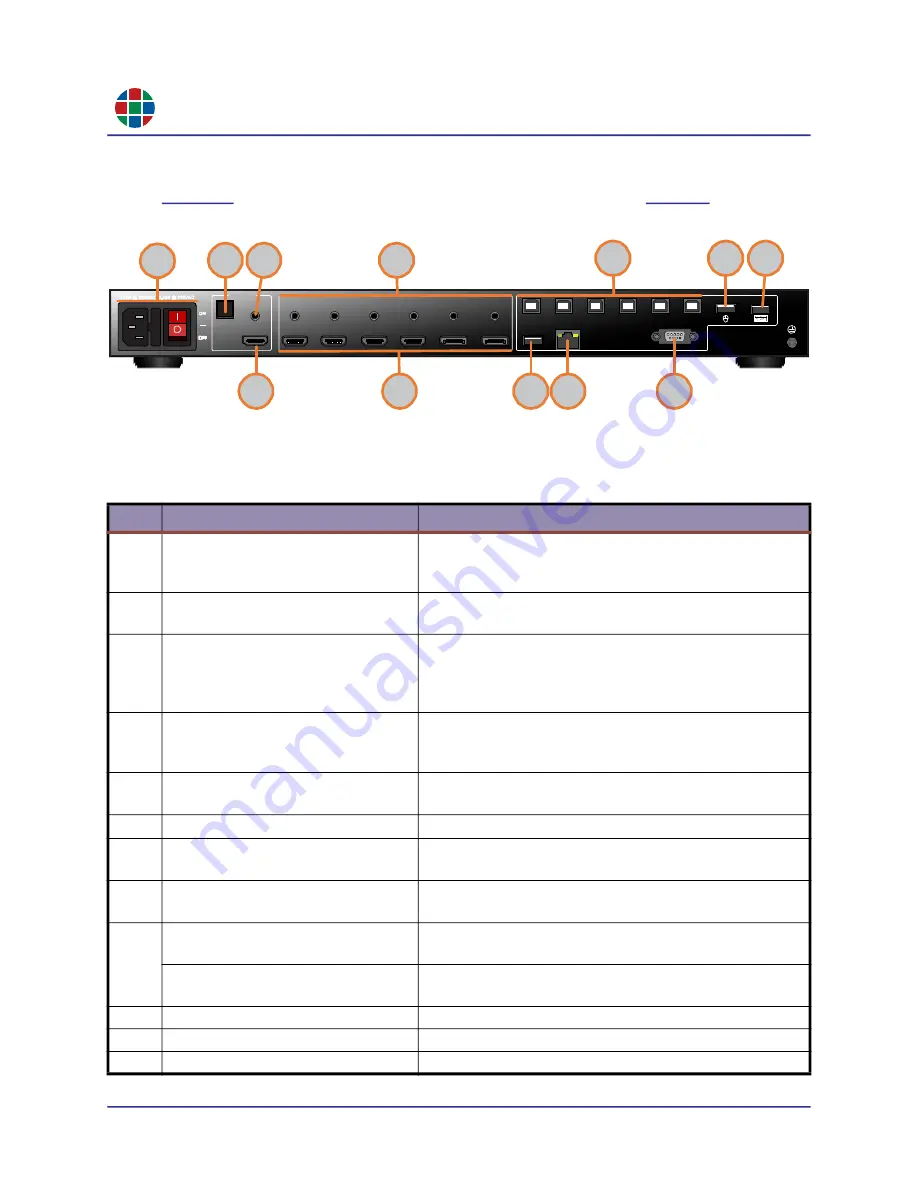
Rear Panel Controls and Indicators (KVM)
shows the QuadView UHDx KVM rear panel connectors, and
them.
Figure 1-3
Rear Panel Connectors (KVM)
Table 1-3
QuadView UHDx KVM Rear Panel Controls and Indicators
ID
Name
Description
1
Power Switch and AC Power
Receptacle.
Turn the power on or off using this switch. Connect the
included AC power cord to this receptacle, and then
connect the plug to an available electrical outlet.
2
Optical output.
Connect this port to the digital audio input port of your A/V
receiver or other audio processing equipment.
3
Analog audio output.
Stereo analog audio output. Use cables with 3.5-mm mini-
stereo plugs at one end to connect these jacks to an
audio/video (A/V) receiver or other audio processing
equipment.
4
Analog audio inputs 1~6.
Stereo, analog audio inputs. Use cables with 3.5-mm
mini-stereo plugs at one end to connect these jacks to
audio sources.
5
PROG.
Standard USB Type A port for updating QuadView UHDx
firmware.
6
LAN.
Connect this port to a network to use IP control.
7
RS232.
Connect an RS-232 cable from this port to an RS-232
device.
8
HDMI output/
Connect an HDMI cable from this port to a High-Definition
(HD) or UHD display.
9
HDMI input 1-4.
Connect up to four (4) HD or 4K/UHD sources to these
inputs using HDMI cables.
DisplayPort input 5-6.
Connect up to two (2) HD or 4K/UHD sources to these
inputs using DisplayPort cables.
10
KVM outputs
Connect computers to these ports for KVM control.
11
Mouse input
Connect the mouse to use for KVM control here.
12
Keyboard input
Connect the keyboard to use for KVM control here.
OUTPUTS
L/R
HDMI
OPTICAL
INPUTS
1
2
3
4
5
6
HDMI 1
HDMI 2
HDMI 3
HDMI 4
DI SP L
AY PORT 5
DI SP LAY PORT 6
PROG
LAN
RS232
1
2
3
4
5
6
2
1
5
6
7
3
4
8
9
10
11
12


