Green House Manual
Page | 9
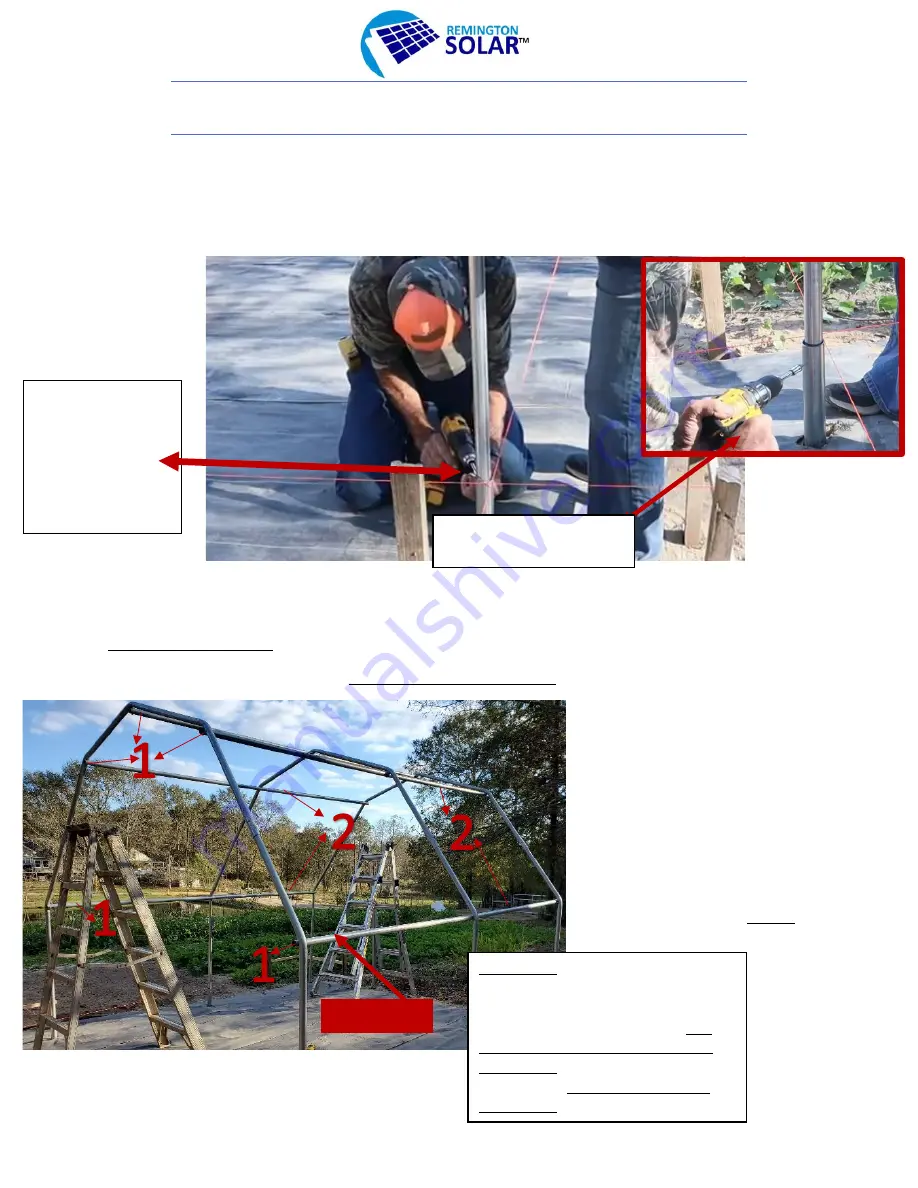
Here is where the
top of the ground
pipe and the 6-inch
mark you made at
the bottom of your
bow meet.
3.
Secure the bow to the ground pipe
with a 3/8” self
-tapping screw matching the top of the
ground pipe with the mark you made at the bottom of your bow. Meaning the bow will only go
as deep into the ground pipe as that 6-inch mark you made as shown below.
You will repeat this for all 3 assembled bows until your frame is secure and complete.
Assembling your purlins
1.
Locate your purlin bundles.
Make sure not to mix them up
they come in matched sets and must
go together. Assemble one purlin
by fitting the numbered pieces
together. They are numbered 1
and 2.
2.
Make sure to start with the
base purlins as shown below to
adjust your clamps where they
need to be
.
3.
Before securing your base
purlins, drag all the clamps below
the sleeves on each bow
ABOVE
the arch.
Close up from the
INSIDE
of the greenhouse
IMPORTANT
: Since all the purlins have a
number 1 & 2 on them,
put the side of
the purlin set with the #1 on it, towards
the front of the green house and face
the number towards the inside of the
greenhouse.
The #2 should be on the
back end also facing the inside of the
greenhouse.
Base Purlins


