INSTRUCTION
i
Read this instruction before installation
and wiring of the product
RVA25-24A
Valve actuator for 0(2)...10 V control
RVA25-24A is a valve actuator for control of GTRS125-215 and
GTRS150-310, as well as GTVS125-215 and GTVS150-310. The
actuator has automatic self stroke adjustment and can be operated
manually.
Technical data
Supply voltage
24 V AC ±15%, 50/60 Hz
Control signal
0(2)...10 V DC
Power consumption
Max. 12 W
Stroke
10...52 mm (40 mm fixed stroke)
Stroke time
3 s/mm
Force
2500 N
Ambient temperature
0...50°C
Storage temperature
-40...80°C
Ambient humidity
10...90% RH
Dimensions (WxHxD)
200 x 300 x 135 mm
Protection class
IP54
Installation
If the valve stem adaptor and valve throat adaptor are not already
mounted on the valve, mount them. Pull the valve stem out as far as pos-
sible.
Remove the locking bolt (U-bolt) from the actuator yoke. Insert the valve
stem into the yoke and make sure that the stem adaptor engages the hole
in the angled iron of the actuator drive spindle.
The groove in the valve throat adaptor must be made to line up with the
U-bolt mounting holes on the actuator. If the spindle needs moving in or
out for this to happen, depress the central part of the manual button and
turn it clockwise for the actuator spindle to extend, and anti-clockwise for it
to retract (see Manual override). When the valve is in the correct position,
insert the U-bolt. Tighten the bolt nuts until the valve is firmly gripped.
Disassembly in reverse order.
Mounting positions
85º
85º
Wiring
24 V AC
1
2
3
4
5
1
2
3
4
5
6
Y
U
B
M
O
ve
rr
id
e
in
pu
t
Y 0(2)...10 V DC
Control signal from
controller
U 0...10 V DC
Measuring voltage
for position indication
7
8
9
Automatic stroke and endpoint calibration
On each power-up and after manual manoeuvring, automatic stroke and
endpoint calibration will take place. If the unit has been configured for
fixed stroke (DIP-switch 2 in position Off) the actuator will first go to the
fully closed end position. The position will be stored in memory and the
stroke will be calculated from this point.
If the unit has been configured for free stroke (DIP-switch 2 in posi
-
tion On) the actuator will first go to both endpoints of the stroke. The
points will be stored in memory and the control will be calibrated so
that the full stroke will be covered by the set input signal.
Override
Activation of the override input will force the actuator spindle to go to
its lowest position or its highest position, depending on the setting of
DIP-switch SW1. SW1 also affects the direction of movement.
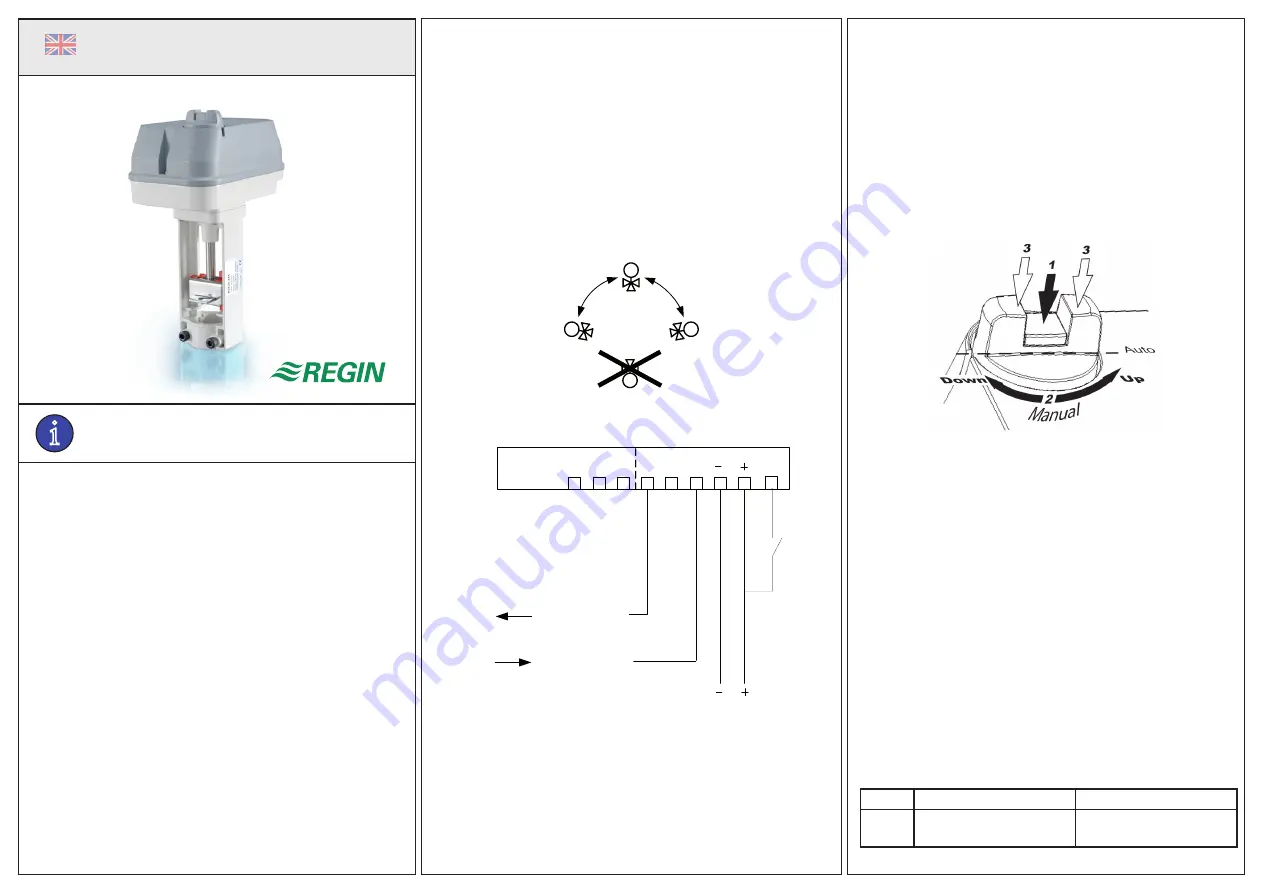
Manual override
To manually set the valve position, first depress the central part of
the button until it clicks and remains depressed (1 in the figure). This
disengages the gears and also cuts the power to the motor. Then the
valve position can be changed manually by turning the button (2 in
the figure). Clockwise rotation will extend the drive rod and anti-clock
-
wise will retract it.
To reconnect power, set the button so the flats are in line with the
cutout in the edge of the cover, Auto position. Then press on the outer
parts of the button (3 in the figure). The central depressed part will
pop out re-engaging the gears and reconnecting the power.
Note: After any manual operation the actuator will always run through
a full stroke and endpoint calibration.
DIP-switches
There are seven DIP-switches for setting different functions. Follow
the table below for setting the DIP-switches.
Changes of the setting for SW2 will take effect immediately. Changes
of the other positions will be ignored during operation. New settings
will be valid only after the next power-on.
1 (On)
0 (Off)
SW1
Spindle up on closed
contact
Spindle down on closed
contact (FS=factory setting)
RVA25-24A
6971G
DEC 09
EN
1


