


30
|
Regency Plateau
®
PTO30-11 Outdoor Gas Fireplace
|
30
installation
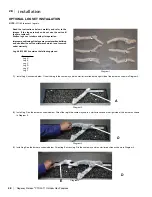
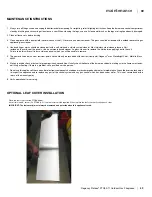
OPTIONAL GLASS SURROUND INSTALLATION
1
OUTDOOR SERIES
919-037
01/13/21
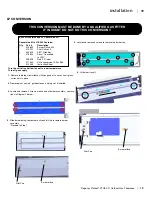
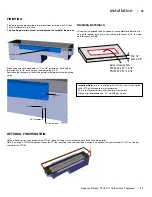
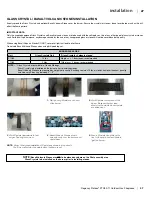
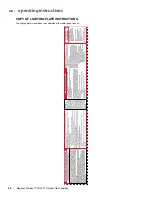
OPTIONAL GLASS SURROUND/WINDSHIELD INSTALLATION
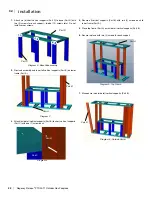
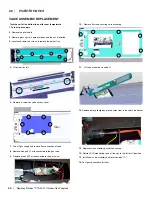
1.
Remove metal fasteners from the corner brackets.
2.
Assemble the 4 pieces of the glass surround/windshield and fasten
together with 4 corner top brackets and supplied nylon fasteners as
shown below.
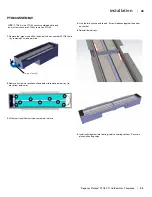
3.
Using a flat screwdriver, secure 4 top corner brackets with nylon fasteners in
each corner, bracket should be flush with the top of glass as shown below.
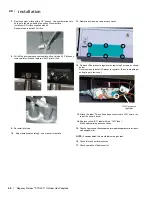
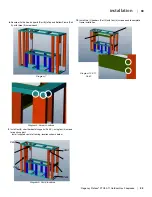
5.
Secure bottom corner brackets with nylon fasteners in each corner.
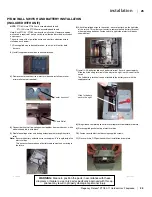
6.
Flip the glass back over and place on a soft surface. The glass is now right
side up. The glass should be raised up 1/2" in bracket as shown below.
4b.
Use supplied spacer tool to determine where the bottom bracket
should be placed and secured.
4a.
After the 4 top brackets are installed - flip over and place on a soft surface,
to install the 4 bottom brackets.
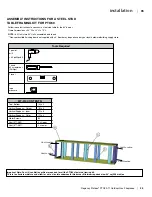
7.
Place assembled glass surround/windshield on table top - ensure glass is
centered on the table top. Once in correct position, lift up one end, apply
double sided tape that has been cut to size, to the bottom of the brackets.
Repeat process on other end. Press down firmly from to secure glass sur-
round/windshield in position. Use care not to scratch surfaces.
1/2"
Insert nylon fastener
here.
Spacer Tool
Bottom Bracket
Top Bracket
Nylon Fasteners
Nylon Fasteners
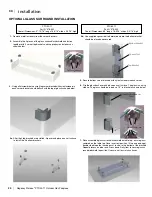
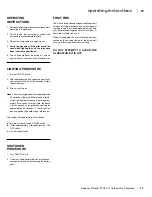
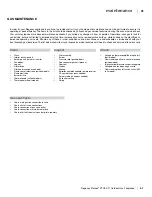
PTO 30-11
Part N
o
378-932
Overall Dimensions: 37-15/16" long x 16-5/16" wide x 5-5/16" high
4 Piece Glass Surround
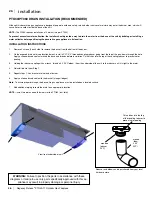
PTO60-11
Part N
o
378-955
Overall Dimensions: 68" long x 16-5/16" wide x 5-5/16" high
Summary of Contents for Plateau PTO30
Page 45: ...Regency Plateau PTO30 11 Outdoor Gas Fireplacee 45 45 notes ...
Page 50: ......
Page 51: ......