RED DSMC OPERATION GUIDE
COPYRIGHT © 2014 RED.COM, INC
955-0020_V5.1, REV-H
|
113
POWER DOWN
USING CAMERA
When REDMOTE is connected to the camera and the camera is powered down, the REDMOTE will also power
down. When disconnected from the camera, the REDMOTE will not power down with the camera.
USING REDMOTE
To power down REDMOTE, slide and hold the Power/Key Lock Switch in the down direction for 5 seconds.
Or slide and hold the Power/Key Lock Switch in the down direction momentarily, then release. A screen will
display with options to power down the REDMOTE, the Camera, or REDMOTE and Camera together. Select the
desired option and press the ENTER key in the REDMOTE Navigation Group.
NOTE:
Wireless mode shown. When docked to camera, SHUTDOWN CAMERA is not displayed.
RECORDING
To record, press the red REC (record) button. If media is connected and properly formatted, the upper LED
will illuminate red and the Timecode value displayed in the LCD will change to red text.
To stop recording, press the REC button a second time. After recording to media is completed, the upper LED
will go out and the Timecode value displayed in the LCD will change back to white text.
NOTE:
If media is NOT connected when record is requested, the REDMOTE LCD and camera VIEWFINDER
(MENUS) output will indicate “NO MEDIA ATTACHED”.
ACCESSING CAMERA CONTROLS/SETTINGS
The Navigation Group is used to navigate through camera menus. The camera settings and status are displayed
on the REDMOTE LCD.
CHANGING CAMERA SETTINGS
USING CAMERA LCD/EXTERNAL MONITOR AS REFERENCE
To adjust a parameter value displayed on the camera’s Upper Status Group, first note the red colored bar (lo-
cated under 24 FPS in this example), indicating the currently active parameter for instant adjustment.
Use the NAVIGATION GROUP directional pad to move the cursor to a different parameter if desired, then press
the ENTER key to select that parameter and use the Scroll Wheel to adjust that parameter’s value. To confirm
the change in parameter value and to exit the adjustment menu, press the ENTER button.
To access the camera’s menus, press the MENU button at the lower left. The MENU displays on the EVF, LCD
or external monitors if the LCD and/or EVF are not connected disconnected.
Use the NAV GROUP to make changes to the cameras settings. Use the scroll wheel and directional pad to
move the cursor to navigate and make changes to the desired settings. When a desired setting change is made,
press the ENTER button or the directional pad UP arrow to exit from that setting.
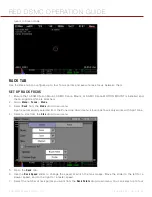
USING REDMOTE LCD STAND-ALONE
The LOCAL function of the REDMOTE allows you to adjust the camera settings from the REDMOTE while ob-
serving the parameters directly on the REDMOTE LCD as opposed to on the camera LCD or an external monitor.
Summary of Contents for SCARLET-X
Page 1: ...EPIC SCARLET V5 1 DRAGON MYSTERIUM X RED COM RED DSMC O PERAT ION GU IDE ...
Page 154: ...COPYRIGHT 2014 RED COM INC RED DSMC OPERATION GUIDE 955 0020_V5 1 REV H 154 SIDE VIEW ...
Page 155: ...RED DSMC OPERATION GUIDE COPYRIGHT 2014 RED COM INC 955 0020_V5 1 REV H 155 TOP VIEW ...
Page 156: ...COPYRIGHT 2014 RED COM INC RED DSMC OPERATION GUIDE 955 0020_V5 1 REV H 156 BOTTOM VIEW ...
Page 157: ...RED DSMC OPERATION GUIDE COPYRIGHT 2014 RED COM INC 955 0020_V5 1 REV H 157 BACK VIEW ...

