11
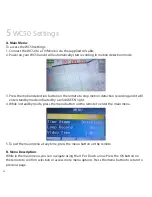
1. Resolution - Here you can change between the four resolution options: 480p, 720P30, 720P60 or
1080P.
2. Time Stamp - Here you can choose between having the time/date stamp, just the date stamp, or
neither display.
3. Loop Record - If Loop record is turned on, your WC50 will record over the oldest files when the
memory capacity is reached so that you never have to change the memory card. If Loop is turned
off, your WC50 will stop recording when the memory capacity is reached.
4. Video Time - There are 3 options for the video time which include 1 min, 3 min, and 5 min. The
time selected determines the length of segment the video will be broken into to reduce file size.
5. Audio Record - This option allows you to control audio recording in the videos. If you want sound
to be recorded on the video, select On. If you don’t want sound to be recorded, select Off.
6. EV (exposure Value) - There are 13 exposure values available ranging from -2.0 to +2.0.
7. Motion Detection - There are 3 sensitivity options available which include High, Medium, and
Low. This will not effect the PIR mode.
8. Setup - Here you’ll find more settings available to help you further personalize your WC50.
a. Format: Here you can format the micro SD card inserted in your WC50. To format the
SD card select execute. If you do not want to format the memory card select ‘cancel’.
b. Language: Here you can select your preferred language.
c. TV output: There are 2 options which include NTSC and PAL.
d. Light Freq. (light frequency): There are 2 options which include 50Hz and 60Hz.
e. Date Format: You can choose between 3 date formats available.
f. Date Input: Use this option to change the date on your WC50.
g. Time Input: Use this option to change the time on your WC50.
h. System Reset: This resets your WC50 to its factory setting. To reset your WC50, select
‘execute’. If you do not want to reset your WC50, select ‘cancel’.
i. FW Upgrade: This option isn’t available at this time.
j. FW version: The submenu contains the version of your firmware.


