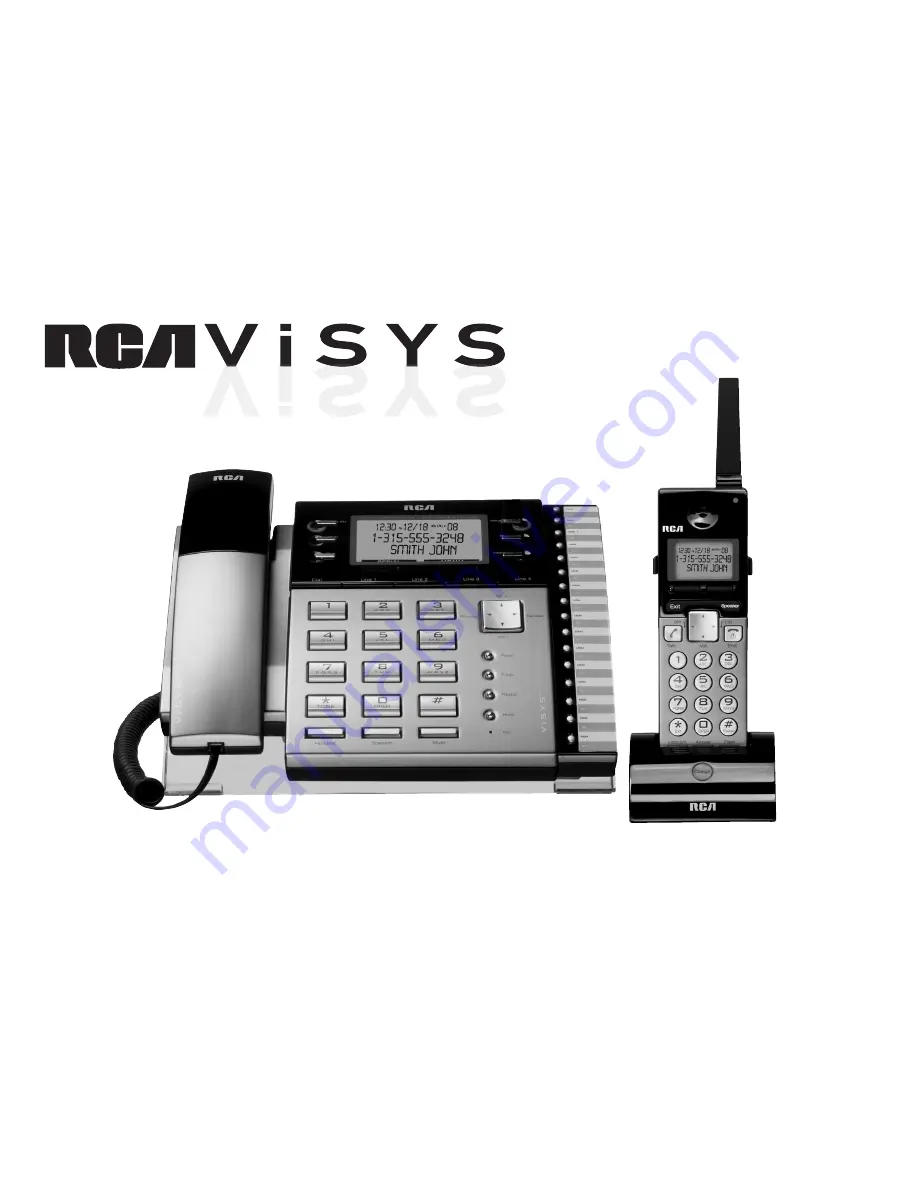
4 Line
Multi-Handset Office System
User’s Guide
Please read this manual before
operating this product for the first time.
Model 25450
TM
Page 1: ...4 Line Multi Handset Office System User s Guide Please read this manual before operating this product for the first time Model 25450 TM ...
Page 2: ...s and therefore you may not be able to use your own telephone equipment if you are on a party line Check with your local telephone company Notice must be given to the telephone company upon permanent disconnection of your telephone from your line If your home has specially wired alarm equipment connected to the telephone line ensure the installation of this product does not disable your alarm equi...
Page 3: ...f and on the user is encouraged to try to correct the interference by one or more of the following measures Reorient or relocate the receiving antenna that is the antenna for radio or television that is receiving the interference Reorient or relocate and increase the separation between the telecommunications equipment and receiving antenna Connect the telecommunications equipment into an outlet on...
Page 4: ... SIgN ALERTINg YOU OF IMPORTANT INSTRUCTIONS ACCOMPANYINg ThE PRODUCT CAUTION Important Information FCC RF Radiation Exposure Statement This equipment complies with FCC RF radiation exposure limits set forth for an uncontrolled environment This equipment should be installed and operated with a minimum distance of 20 centimeters between the radiator and your body This transmitter must not be co loc...
Page 5: ...ady to go out of the box This user guide will cover the basics to get you started explain the advanced features of the telephone and show you how to tailor the RCA 25450 to your specific needs To get the most from your new phone we suggest that you take a few minutes right now to read through this user s guide NOTE The ringer timing in this system may ring in a different sequence than other types ...
Page 6: ... 16 Installing the Charging Cradle and AC Adaptor 16 Installing the Cordless Handset Battery 16 Installing the Charging Cradle Wall Mount 17 Registering the Cordless Handset 17 Base Unit Layout 18 Base Unit Features 19 LCD Display 19 Navigation Button 19 Soft Buttons 19 MENU System 19 Redial Button 20 Line Buttons 20 Line Dedicate 20 Pre Dialing 20 Speaker Button 21 Headset Button 21 Mute Button 2...
Page 7: ... Call Forwarding Cordless Handset 41 Transferring a Call to Another Extension 42 Intercom Calls 45 Making an Intercom Call 45 Receiving an Intercom Call 46 End an Intercom Call 47 Ignore and Override an Incoming Line or Intercom Call 47 Paging Base Unit 49 Voice Mail VM 50 Configure Voice Mail Base Unit 50 Reset Extension Password Base Unit 51 Clear all VM box messages Base Unit 52 Voice Mail Box ...
Page 8: ... Time Base Unit 104 Do Not Disturb DND Base Unit 105 Auto or Manual Line Selection Settings Cordless Handset 106 Reset System Base Unit 108 Headset and Belt Clip Operation 109 Replacing the Batteries 110 Cordless Handset Battery 110 Handset Memory Retention 110 Base Unit Battery 111 Battery Safety Precautions 111 Other Information 112 Display Messages 112 Sound Signals 113 Troubleshooting Tips 113...
Page 9: ...before battery installation or replacement INSTALLATION NOTE Some cordless telephones operate at frequencies that may cause or receive interference with TVs microwave ovens and VCRs To minimize or prevent such interference the base of the cordless telephone should not be placed near or on top of a TV microwave ovens or VCR If such interference continues move the cordless telephone farther away fro...
Page 10: ...er two RJ14 two line or four RJ11 one line modular jacks in order to supply this unit with 4 phone lines The modular jacks which may look like the one shown here If you don t have a modular jack call your local phone company to find out how to get one installed Modular telephone line jack 10 ...
Page 11: ...Connections and Setup Parts Checklist Base Unit Make sure your package includes the following items Base Battery Compartment Cover Handset Cord Handset Battery Pack Line Cords 4 Charger AC Adapter 11 ...
Page 12: ...ts Checklist Cordless Handset Make sure your package includes the following items REDIAL MENU Cordless Handset Belt Clip Base Charging Cradle Charging Cradle Bracket Battery Pack Battery Compartment Cover Charger AC Adapter 12 ...
Page 13: ...parately 2 Plug in the battery pack as shown 3 Snap the battery compartment cover in place 4 Charge the backup battery for 10 hours before the first use NOTE If the low battery icon appears in the display when electrical power is on replace the rechargeable batteries It is important to replace them as soon as possible to maintain unit operation when electrical power is off As a precaution you may ...
Page 14: ...e using for line 1 2 Plug one end of a telephone line cord into the jack on the base labeled as L2 and the other end into the wall jack you are using for line 2 3 Plug one end of a telephone line cord into the jack on the base labeled as L4 L3 and the other end into the wall jack you are using for line 3 4 Plug one end of a telephone line cord into the jack on the base labeled as L4 Data and the o...
Page 15: ...Connections and Setup Two 2 line Jacks Using 4 Wire Line Cords Supplied Four 1 line Jacks L4 Data L4 L3 L2 L2 L1 Line 1 Line 2 Line 3 Line 4 L4 Data Line 4 L4 L3 Line 3 L2 Line 2 L2 L1 Line 1 15 ...
Page 16: ...ttery NOTE It is important to maintain the polarity black and red wires to the jack inside the compartment To ensure proper battery installation the connector is keyed and can be inserted only one way 3 Close the battery compartment by pushing the back cover up until it snaps into place 4 Place the handset in the charging cradle Charge the battery for 12 hours before the first use NOTE Allow the h...
Page 17: ...on the bottom of the charging cradle 7 Insert the front tabs of the bracket in the square holes of the charging cradle Swing the cradle down to snap it in place Make sure the AC adapter cord is not pinched between the cradle and the mount 8 Mount the assembly to the wall 9 Plug the AC Adapter into a power outlet 10 Insert the cordless handset into the cradle Charge the battery for 12 hours before ...
Page 18: ...ne Buttons Dial Buttons Mute Voice Mail Lines Voice Mail Store Intercom Memory Buttons Auto Attendant DND Exit Auto Att Lines Soft Button Soft Button Page Flash Redial Hold Microphone Keypad Navigation Button Volume Directory DIR Caller ID LCD Display 18 ...
Page 19: ...g a call Press 3 and 4 to move the cursor on the Display during number and name editing and to access Caller ID or Directory functions during Standby Mode Soft Buttons The function of each Soft Button changes according to what is shown in the Display above it Press to perform the function shown above the soft button MENU System Adjust Settings and Registration Use the Menu system by pressing the s...
Page 20: ...slowly Cordless Handset is holding a call flashing red slowly Base Unit in use constant green Cordless Handset in use constant red Line Dedicate The line dedicate function allows an extension Base Unit or Cordless Handset to be dedicated to a line Dial Button Pressing the Dial button accesses an available telephone line and dials the number on the display This allows users to pre dial a number or ...
Page 21: ...ne hangs up or you press the Headset button again Mute Button Allows you to temporarily turn off the microphone on the Handset Receiver Head set or Speakerphone during a call so the person on the line cannot hear you Page Button Pages all Cordless Handsets Each Cordless Handset can be paged individually using a Memory Button Flash Button Sends a signal to a phone line to retrieve a dial tone after...
Page 22: ...to an extension Cordless Handset or Group ID Reset Button Located on the back of the Base Unit this button is indented to prevent accidental reset Press to reset the Base Unit to factory settings All Voice Mail Auto Attendant Caller ID and Directory records will be erased All Cordless Handsets will need to be re registered if the Base Unit is reset Auto Attendant Button Auto Attendant is an automa...
Page 23: ... the Base Unit or a Cordless Handset to add a third person to a call The call must include at least one outside line Second Incoming Call Alerts you of a new call from a different line by a tone when you are on the phone Allows you to toggle between calls Caller ID Contact your local phone company to subscribe to this feature The phone system receives and displays Caller ID information transmitted...
Page 24: ...ID time and date or can show the following status icons from left to right RSSI Receive Signal Strength Indicator During a call the number of bars is proportional to the radio signal strength received Line Indicators Indicate the line number s being accessed or held Handset ID Displays a 2 digit Handset ID Battery Strength Indicator Number of bars is proportional to the amount of battery time rema...
Page 25: ...ayout Speaker Voice Mail Microphone Speakerphone Intercom Keypad Exit Soft Button LCD display Cordless Handset Receiver Soft Button Voice Mail Indicator Antenna Flash Navigation Button Volume Directory Caller ID Talk End Power 25 ...
Page 26: ...Contacts Cordless Handset Charging Cradle Features 26 ...
Page 27: ...ngs and to register Cordless Handsets Redial Soft Button Allows you to dial the last ten 10 numbers called You can use the Navigation Button 5 or 6 arrows to scroll through the last 10 numbers Pre Dialing Allows you to enter a phone number before accessing a telephone line by pressing the Talk or Speaker button Navigation Button Press 5 or 6 to scroll through records and menu selections on the Dis...
Page 28: ...ug Mute Available through the soft button During a call allows you to temporar ily turn off the microphone on the Cordless Handset headset or speakerphone so the person on the line cannot hear you Flash Button Press to send a signal to a phone line to retrieve a dial tone after you end a call or to perform the call waiting feature provided by local phone companies during a call Hold Available thro...
Page 29: ... Group ID Call Forwarding Allows you to forward future incoming calls from your extension to an external phone number Call Transferring Allows you to move a call from one extension to another Conference Calling The conference call function allows a caller from the Base Unit or a Cordless Handset to add a third person to a call The call must include at least one outside line Second Incoming Call Al...
Page 30: ...ear the tone or can answer the call Extension Groups This feature allows several Cordless Handset users to be called or paged at the same time as one group The first Handset user to answer receives the call There are four group ID numbers 91 94 available for Cordless Handset users NOTE The Base Unit always belongs to all groups For example if several Cordless Handset users in a sales department de...
Page 31: ...on dial function allows the user to make a call without choos ing a phone line An available line is automatically selected 1 Press the Dial Speaker or Headset button when a Headset is plugged in or pick up the Handset off hook NOTE To cancel dialing at any time press the Speaker or Headset button again or return the handset to the cradle 2 If all usable phone lines are not available the display wi...
Page 32: ...he dialing prefix if it is enabled via phone setting menu To use the Handset lift it from the cradle If the Handset is in the cradle the speakerphone will be turned on 4 Press the Redial button to redial the last number called or enter the phone num ber using the keypad 0 9 Pre Dialing Base Unit The pre dial function allows you to enter the number before accessing a phone line 1 To pre dial a numb...
Page 33: ...to Standby Mode in 5 seconds 2 Press 5 or 6 on the Navigation button to scroll through the last 10 numbers dialed 3 Press the Dial Speaker or Headset when a headset is plugged in button or pick up the handset off hook to make an auto line selection dial or press Line 1 4 to make a manual line selection dial The phone number shown will be sent 4 Before the auto or manual line selection dial is made...
Page 34: ...number with out first choosing a line An available line is automatically selected 1 Press the Talk or Speaker button NOTE To cancel dialing at any time press the End button 2 The display will show Press REDIAL or dial number or the dialing prefix if it is enabled via the phone setting menu 3 Press the soft button to redial the last number called or enter the phone number using the keypad 0 9 4 If ...
Page 35: ...ection If all usable phone lines are not available it will show No line is available If there are usable phone lines avail able but system resources are busy the display will show System busy 3 Otherwise the display will show phone lines that are available at the time Use the keypad 1 4 to select a line 4 If the phone line selected is unavailable it will show Line 1 4 is in use 5 Otherwise it will...
Page 36: ...4 If the dialing prefix function is enabled via phone setting menu the dialing prefix will be inserted before the phone number entered 5 Before the auto or manual line selection dial is made an incoming call takes priority and will cancel the pre dialing Redial Cordless Handset The redial function allows the user to dial a number from the last 10 numbers dialed 1 To redial a phone number press the...
Page 37: ...on for detailed operation Receiving a Call Base Unit 1 The Base Unit will ring when there is an incoming call for it The corresponding Line 1 4 button will flash fast green 2 The display will show Incoming call from line 1 4 then Caller ID information when available Private or Unknown may show on the display if the caller s information has been blocked by the caller or the originating phone compan...
Page 38: ... ignore the call NOTE The soft button applies only to the current call 3 To switch between handset and speakerphone press the Speaker button to switch to speakerphone press the Talk button to switch to handset 4 To end the call press the End button Call Waiting To use this feature you must subscribe to a Caller ID with a Call Waiting Service When you are on the phone and you are receiving another ...
Page 39: ...ll 3 To switch to headset call press the Headset button then put the handset back on the cradle if it was handset call NOTE A headset must be plugged in otherwise error tone will be heard Cordless Handset 1 To switch to receiver call from headset call unplug the headset 2 To switch to headset call from receiver call plug in the headset 3 To switch to receiver or headset call from speakerphone call...
Page 40: ... To resume the call press the corresponding Line 1 4 button Cordless Handset 1 To put a call on hold press the soft button 2 Press 5 or 6 on the Navigation button to scroll to the Hold option 3 Press the soft button The display will show the call on hold and the corresponding Line 1 4 button on Base Unit will flash slow red 4 To take a call off hold press the corresponding soft button 5 Press 5 or...
Page 41: ...e setting Intercom calls are not forwarded A warning message will appear on the Cordless Handset display that all calls are being forwarded Setting a new call forwarding phone number will automatically replace the previous number NOTE Each Cordless Handset that has Call Forwarding enabled will use 2 phone lines one for the incoming call and one for when the call is forwarded NOTE The Cordless Hand...
Page 42: ...on to locate the Phone setting option 3 Press the soft button 4 Press 5 or 6 on the Navigation button to locate the Call forward option 5 Press the soft button 6 Press 5 or 6 on the Navigation button to locate the Disable default option 7 Press the soft button Transferring a Call to Another Extension The Call Transfer function allows the user to move a call from one extension to another There are ...
Page 43: ...lete the announced call transfer Cordless Handset 1 To make an announced call transfer from the Cordless Handset press the soft button 2 Press 5 or 6 on the Navigation button to locate the Xfer option 3 Press the soft button NOTE To cancel call transfer at any time press the soft button 4 Enter a valid two digit extension or extension group using the keypad 0 9 The Cordless Handset will page the s...
Page 44: ...nter a valid two digit extension or extension group using the keypad 0 9 or press a Memory 1 16 button for one touch paging The Base Unit will page the selected extension s 3 End the call to complete the unannounced call transfer Cordless Handset 1 To make an unannounced call transfer press the soft button 2 Press 5 or 6 on the Navigation button to locate the Xfer option 3 Press the soft button NO...
Page 45: ...to an Extension Group or all extensions the first extension to answer will be connected Intercom paging will time out after 30 seconds if there is no answer and the display will show Paging timeout for a few seconds Base Unit 1 Press one of the sixteen one touch Memory 1 16 buttons for Cordless Hand set 01 16 or 2 Press the Intercom button followed by a two digit Cordless Handset ID 01 16 or an Ex...
Page 46: ... the Base Unit only the first call s information will be shown 2 Press the soft button or the DND button to turn the ringer off NOTE The soft button only turns off the ringer for the current call The DND button turns off the ringer for the current and all following calls Press the DND button again to turn on the ringer 3 Press the Speaker or Headset when a headset is plugged in button or pick up t...
Page 47: ...d button or place the Cordless Handset in charging cradle Ignore and Override an Incoming Line or Intercom Call Base Unit Making an Outbound Line Call During an incoming or intercom call ring the user can ignore the call and make an outbound telephone call 1 Press the soft button 2 Press 5 or 6 on the Navigation button to scroll through the options until Line call appears on the display 3 Press th...
Page 48: ...ge a specific extension or press the Page button to page all extensions 5 If the page is answered this becomes an intercom call Cordless Handset Making an Outbound Line Call During an incoming or intercom call ring the user can ignore the call and make an outbound telephone call 1 Press the soft button 2 Press 5 or 6 on the Navigation button to scroll through the options until Line call appears on...
Page 49: ...rcom call Paging Base Unit The Page button on the Base Unit is a one touch button to intercom page all cord less handsets 1 Press the Page button The display shows Paging All if the Base Unit is not busy Otherwise the display shows System busy 2 The Cordless Handsets will display Incoming page from Ext 00 3 The Base Unit will connect to the first Cordless Handset to answer Press the Talk or Speake...
Page 50: ... the options until Configure VM appears on the display 3 Press the soft button 4 Press 5 or 6 on the Navigation button to scroll through the options to select which line to configure for voice mail Auto attendant must be turned off to change the configuration The display will show VM can only be configured when AA is off if auto attendant is on 5 Press the soft button 6 The display will show wheth...
Page 51: ...ars on the display 3 Press the soft button 4 Enter the four digit administrator password NOTE The default administrator password is 7221 Use this password when resetting the extension passwords or erasing all voice mail If the administrator password was changed and the new number is not known there is no way to recover it without resetting the system The administrator password will default to 7221...
Page 52: ...Voice Mail Box Management Options Base Unit VM box management allows users to change their extension password and customize their mailbox greeting Change Extension Password Base Unit 1 Press the Voice Mail button 2 Press 5 or 6 on the Navigation button to scroll through the options until Access VM appears on the display 3 Press the soft button 4 Voice mail can only be accessed by 2 users at a time...
Page 53: ...ft button 11 Enter new password using keypad 1 9 12 Re enter password to verify 13 If the passwords match a confirmation tone will sound The password is now changed and the system will return to the VM box option screen 14 If the passwords do not match the display will show Invalid password Please re enter Re enter password or press the soft button to exit Play Greeting Base Unit 1 Press the Voice...
Page 54: ...til VM box option appears on the display 8 Press the soft button 9 To play recorded mailbox greeting press 5 or 6 on the Navigation button to scroll through the options until Play greeting appears on the display 10 Press the soft button 11 The system will play the greeting To stop playing the greeting press the soft button 12 The system will return to the VM box option screen Record Greeting Base ...
Page 55: ...ress the soft button 9 To record mailbox greeting press 5 or 6 on the Navigation button to scroll through the options until Record greeting appears on the display 10 Press the soft button 11 After a long beep the system will begin recording Start recording your greeting When you are finished press the soft button 12 The system will playback the recorded greeting and then return to the VM box optio...
Page 56: ...e Navigation button to scroll through the options until VM box option appears on the display 8 Press the soft button 9 To delete mailbox greeting press 5 or 6 on the Navigation button to scroll through the options until Delete greeting appears on the display 10 Press the soft button 11 The display will prompt the user to confirm Delete greeting 12 To confirm press the soft button If the system is ...
Page 57: ...nge password appears on the display 6 Press the soft button 7 Enter new four digit password 8 Re enter password to verify 9 If the passwords match a confirmation tone will sound The password is now changed and the system will return to the VM box option screen 10 If the passwords do not match the display will show Invalid password Please re enter Re enter password or press the soft button to exit ...
Page 58: ...gation button to scroll through the options until VM box option appears on the display 4 Press the soft button 5 To record mailbox greeting press 5 or 6 on the Navigation button to scroll through the options until Record greeting appears on the display 6 Press the soft button 7 After a long beep the system begins recording Start recording your greeting When you are finished press the soft button 8...
Page 59: ...e Mail Box Management Options Offsite Your voice mail personal greeting can be changed from an offsite location 1 When calling from an offsite location wait until the phone answers then press the i star key to access voice mail through the auto attendant 2 A voice prompt will ask Please enter the extension followed by the password 3 Enter the two digit extension and four digit extension password 4...
Page 60: ... and press the key Press 4 to delete the personal greeting 6 Press to return to the previous menu Access Voice Mail Base Unit Several options are available when accessing voice mail through the Base Unit including play new play old and VM box option Play New Messages Base Unit 1 Press the Voice Mail button 2 Access VM appears on the display 3 Press the soft button 4 Voice mail can only be accessed...
Page 61: ...1 At the end of the message 2 beeps will sound and a voice will say This message was recorded on date and time 12 To delete a new message press the soft button 13 Delete appears on the display 14 Press the soft button 15 To view the Caller ID information press the soft button 16 Press 5 or 6 on the Navigation button to scroll through the options until View CID appears on the display 17 Press the s...
Page 62: ...s on the display 3 Press the soft button 4 Voice mail can only be accessed by 2 users at a time Only 1 user can access a mailbox at a time If voice mail is not available the display shows System busy 5 Enter the two digit VM box number followed by the four digit extension pass word when prompted If voice mail is in use the display will show System busy and return to the voice mail menu after 5 sec...
Page 63: ...on 13 Delete appears on the display 14 Press the soft button 15 To view the Caller ID information press the soft button 16 Press 5 or 6 on the Navigation button to scroll through the options until View CID appears on the display 17 Press the soft button 18 The display will show the date time name and number of the caller if available 19 Press the soft button to return to the old message option scr...
Page 64: ...old and VM box option Play New Messages Cordless Handset 1 Press the Voice Mail button The display will show Connecting while the Cordless Handset contacts the voice mail system If the connection fails the display will show No connection 2 Voice mail can only be accessed by 2 users at a time Only 1 user can access a mailbox at a time If voice mail is in use the display will show System busy 3 Ente...
Page 65: ...button to scroll through the options until View CID appears on the display 16 Press the soft button 17 The display will show the date time name and number of the caller if available 18 Press the soft button to return to the new message option screen 20 To transfer the message to another extension press the soft button 21 Press 5 or 6 on the Navigation button to scroll through the options until Tra...
Page 66: ...t the display will show Invalid password 5 If the password is correct the display will show the voice mailbox number number of new messages and the number of old messages 6 To listen to old messages press 5 or 6 on the Navigation button to scroll through the options until Play old appears on the display 7 Press the soft button 8 Press 4on the Navigation button to move to the next old message If th...
Page 67: ... two digit extension at the display prompt or press the soft button to return to the old message option screen 22 If the extension number is valid the message will be transferred and the display will return to the old message option screen 23 After moving through all messages the display will stay on the last old message until it times out and returns to Standby Mode Deleted or transferred message...
Page 68: ... 6 When the message has finished the voice prompt will say Press one to replay this message Pressing 1 will replay the message and then return to the mes sage menu 7 If there are additional messages the voice prompt will say Press two for next message Pressing 2 will play the next message and then return to the mes sage menu 8 If you have not deleted the previous message the voice prompt will say ...
Page 69: ...e keypad to jump to the first record in that al phabet group then Press 5 or 6 on the Navigation button to reach the exact record Add Entry 1 Press 3on the Navigation button 2 The directory will display the first entry or will show Directory empty if there are no entries 3 To add an entry press the soft button 4 Enter the name when prompted by the display using the keypad NOTE To enter a letter or...
Page 70: ...et group then press 5 or 6on the Navigation button to reach the exact record NOTE To enter a letter using the keypad press the corresponding keypad number one or more times according to the order of the character on the button 3 Press the soft button 4 Delete appears on the display Press the soft button 5 The display will prompt for confirmation 6 Press the soft button to delete entry 7 Press the ...
Page 71: ...isplay press 3 or 4 on the Navigation button to move the cursor to the immediate right of the letter then press the soft button 8 Press the soft button 9 Edit the number when prompted by the display 10 Press the soft button View Number 1 Press 3on the Navigation button 2 The directory will display the first entry Press 5 or 6 on the Navigation button to scroll through the directory or enter a lett...
Page 72: ...he RCA 25450 a complete phone system These functions include auto attendant speed dial conference calls second incoming call group setting Cordless Handset and call log Auto Attendant Base Unit Auto Attendant is an automated call answering feature that uses default messages or messages you record to direct a call to extensions or their voice mails Auto Attendant can be turned on or off on each lin...
Page 73: ...ry another extension 4 If the caller chooses to speak with the operator by pressing 0 the phone will prompt the caller Please hold your call is being transferred to the operator The call will then ring the Base Unit If the Auto Attendant function is turned off all extensions will ring and the first one to answer receives the call Configure Auto Attendant Base Unit Auto Attendant can be turned on o...
Page 74: ...ation button until Configure AA appears on the display 3 Press the soft button 4 Press 5 or 6 on the Navigation button until Record OGM appears on the display 5 Press the soft button 6 Up to 5 different greetings can be saved Select a greeting 1 5 by pressing 5 or 6 on the Navigation button NOTE The greeting locations 1 5 are the same as the default greeting until a new OGM is recorded and overwri...
Page 75: ... Press the soft button 8 The greeting will play 9 Press the soft button when finished listening to the greeting The display will return to step 6 When the message ends the display will return to Play OGM 10 To review another greeting repeat the steps for the Play OGM function Select Outgoing Message OGM 1 Press the Auto Att button 2 Press 5 or 6 on the Navigation button until Configure AA appears ...
Page 76: ...e repeat the steps for the Configure AA function Hold Message Base Unit The hold message function allows the user to record play or delete a message for callers placed on hold to remind them they are on hold The message can be as long as 30 seconds The default message is a double beep tone To record your own hold message refer to the following steps Record a Hold Message Record a Hold message allo...
Page 77: ...e will play After the message plays press the Exit button or wait for the menu to time out to return to the Standby Mode Play a Hold Message The hold message can be reviewed using the play message function 1 On the Base Unit press the soft button 2 Press 5 or 6 on the Navigation button to scroll through the options until System setting appears on the display 3 Press the soft button 4 Press 5 or 6 ...
Page 78: ...scroll through the options until Hold message appears on the display 5 Press the soft button 6 Press 5 or 6 on the Navigation button to scroll through the options until Delete message appears on the display 7 Press the soft button 8 The display will prompt Delete hold message 9 Press the soft button to delete the message or to return to hold message option menu Speed Dial Base Unit The Base Unit c...
Page 79: ...te at the top of the screen 7 Press the soft button to update the record 8 Press the soft button to cancel changes to the current record Three Way Conference Calls The conference call function allows a caller from the Base Unit or a Cordless Handset to add a third person to a call The call must include at least one outside line Conference calls between three extensions handsets or Base Unit are no...
Page 80: ...tension From Cordless Handset 1 Press the soft button 2 Hold appears on the Display 3 Press the soft button 4 To add handset or the Base Unit for a three way conference press the Intercom button 5 Enter a handset ID or ID 00 for the Base Unit 6 After the second handset or the Base Unit answers press the soft button 7 The display will show Select line to conference and list all lines which have bee...
Page 81: ...on to start three way conference Any one of the 2 non initiating parties can drop out of the three way conference leaving the remaining two parties still in conversation Add Phone Line From Cordless Handset 1 Press the soft button 2 Hold appears on the Display 3 Press the soft button 4 To add a phone line press the Talk or Speaker button and enter a phone number press the soft button or press 3 or...
Page 82: ...utton 2 Press 5 or 6 on the Navigation button to locate Phone settings 3 Press the soft button 4 Press 5 or 6 on the Navigation button to locate 2nd call alert 5 Press the soft button 6 Press 5 or 6 on the Navigation button to choose on default or off 7 Press the soft button Using Base Unit for Second Incoming Call 1 To accept the second call place the first call on hold by pressing the Hold butto...
Page 83: ...and set ID number it can be called paged or have calls transferred to it A Cordless Handset s group setting s is individually selected and is not known to other cordless handsets or the Base Unit A Cordless Handset can change group settings at any time The Base Unit is a member of all groups However the Base Unit cannot assign groups to the cordless handsets nor can it unsubscribe a Cordless Hands...
Page 84: ...pon entering a valid Group ID display will show the updated subscription list 14 Press the soft button to return to the Phone setting menu or press the Exit button to return to standby or press the soft button to make more changes Call Log Call Log is a list of Caller ID CID information for the last 50 incoming calls starting with the most recent Each record includes the telephone number name if a...
Page 85: ...en digit number with the three digit area code followed by the seven digit telephone number Logged numbers can be modified to comply with the local dialing rules 1 To enter the Call Log press 4 on the Navigation button 2 The display will show the date time name and number with area code 3 To display the telephone number without the 1 or area code press the soft button 4 To return to displaying the...
Page 86: ...ation From the Call Log 1 To delete displayed Caller ID information from the Call Log press the soft button 2 Press 5 or 6 on the Navigation button to move to the Delete option 3 Press the soft button 4 Press the soft button to erase the displayed CID record Press the soft button to return to the Call Log menu Clear All Caller ID Information from the Call Log 1 To clear all Caller ID information f...
Page 87: ...NOTE Some settings listed below are described in other sections of this User s Guide Base Unit Soft Button Cordless Handset Soft Button Sound Sound Ring volume Ring volume Ring tone Ring tone Key volume Key volume Key tone Key tone Phone setting Phone setting Dialing prefix Dialing prefix Area codes Area codes Contrast Call forward Set time Group setting 2nd call alert Line Selection Registration ...
Page 88: ...ash time appears on the display 5 Press the soft button 6 The display will show a range of values from 100 to 1000 7 Press 5 or 6 on the Navigation button to scroll through the options and choose the desired flash time 8 Press the soft button Administrator Password The administrator password can be changed using this function 1 Press the soft button 2 Press 5 or 6 on the Navigation button to scrol...
Page 89: ... menu press the soft button 9 Re enter the new password when prompted 10 If the new password is retyped incorrectly the system will to return to the Enter new password display Enter the new password and re enter the password to verify 11 If both passwords match the new password will be saved and the system will return to the system setting menu Line Dedicate Base Unit The line dedicate function al...
Page 90: ...lay will show Line 1 4 dedicated to Ext 1 16 To dedicate the phone line or to dedicate the line to a different extension press the soft button Press the soft button to return to the previous menu 8 The display will ask whether to dedicate the line Press the soft button to dedicate line Press the soft button to return to the line dedicate menu 9 The display will ask for the two digit extension numb...
Page 91: ... pressing 5 or 6 on the Navigation button or using the menu system Adjust by pressing 5 or 6 on the Navigation button 1 The Base Unit should be on hook not in use 2 To increase ring volume press 5 on the Navigation button 3 To decrease ring volume press 6 on the Navigation button 4 The display will show the volume level High Medium Default Low Off and the phone will play the ring volume at each vo...
Page 92: ...ne will remain in effect for future phone calls until changed 1 Press the soft button 2 Sound appears on the display 3 Press the soft button 4 Press 5 or 6 on the Navigation button to scroll through the options until Ring tone appears on the display 5 Press the soft button 6 To change the ring tone press 5 or 6 on the Navigation button 7 The display will show the ring tone 1 4 and the phone will p...
Page 93: ...9 To accept the volume setting shown on the display press the soft button Key Tone Base Unit The key tone can be changed using the menu system There are four different key tones with key tone 1 the default The selected key tone will remain in effect for future phone calls until changed 1 Press the soft button 2 Sound appears on the display 3 Press the soft button 4 Press 5 or 6 on the Navigation b...
Page 94: ...gistration has been deleted the display shows Please register NOTE You must program both the Base Unit and the Cordless Handset to register the handset Have both units ready to program as you must complete registration of the handset within 30 seconds after programming the Base Unit 1 On the Base Unit press the soft button 2 Press 5 or 6 on the Navigation button to scroll through the options until...
Page 95: ...Handset You will program the Base Unit and the Cordless Handset to complete the procedure NOTE Cordless Handsets must be deregistered from the Base Unit before the assigned ID can be reused 1 On the Base Unit press the soft button 2 Press 5 or 6 on the Navigation button to scroll through the options until Registration appears on the display 3 Press the soft button 4 Press 5 or 6 on the Navigation ...
Page 96: ...ID Base Unit The Clear HS ID function clears an assigned Cordless Handset ID from the Base Unit This is useful if a Cordless Handset has been lost or replaced Even if an ID is deregis tered by the Cordless Handset the ID will still be assigned on the Base Unit The Clear HS ID allows the ID to be reused 1 On the Base Unit press the soft button 2 Press 5 or 6 on the Navigation button to scroll throu...
Page 97: ...esting registration 1 On the Base Unit press the soft button 2 Press 5 or 6 on the Navigation button to scroll through the options until Registration appears on the display 3 Press the soft button 4 Press 5 or 6 on the Navigation button to scroll through the options until Next HS ID appears on the display 5 Press the soft button 6 The display will ask for a two digit Cordless Handset ID Enter a va...
Page 98: ...tton Ring Volume and Vibrate Settings Cordless Handset Ring volume controls the ringer volume for incoming calls and pages The volume can be adjusted by pressing 5 or 6 on the Navigation button 1 Press 5 or 6 on the Navigation button to increase decrease ringer volume 2 The display will show the ring volume level and vibrate settings Vibrate High Vibrate High Medium Default Low and Off and the pho...
Page 99: ...press the soft button Ring Tone Cordless Handset The ring tone can be changed using the menu system There are 4 different ring tones The selected ring tone will remain in effect for future phone calls until changed 1 Press the soft button 2 Sound appears on the display 3 Press the soft button 4 Press 5 or 6 on the Navigation button to scroll through the options until Ring tone appears on the displ...
Page 100: ...ss 5 or 6 on the Navigation button 7 The display will show the volume level Off Low Medium Default High 8 To accept the volume setting press the soft button Key Tone Cordless Handset The key tone can be changed using the menu system There are four different key tones with key tone 1 the default The selected key tone will remain in effect for future phone calls until changed 1 Press the soft button...
Page 101: ...dit and calling cards or phone services requiring access numbers Turn On Dialing Prefix 1 Press the soft button 2 Press 5 or 6 on the Navigation button to scroll through the options until Phone setting appears on the display 3 Press the soft button 4 Dialing prefix appears on the display 5 Press the soft button 6 To turn on the dialing prefix function scroll through the options until On ap pears o...
Page 102: ...ough the options until Off appears on the display 7 Press the soft button Area Codes The area code functions allow calls within local and regional area codes to be dialed without the prefix Edit Local Area Code LAC 1 Press the soft button 2 Press 5 or 6 on the Navigation button to scroll through the options until Phone setting appears on the display 3 Press the soft button 4 Press 5 or 6 on the Na...
Page 103: ...ress the soft button 2 Press 5 or 6 on the Navigation button to scroll through the options until Phone setting appears on the display 3 Press the soft button 4 Press 5 or 6 on the Navigation button to scroll through the options until Area codes appears on the display 5 Press the soft button 6 Press 5 or 6 on the Navigation button to scroll through the options until Regional appears on the display ...
Page 104: ...ppears on the display 3 Press the soft button 4 Press 5 or 6 on the Navigation button to scroll through the options until Contrast appears on the display 5 Press the soft button 6 Scroll through the options to the desired contrast 7 Press the soft button Set Time Base Unit After the initial setting the time and date are automatically updated through Caller ID information received from the local ph...
Page 105: ... the soft button 8 Press 5 or 6 on the Navigation button to select AM or PM 9 Press the soft button Do Not Disturb DND Base Unit The ringer and intercom can be turned off using the Do Not Disturb function Base Unit 1 Press the DND button to turn off the ringer Press the DND button again to turn on the ringer The DND button flashes when DND is on DND enabled also flashes on the display 2 To turn of...
Page 106: ...umber without first choosing a line An available line is automatically selected Manual Line Selection mode allows the user to choose a phone line to make a call Auto Line Selection Setting 1 Press the soft button on the Cordless Handset 2 Press 5 or 6 on the Navigation button to scroll through the options until Phone setting appears on the display 3 Press the soft button 4 Press 5 or 6 on the Navi...
Page 107: ...the display 3 Press the soft button 4 Press 5 or 6 on the Navigation button to scroll through the options until Line selection appears on the display 5 Press the soft button 6 Press 5 or 6 on the Navigation button to scroll through the options until Manual appears on the display 7 Press the soft button A confirmation tone will sound The Cordless Handset is now set to the Manual Line Selection mode...
Page 108: ... Directory Call forwarding numbers for all extensions All mailbox contents All extension mailbox passwords reset to 0000 Admin password reset back to 7221 RCA1 All custom outgoing messages will be reset to default Main OGM AA and VM turned on for all lines Custom recorded hold message reset to default Time and date will be reset to 01 01 12 00 AM Mailbox greeting messages voice volume ring tone ri...
Page 109: ...rtably on top of your head and over your ear Move the microphone to approximately 2 to 3 inches from your mouth 3 Press the Talk button to answer or place a call 4 To return to normal operation unplug the headset from the jack NOTE If the headset is disconnected during use the call will remain active until the caller hangs up or you end the call Attaching the Belt Clip 1 Insert the sides of the be...
Page 110: ...n the connector is keyed and can be inserted only one way 5 Close the battery compartment by pushing the back cover up until it snaps into place 6 Place the handset in the charging cradle NOTE Allow the handset battery to properly charge for 12 hours prior to first use or when you install a new battery pack If you do not properly charge the phone battery performance will be compromised NOTE Only u...
Page 111: ...ttery installation the connector is keyed and can be inserted only one way 5 Close the battery compartment cover NOTE Allow the Base Unit battery to properly charge for 12 hours prior to first use or when you install a new battery pack If you do not properly charge the phone battery performance will be compromised Battery Safety Precautions Do not burn disassemble mutilate or puncture Like other b...
Page 112: ...mpt to delete one Directory entry CLEAR ALL CID RECORDS Prompt asking if you want to erase all Caller ID records EMPTY Indicates a memory location is vacant ENTER NAME Prompt telling you to enter the name and number for one of the 16 memory locations ENTER TEL NUMBER Prompt telling you to enter the telephone number for one of the 16 memory locations INCOMPLETE DATA Caller information has been inte...
Page 113: ...ER NUMBER the information was not sent Sound Signals Signal Meaning Single short beep Successful key entry Single long beep Successful operation Triple short beep Power ON Cordless Handset Unsucessful key entry A long warbling tone cordless handset Signals an incoming call One long beep ConfirmationTone One long beep and two short beeps every minute Low battery warning Other Information 113 ...
Page 114: ...displays this message if it detects anything other than valid Caller ID information during the silent period after the first ring This message indicates the presence of noise on the line Telephone No dial tone Check or repeat installation steps Make sure the base power converter is connected to a working electrical outlet Make sure the telephone line cord is connected to the base and the wall jack...
Page 115: ...nes on your line Try unplugging some phones See solutions for No dial tone You experience static noise or fading in and out Handset or headset may be out of range Move closer to the base Relocate the base Charge the battery Make sure the base is not plugged into an outlet with another household appliance Unit beeps See solutions for No dial tone Replace the battery Memory dialing Make sure you hav...
Page 116: ...r because this will damage the finish Retain the original packaging in case you need to ship the phone at a later date Causes of Poor Reception Aluminum siding Foil backing on insulation Heating ducts and other metal construction that shield radio signals You re too close to appliances such as microwaves stoves computers etc Atmospheric conditions such as strong storms Base is installed in the bas...
Page 117: ...adio or television reception which can be determined by turning the equipment off and on the user is encour aged to try to correct the interference by one or more of the following measures Reorient or relocate the receiving antenna that is the antenna for radio or television that is receiving the interference Reorient or relocate and increase the separation between the telecommunica tions equipmen...
Page 118: ...NKS USA Inc could void the user s authority to operate this product For instructions on how to obtain service refer to the warranty included in this guide or call customer service at 1 800 511 3180 Or refer inquiries to Thomson Inc Manager Consumer Relations P O Box 1976 Indianapolis IN 46206 Attach your sales receipt to the booklet for future reference or jot down the date this product was purcha...
Page 119: ...must be presented to obtain warranty service For rental firms proof of first rental is also required Also print your name and address and a description of the defect Send via standard UPS or its equivalent to ATLINKS USA Inc c oThomson Inc 11721 B Alameda Ave Socorro Texas 79927 Pay any charges billed to you by the Exchange Center for service not covered by the warranty Insure your shipment for lo...
Page 120: ... USA Inc shall not be liable for incidental or consequential damages resulting from the use of this product or arising out of any breach of any express or implied warranty on this product This disclaimer of warranties and limited warranty are governed by the laws of the state of Indiana Except to the extent prohibited by applicable law any implied warranty of merchantability or fitness for a parti...
Page 121: ...Wall Mount Template for Cordless Handset Wall Mounting Bracket Template for Cordless Handset 1 3 4 TOP Outline of Wall Mount Assembly Mounting Template 121 ...
Page 122: ...This page is intentionally blank 122 ...
Page 123: ...r Visa MasterCard or Discover Card ready and call toll free 1 800 338 0376 A shipping and handling fee will be charged upon ordering It is required by law to collect appropriate sales tax for each individual state country and locality to which the merchandise is being sent Items are subject to availability Replacement battery NiMH for Base Unit 5 2670 Replacement battery NiMH for Cordless Handset ...
Page 124: ...is address listed in this manual or on the carton This will only add delays in service for your product Thomson Inc 101 West 103rd Street Indianapolis IN 46290 2006 Thomson Inc Trademark s Registered Marca s Registrada s Model 25450 06 05 00006660 English 00006661 Espanol Printed in China ...