Product
Description
T112
Multifunction wireless
analogue display
T113
Multifunction wireless
remote display
Performing Autonetworking
Follow the steps below to add new Micronet products
to an existing system, or create a new system from
multiple boxes.
Note:
• Autonetworking should be performed before new
products are mounted.
• The following procedure is NOT required when
creating a new system with products that have
been supplied in a single box.
• You will need to choose a display capable of
initiating Autonetworking.
• If you have an existing system then a capable
display from this system should be chosen.
1. Connect products that require an external power
source to a 12 V dc power supply.
2. Place all
New
products within 300 mm (11.8 in) of the
display you have chosen to perform Autonetworking.
Existing networked products do not need to be
included.
3. Ensure all products are powered off.
4. Power on the chosen display, by pressing and
holding the
Down/Power
button for 2
seconds.
5. Ensure the chosen display is not showing a ‘Racer
Timer’ or ‘Wind Shift’ page.
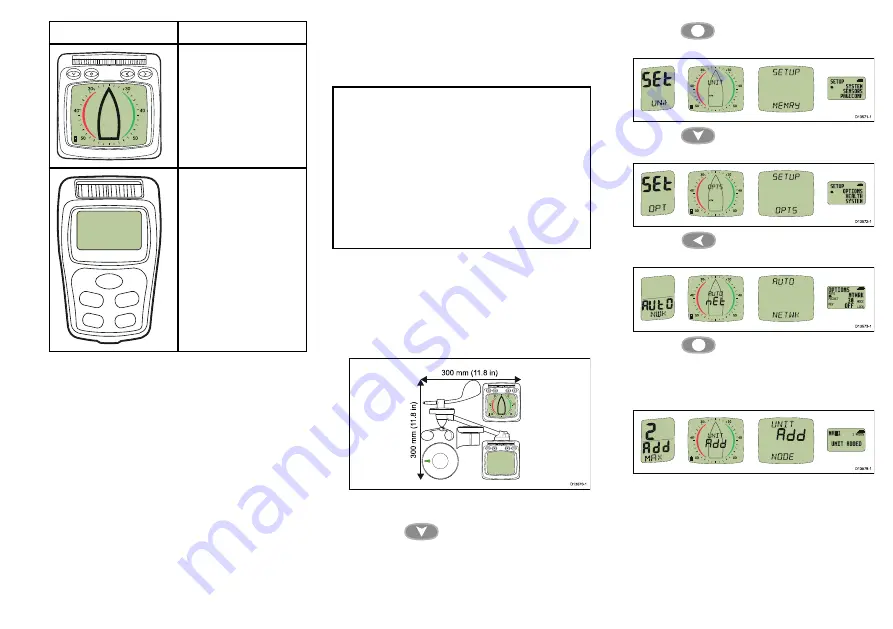
6. Press the
Set Up
button for 2 seconds to
display the Setup menu.
7. Press the
Down/Power
button until the
Options page is displayed.
8. Press the
Left
button to display the
Autonetworking page.
9. Press the
Set up
button to begin the
Autonetworking procedure.
A countdown will begin and the chosen display
shows ‘
WAIT
’ and then ‘
JOIN
’ as devices join the
network.
10. In the last 30 seconds of the countdown some
displays may switch on and ‘
JOIN
’ will flash
onscreen, to allow these displays to join the network
follow the steps below:
23


