


Weather Station - Model “PRO”
Model “PRO” - Weather Station
Page
31
Nov., 2001
GT27145B Cozz
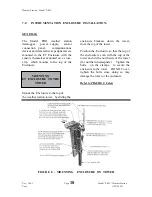
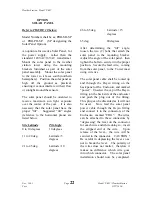
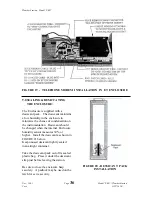
CONFIGURE SENSOR SWITCH
SETTINGS:
Refer to FIGURE 16 below:
The Sensor Switches are located on the
ET Enclosure panel just below the
modem and to the right of the the “Heat
Sink” located to the right of the battery
connectors. These switches or pots
need to be set as indicated in FIGURE
16 below.
FIGURE 16 - SENSOR SWITCH SETTINGS
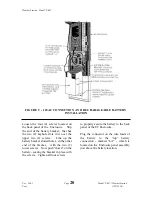
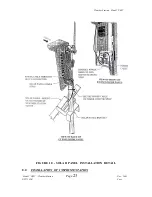
UPGRADING A “JR” MODEL
WEATHER STATION TO A
“PRO” MODEL:
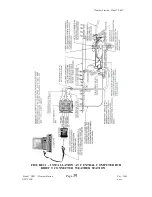
Refer to FIGURE 17 below:
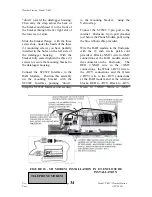
By means of the “UPGRADE KIT” a
Model “JR” Rain Bird weather station
can be upgraded to a Model “PRO”
weather station.
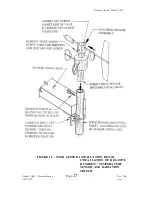
On the top of the Enclosure of the
existing model “JR” weather station -
remove the three (3) leveling screws and
springs from the mounting bracket for
the Temperature/Relative Humidity and
Solar Radiation sensors.
Remove the white Temperature/Relative
Humidity sensor from the bracket by
removing the three screws under the
bracket and securing it to the bracket.
This sensor will NOT be used with the
new upgrade kit.
Reverse the orientation of the mounting
bracket and place it on the upgrade