


Weather Station - Model “PRO”
Nov., 2001 Page
22
Model “PRO”- Weather Station
Cozz GT27145B
OPTION
SOLAR PANEL
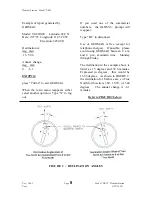
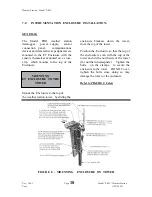
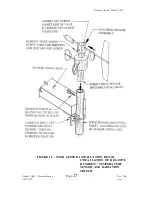
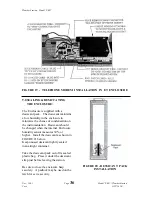
Refer to FIGURE 10 below:
Model Numbers shall be as; PRO-SH-SP
or PRO-PH-SP. (SP designating the
Solar Panel Option).
An option is for use of a Solar Panel, for
the power supply, rather than the
standard 120VAC/16VAC transformer.
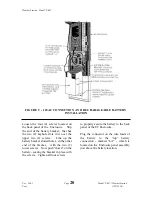
Mount the solar panel to the weather
station tower using the mounting
brackets furnished as part of the solar
panel assembly. Mount the solar panel
to the tower so it faces south (northern
hemisphere). Position the solar panel as
high off the ground as practical,
ensuring it cannot interfere with air flow
or sunlight around the sensors.
The solar panel should be oriented to
receive maximum sun light exposure
over the course of the year. It is also
necessary that the solar panel have the
proper “tilt”. Suggested “tilt” angles
(reference to the horizontal plane) are
listed below.
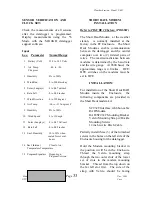
Site Latitude
Tilt Angle
0 to 10 degrees
10 degrees
11 to 20 deg.
La5
degrees
21 to 45 deg.
La10
degrees
46 to 65 deg.
La15
degrees
65 deg.
80 degrees
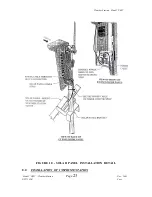
After determining the “tilt” angle,
loosen the two (2) bolts that attach the
solar panel to the mounting bracket.
Adjust the angle of the solar panel, then
tighten the bolts to secure it in the proper
position. Secure the lead wire, coming
from the solar panel, to the Tower mast
using wire ties.
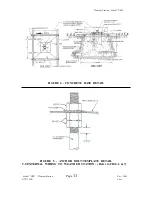
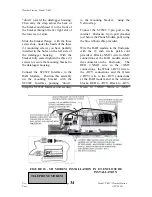
The solar panel cable shall be routed up
and through the Heyco fitting on the
back panel of the Enclosure and marked
“power”. Unscrew the cap of the Heyco
fitting (on the back side of the enclosure)
and push the plug out of the fitting.
This plug can be discarded as it will not
be used. Now feed the solar panel
power cable through the Heyco fitting
and connect it to the connectors of the
Enclosure, marked “CHG”. The wires
can be attached to these connectors by
“depressing” the lever on the connector
for eaach wire and while doing so, insert
the stripped end of the wire. Upon
release of the lever,, the wire will be
secured in the connector. CAUTION !
Be careful in depressing the lever so as
not to break the lever. The polarity of
the wires does not matter, therefore it
makes no difference which wire goes
into which connector. The solar panel
installation should now be completed.


