16
17
Step 9: Check fastener torque values
Step 10: Inflate tires to 35-55 psi
WARNING! It is important to maintain proper air pressure in
the tires while riding. Do not overinflate or underinflate the tires.
Overinflated tires may burst. Inflate your tires using an air source with
a pressure gauge to avoid overinflation. Underinflated tires may impair
the control of the eBike and cause a safety hazard.
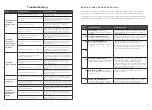
Area of Bike
Hardware
Torque (Nm)
Handlebar
Stem Clamp Bolts
18
Stem Expansion Bolt
20
Brake Lever Clamp Bolts
7.5
Seat Post
Saddle Mounting Bolts
10
Kickstand
Kickstand Bolt
25
Front/Rear
Brakes
Disc Brake Rotor to Hub
8
Caliper Adapter to Frame
13
Caliper to Adapter
13
Front Fork
Fender Connection Screw
7.5
Headlight Screw
7.5
Front Axle Nut
25
Rear Dropout
Rear Axle Nuts
35
Derailleur Hanger Screw
35
Bottom
Bracket
Crank Arm Bolt
45
Pedal into Crank Arm
35
Chain Ring Bolts
45
A C C E S S O R I E S
Radio Flyer carries a full line of custom accessories to enhance the usability of your
eBike. Please refer to the instruction sheets provided with each accessory to ensure
proper assembly. Visit
flyer.radioflyer.com
or contact
for additional assistance assembling, using, or repairing your accessories.
WARNING! Incorrect installation of accessories can cause
damage to the bike frame, loss of control, serious injury, or death.
WARNING! The seat post must be inserted to the minimum insertion mark. Do not raise the
seat post beyond the minimum insertion marking on the seat post tube. If the seat post is not
inserted properly, the seat may be loose which can lead to serious injury or death.
A D J U S T I N G S E AT H E I G H T
The seat height should be set based on your personal preference. The initial seat position
can be set by first placing the ball of your foot on the pedal with the crank arm in its lowest
position. In this position, your leg should be almost fully extended with a slight bend in your
knee. The proper seat position is important to avoid strain and potential injury during riding.
Consult a trusted, reputable bike mechanic or contact Flyer customer service for any questions
related to the seat position and fit of your bike.
A. Open the quick release lever located under the saddle. Rotate the lever fully open to allow
the seat post to slide easily.
B. Move the seat up and down by sliding the seat post in or out of the seat tube. Set the saddle
to the desired height based on rider preference. Ensure that the seat post does not extend
beyond the “minimum seat post insertion” markings on the seat post.
C. Close the quick release lever fully against the seat post tube. This should take some force to
ensure the seat post will stay firmly in place while riding.
A
B
C


