10
11
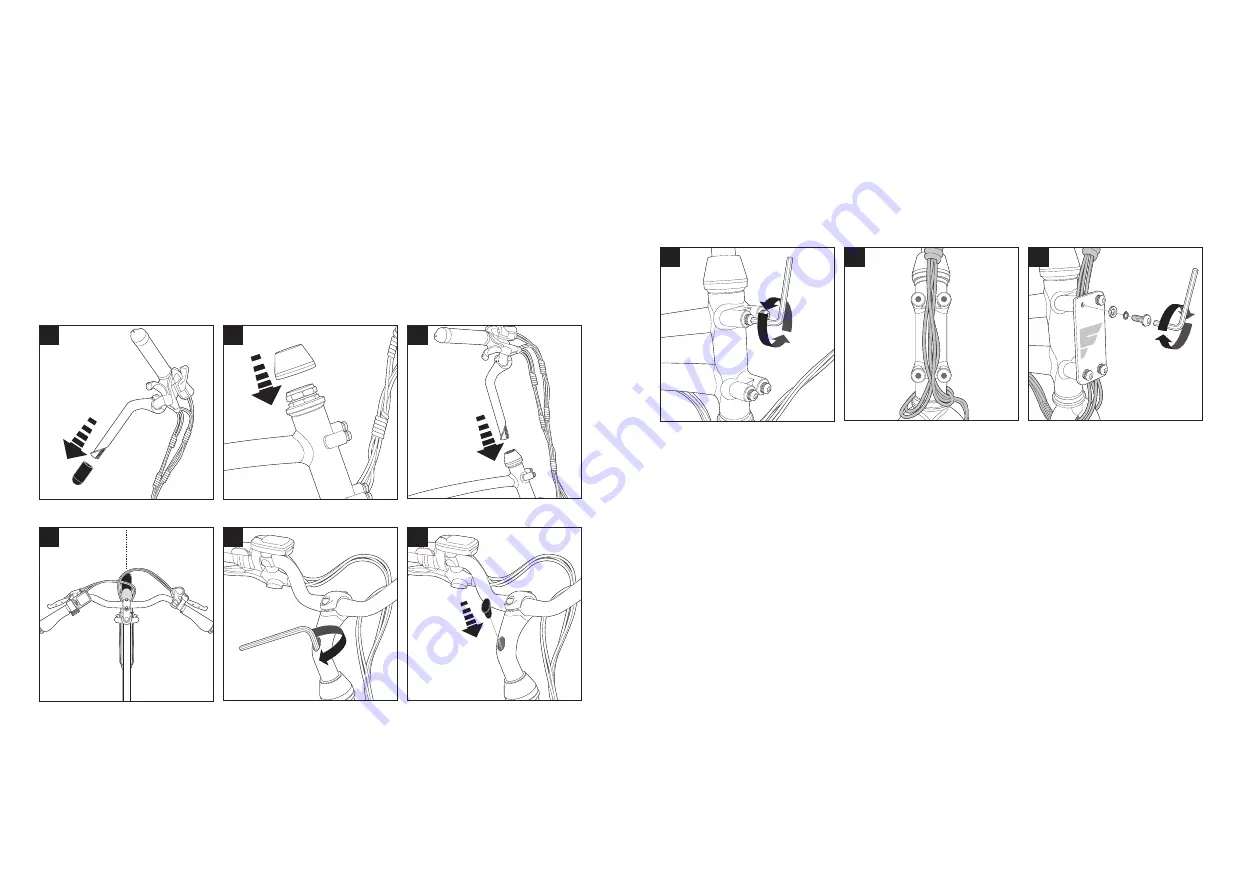
Step 3: Install handlebar stem
Your Flyer™ eBike’s handlebar stem is designed to be adjusted for optimal comfort.
A. Remove the protective cover from the handlebar stem and discard.
B. Install the headset cover on top of the headset bearings.
C. Insert the handlebar stem into headtube a minimum of 45mm. Ensure that the
“minimum insertion” markings are not visible before proceeding.
D. Align handlebar with the front fork. Check the handlebar orientation matches the
image below and that the cables are not twisted.
E. Tighten the stem bolt to 20 Nm using the provided 6mm allen key.
F. Install the rubber caps over the stem bolt and stem clamp screws.
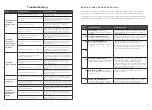
Step 4: Install the front logo plate
A. Remove the screws and washers using the 3mm allen wrench and set aside.
B. Align the wire harness, rear brake cable, and shifter cable between the threaded
posts on the headtube. Route the front brake cable to the side of the threaded posts
as shown in image B.
C. Align the logo plate with the threaded holes and reinstall the washer, lock washer, and
screw using the provided 3mm allen wrench.
Note: Complete assembly of the bike per the steps below. The stem and handlebar angle
can be adjusted as needed based on rider preference. Always re-tighten bolts to the
specified torque values prior to riding.
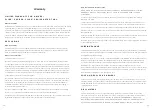
Note: Following installation of the front logo plate, check that the cables and wires can
move freely by turning the handlebars fully to either side. If any resistance occurs, the
wires and cables should be repositioned by sliding them up or down along the headtube.
A
C
B
A
C
B
D
F
E


