background image

25

6.1 The System Menu

At any point while within the 

main menu

, the system menu button can be found in the 

bottom right corner of the screen (shown in Figure 10 and highlighted in Figure 11). This 
button opens a system menu, a menu which contains information about the system, as 
well as some important features.


Figure 11:


The button icon which  


launches the system menu

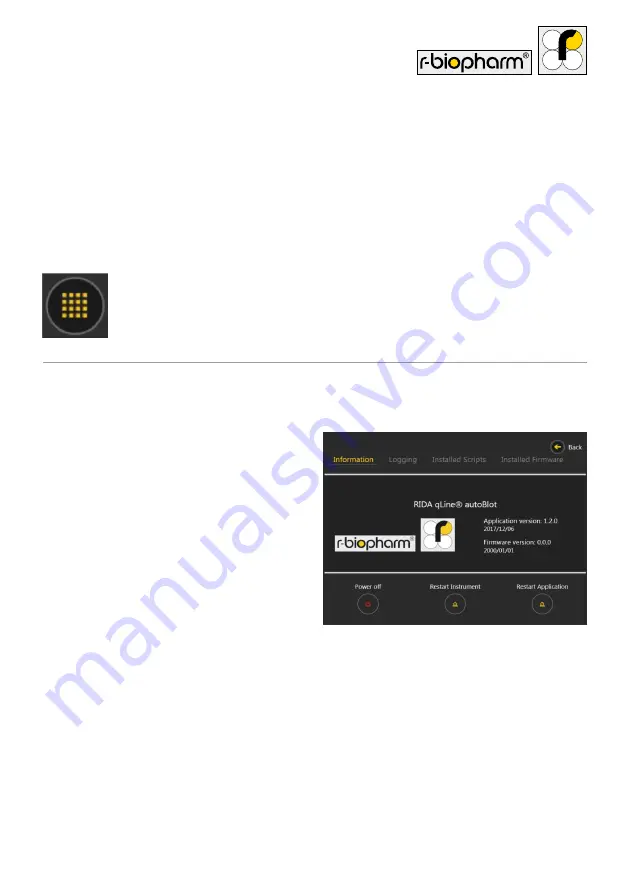
6.1.1 Information Tab

Upon pressing the button, a new window 
will cover the old and show a screen that 
resembles what is show in Figure 12. The 
first tab is called ‘information’ and primarily 
serves as a view for showing the instrument 
name, slogan and software version. 

The bottom row all contain power options: 
‘power off’ turns the instrument off, 
‘restart instrument’ turns the instrument 
off but immediately back on again, and 
‘restart application’ closes the software 
application and re-launches it once more. 
 
A hidden feature on this screen is the ability to unlock a fourth main menu tab called 
Engineering. This is done by pressing down on the branding logo for approximately  
3 seconds, or until you see the message ‘engineering activated’ as shown in Figure 13. 

Figure 12: 

The instrument information 

tab of the system menu

Summary of Contents for RIDA qLine autoBlot

Page 1: ...User Manual RIDA qLine autoBlot https clinical r biopharm com...

Page 2: ...2 RIDA qLine autoBlot User manual...

Page 3: ...rm AG assumes no liability for errors or omissions or for any damages resulting from the application or use of this information The content of this manual is the property of R Biopharm AG and is copyr...

Page 4: ...O Ring 17 4 7 2 Mount and Connect the Touchscreen 17 4 7 3 Powering the Instrument 19 4 7 4 System Start up and Initialisation Check 19 4 7 5 Critical Errors 21 5 System Overview 22 5 1 AutoBlot Compo...

Page 5: ...tion 50 11 1 5 Critical Error Messages 51 12 Cleaning the Instrument 51 13 Disposal 52 14 Corrective action Notification to authorities 53 15 Technical Support 53 16 Conformity IEC 61326 2 6 and RoHS3...

Page 6: ...tion 1 1 Intended purpose For in vitro Diagnostics The RIDA qLine autoBlot is a fully automated Analyzer for the processing RIDA qLine Allergy tests The RIDA qLine autoBlot may only be used in combina...

Page 7: ...ser interface The combination of all these features result in the ability to completely automate the processing of R Biopharm RIDA qLine Allergy for detection of specific IgE in allergy diagnostic Sta...

Page 8: ...the correct sample tubes are loaded into the carousel This is done by comparing detected barcodes with the ones specified in the work list v When the correctness of the samples have been verified the...

Page 9: ...tandalone bench top Processing Capability 1 to 36 samples per run Processing Time Typically 3 5 hours for 36 samples Temperature Control PID under software control Processing Volumes 10 mL to 1000 mL...

Page 10: ...ent from the container 1 Upon receipt of the instrument visually inspect the container for any transit damage Any damage should be recorded prior to opening 2 Ensure that the wooden container is place...

Page 11: ...uter shell can be collapsed flat and placed onto the base of the packaging and the lid replaced over it 9 Inspect the instrument for any obvious signs of transit damage Report any damage immediately t...

Page 12: ...Accessory Box B Item Description Quantity 13 1000 mL spare Nalgene Rect Bottle Labelled A bidest 1 14 Touchscreen Mounting Arm Cables 1 15 Waste Tip Trough 1 16 Tray Strip Holder 1 17 Sample Carousel...

Page 13: ...Height 75 102 mm Diameter 12 17 mm The supplied RIDA qLine Allergy reagents must be transferred into the glass bottles for the autoBlot before use The tips and glass bottles for the reagents can be di...

Page 14: ...ssemble the instrument In either case electrical shock may result and in both cases the warranty will be invalidated Warning The instrument will automatically stop when the Cover is opened Never attem...

Page 15: ...ly raised the height from the base of the instrument to the extreme of the door is 1000 mm Ensure the allocated bench location accounts for this 4 6 2 Disconnection guidelines In an emergency immediat...

Page 16: ...e Altitude Up to 2000 m Temperature Ambient temperature range Between 5 40 C Humidity Maximum relative humidity 80 for temperatures up to 31 C decreasing linearly to 50 relative humidity at 40 C Main...

Page 17: ...the tip on the probe twice over in order to spread the grease over the whole o ring then remove the tip Thoroughly wipe the metal parts of the probes and not the o rings clean with tissue so that ther...

Page 18: ...he instrument ensure that the screen is aligned correctly then tightly clamp the bracket by using the remaining 2x M5 screws and appropriate M5 washers provided in the screw set This is illustrated wi...

Page 19: ...ment has been powered and the on board computer has loaded up the main software application should automatically launch and begin an initialisation task This is a task which happens every start up to...

Page 20: ...camera and barcode reader checks If all are successful the screen should resemble what is shown in Figure 5 At this point the application can be entered by pressing start If anything goes wrong durin...

Page 21: ...ontains error sequences that are vital for ensuring that the service provider is able to diagnose the root of the problem If this screen appears during initialization or any other process contact your...

Page 22: ...5 System Overview 5 1 AutoBlot Component Guide Figure 8 A guide that details the components and locations which are vital to the instrument 5 2 Installation of Accessories Figure 9 An illustration of...

Page 23: ...is only one way in which it can fit Accessory IV Tip Rack Holder Position on the dimples to the right of the priming trough There is only one way in which it can fit Accessory V Waste Tip Trough Posit...

Page 24: ...Upon pressing the start button the first screen that will become visible is the main menu which has the work lists tab automatically selected see Figure 10 The main menu is split into three main categ...

Page 25: ...in Figure 12 The first tab is called information and primarily serves as a view for showing the instrument name slogan and software version The bottom row all contain power options power off turns th...

Page 26: ...of the information tab see Figure 14 This is a tab which provides a preview of the most recent events that were logged by t he software including the ability to copy all of the log files from the past...

Page 27: ...sing protocols 6 1 4 Installed Firmware Tab The installed firmware tab can be found to the right of the installed scripts tab see Figure 16 This tab contains the names version numbers and build dates...

Page 28: ...to be turned on with an RJ 45 Ethernet connector already inserted into the RJ 45 socket on the side of the instrument If the instrument has already entered the main menu before an RJ 45 cable is conne...

Page 29: ...rmer should result in a screen similar to what is shown in Figure 19 The instrument comes with two RJ 45 Ethernet ports which means there are two possible addresses that can be listened to Each of the...

Page 30: ...s and port number should be recorded for later use 6 3 Connecting to the instrument to RIDA qLine Soft 6 3 1 Device settings for RIDA qLine Soft For use with RIDA qLine Soft the data for RIDA qLine au...

Page 31: ...lorer and confirm with the enter key Please open the qsoft ini file by double click and go to the section as shown in Fig 22 For all connected machines the Description name the serial number and the I...

Page 32: ...d sent to the connected RIDA qLine Soft program When RIDA qLine Soft is connected to the LIS all requests will be retrieved from the LIS and a worklist will be created automatically This worklist will...

Page 33: ...es that there are no known work lists for the user to choose from In order to populate this menu with work lists the user must first create new work lists within RIDA qLine Soft and then forward the d...

Page 34: ...volume into the RIDA qLine autoBlot Screw cap bottle 20 mL By navigating ahead by pressing the navigate forward button denoted by the right pointing arrow the user will be taken to a check list which...

Page 35: ...ssful verification scan will automatically jump to the next menu which is the sample verification routine Following the completion of the panel verification the user will be taken to the screen that i...

Page 36: ...ards the scanner or are illegibly printed When the missing sample verification does not encounter any issues and all samples are detected the main processing screen is entered see Figure 28 This is th...

Page 37: ...e Time Remaining is shown a single tap will transform the control to show Current Time Figure 30 Another tap will transform the control to show the Completion Time Figure 31 A third tap will return th...

Page 38: ...e imaging is shown in Figure 33 The value on the left shows the current trough being scanned while the number of the right shows the total number of troughs that need to be scanned In a work list of 2...

Page 39: ...each time using a new tip If the initial issue is not resolved after the third attempt the instrument will pause sound an alarm and bring up a pop up window as shown in Figure 34 Figure 34 The options...

Page 40: ...sure that the barcode points fully outwards and is not smudged or damaged in any way a fresh sticker should be placed if damage is found When done the user should put the carousel back inside the inst...

Page 41: ...his screen the user can select a previously run work list and export the logs and images if available to a selected USB device Entries can be deleted by pressing and holding down on the name of the wo...

Page 42: ...m Figure 38 will become active This screen will inform the user of the progress of the scan along with an estimated time before the procedure finishes If the user wishes to cancel the scan and discard...

Page 43: ...delete the selected entry 8 Automated Cleaning Routine Within the Cleaning category of the main menu there exists a button labelled Standard cleaning procedure which allows the user to initiate the w...

Page 44: ...reflected on screen as shown in Figure 42 Once the instrument has finished soaking the lines a new pop up will appear that asks the user to load DI water into the wash bottle as shown in Figure 43 At...

Page 45: ...will re appear From here the user may return to the main menu or if so inclined re run the cleaning 9 QC test using RIDA qLine Soft Place 10 strips of the RIDA qLine QC Kit ZG1108 in positions 1 to 10...

Page 46: ...toBlot User manual Measurement of the QC strips will start automatically Measuring will take several seconds After the measurement the following image will be displayed in the RLink_ AutoBlot program...

Page 47: ...he instrument The user is strongly advised to follow this routine during every shutdown If the user is ready to shut down the instrument the first step to take should be to power down the instrument B...

Page 48: ...carried out to the instrument and its accessories 1 Remove the Wash and Reagent bottles from their respective holders Cap the bottles if required for future use and return to the fridge 2 Remove the W...

Page 49: ...the steps that have already been taken via this section will help return the instrument to full working order as quickly as possible 11 1 Simple Troubleshooting 11 1 1 Visual Inspection A good visual...

Page 50: ...ousel 11 1 3 Fluidics Check for any damage to the tubing and ensure that there are no kinks visible along the Y and X axes which could affect the sample processing Pay particular attention to the conn...

Page 51: ...using the procedure that is described in section 6 1 2 and forward those with the error report 12 Cleaning the Instrument The cleaning of the instrument should be performed regularly using proprietar...

Page 52: ...sponsibly after use Instruments must be disposed of properly and responsibly at the end of their life cycle Please observe the applicable national regulations for disposal Electrical and Electronic Eq...

Page 53: ...de www r biopharm com Only by R Biopharm AG or associated trained service personnel may authorized repairs and servicing be carried out For further details of instrument or to arrange for training to...

Page 54: ...sed by equipment or system with which the product is used 4 damage caused by modification or repair not made or authorized by R Biopharm AG or 5 theft vandalism fire water or other peril Product may n...

Page 55: ...tive action Notification to authorities 18 Version Number 19 1 Symbols used in manual on instrument 19 Appendix 19 1 Appendix II Synopsis of Symbols used in manual on instrument Special notes in these...

Page 56: ...Serial Label Symbol Outline Black ISO 7000 2498 Serial Number Instrument Box Label Symbol Outline Black ISO 7000 2493 Catalogue Number Instrument Serial Label Symbol Outline Black ISO 7000 3082 Manufa...

Page 57: ...eaning Tab Access the general engineering settings Home Screen Engineering Tab Access the advanced engineering settings Home Screen Engineering Tab Open the System Menu Bottom Right Corner of the Indi...

Page 58: ...mote sources Following this recommendation the INSTRUMENT does not therefore come with any pre installed ANTI VIRUS software It s left up to the specific laboratory technicians to install their own li...

Page 59: ...to CONTROL SOFTWARE When defects are found within the CONTROL SOFTWARE Bee Robotics record them on an internal tracking system with the intention of resolving in the next release When a release become...

Page 60: ...anual 19 4 Appendix IV RIDA qLine autoBlot INSTALLATION CHECKLIST Instrument serial number Customer name Address Telephone number Fax number E mail address Did the instrument arrive in good condition...

Page 61: ...le Holder 1 x Wash Bottle Holder 1 x Waste Bottle Holder 1 x Priming Trough 1 x Waste Tip Trough 1 x Tip Rack Holder 1 x Tray Strip Holder 1 x Sample Carousel 1 x Wash Bottle Lid 1 x Waste Bottle Lid...

Page 62: ...Representative Name Representative Address Representative Signature Date Customer Signature Date Customer Print Name Position Customer to retain original copy Distributor must send copy to R Biopharm...

Page 63: ...procedure or been in contact with blood other body fluids or pathological samples It has been cleaned in preparation for inspection service or repair or This equipment has been cleaned and decontamina...

Page 64: ...64 RIDA qLine autoBlot User manual Signed Date Position Held Full Official Address Telephone number...

Page 65: ...400 L of wash buffer are dispensed onto the membranes and incubated for 1 minute while shaking After the incubation the wash buffer is aspirated whereat the membranes are tilted backwards 4 400 L of p...

Page 66: ...mbranes each and incubated on the orbital shaker for 1 minute Thereafter the wash buffer is aspirated whereat the membranes are tilted backwards 12 400 L of distilled water are dispensed to the membra...

Page 67: ...67...

Page 68: ...68 RIDA qLine autoBlot User manual R Biopharm An der neuen Bergstra e 17 64297 Darmstadt Germany E mail orders r biopharm de clinical r biopharm com 2022 03 30 Version 2 0...

Reviews: