


19
Cleaning
The seatback cushion can be easily cleaned.
Do not use bleach when washing the outer cover. Doing
so may cause damage to the cover.
Follow all safety instructions for the proper use of the
disinfectant and/or cleaning agent before applying it
to your product. Failure to comply may result in skin
irritation or premature deterioration of upholstery and/
or power chair finishes.
To clean the seatback cushion cover:
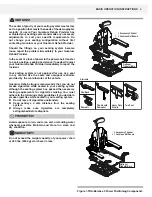
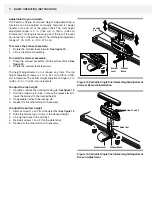
1. Remove the seatback cushion from the seatback by
detaching the reusable hook and loop fastener straps as
well as the reusable fasteners that secure the cushion to
the seatback, then pulling the cushion toward you.
See
figure 22 or 23.
2. Locate the zipper on the cushion.
3. Unzip the cover, pull out the cushion, and remove any
optional wedges, if installed.
4. Wash the cover by hand or in a non-agitating washing
machine at or below a temperature of 140°F (60°C).
5. Allow the cover to air dry.
Do not use bleach when washing the outer cover. Doing
so may cause damage to the cover.
Never submerge the seatback cushion in water. Doing
so may cause damage to the cushion.
Do not attempt to put the cover in a dryer. This may
cause shrinking.
6. Once the cover is dry, re-cover the seatback cushion,
position the seatback cushion to face the reusable
fasteners on the seatback. Secure the cushion to the
seatback using the reusable fasteners on the seatback
as well as the reusable hook and loop fastener straps.
See figure 22 or 23.
Follow all safety instructions for the proper use of the
disinfectant and/or cleaning agent before applying it
to your product. Failure to comply may result in skin
irritation or premature deterioration of upholstery and/
or power chair finishes.
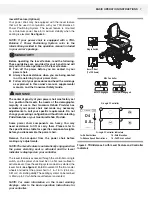
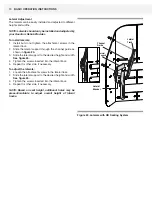
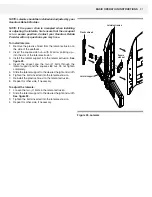
BASIC OPERATION INSTRUCTIONS
WARNING!
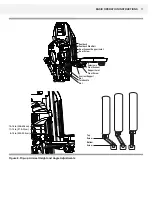
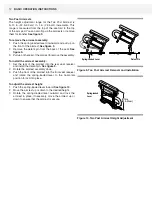
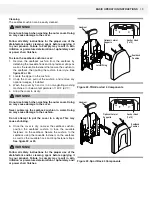
Figure 23. Sport Back 4 Components
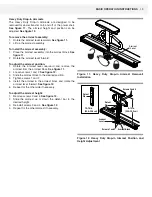
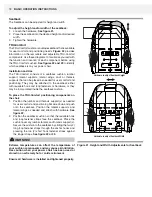
Figure 22. TRU-Comfort 4 Components
Seatback
Cushion
Headrest
Optional Lateral
Supports
Headrest
Seatback
Cushion
Optional Lateral
Supports
Lateral Wing
WARNING!
Anchor Hook
(1 of 2)
Anchor Hook
(1 of 2)
WARNING!
Summary of Contents for TRU-BALANCE 3
Page 24: ...24 BASIC OPERATION INSTRUCTIONS...
Page 25: ...25 BASIC OPERATION INSTRUCTIONS...


