background image

Chapter 2  Installation Procedures

Installing the GoVault System Application Software

GoVault™ for Windows User’s Guide

20

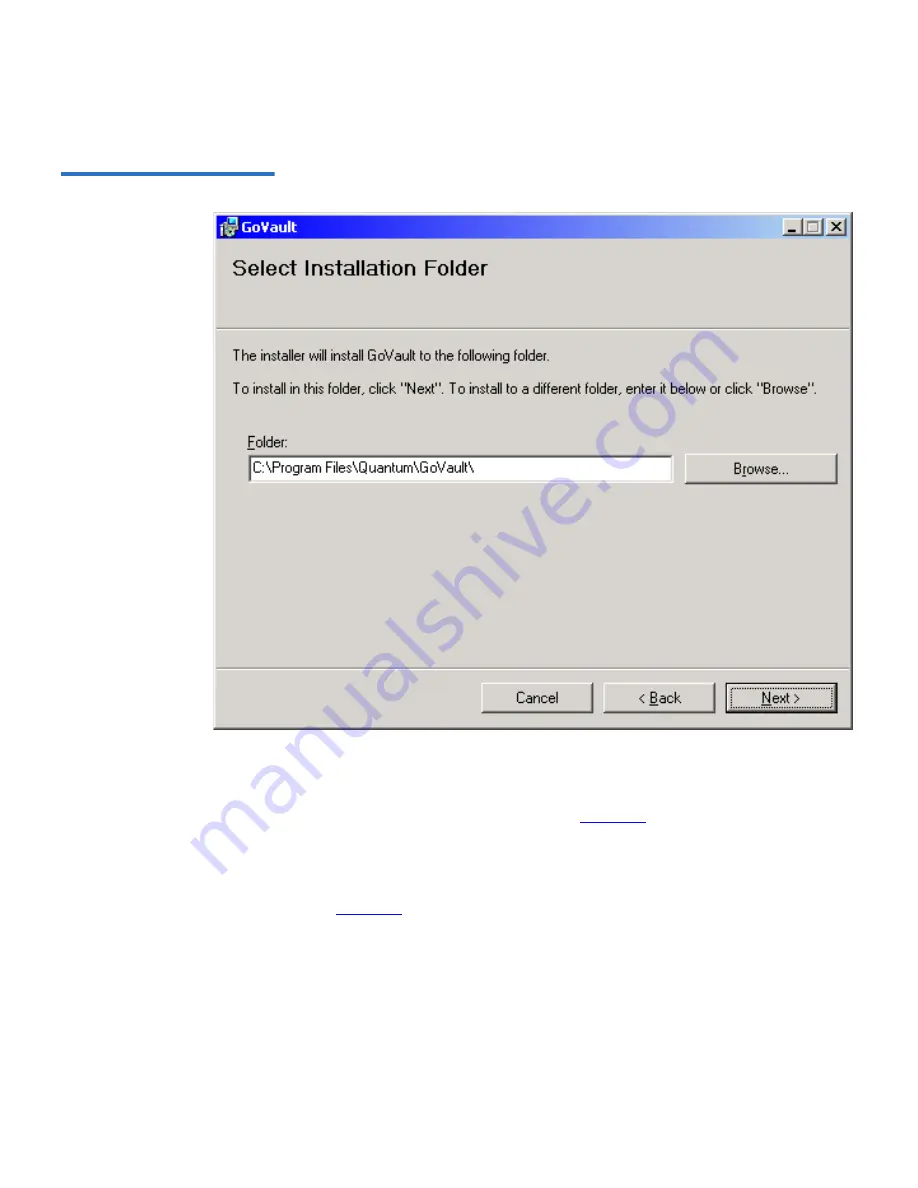
Figure 13  Select Installation 
Folder Dialog

6

Use the 

Select Installation Folder 

dialog to specify the location where 

you want to install the GoVault system application software.

7

The default location is shown in 

figure 13

. If you want to specify a 

different location, click 

Browse

 and navigate to the file location that 

you want.

8

Click 

Next

 to continue and display the 

Confirm Installation 

dialog (see 

figure 14

).

Summary of Contents for GoVault 40GB

Page 1: ...R9DXOW IRU LQGRZV R9DXOW IRU LQGRZV R9DXOW 5SER S UIDE 5SER S UIDE 5SER S UIDE 5SER S UIDE 5SER S UIDE 5SER S UIDE 5SER S UIDE...

Page 2: ...tion from time to time without notice COPYRIGHT STATEMENT Copyright 2007 by Quantum Corporation All rights reserved Your right to copy this manual is limited by copyright law Making copies or adaptati...

Page 3: ...3 GoVault System Application Software 4 Backup Application Software 4 GoVault Firmware 4 Operational Features 5 Drive Properties Context 5 Backup Application Interface 5 Chapter 2 Installation Proced...

Page 4: ...Cartridges 31 Write Protecting Cartridges 32 Changing the Volume Label of Cartridges 33 Reformatting Cartridges 33 Accessing GoVault System Application Software Features 34 Using Cartridge Password Pr...

Page 5: ...ansfer Modes 66 Determining Your Motherboard Configuration 67 Changing the Transfer Mode 69 Appendix C Environmental and Disposal Compliances 73 Environmental Compliance 73 Disposal of Electrical and...

Page 6: ...le to the SATA Card 12 Figure 7 Connecting the SATA Power Cable to the Dock 13 Figure 8 Connecting the SATA Power Cable to the PC 13 Figure 9 Successful Configuration Display 14 Figure 10 GoVault Tabl...

Page 7: ...ult Status Display 45 Figure 29 GoVault Firmware Update Dialog 48 Figure 30 Ready to Commence Firmware Update Message 48 Figure 31 Firmware Update Complete Message 49 Figure 32 GoVault Internal Dock D...

Page 8: ...3 Physical Specifications 53 Table 4 Voltage and Current Specifications 55 Table 5 Performance Specifications 57 Table 6 Reliability Specifications 58 Table 7 Environmental Specifications 59 Table 8 I...

Page 9: ...tions Basic operating procedures Specifications Document Organization This guide is organized as follows Chapter 1 Introduction provides an overview of the GoVault disk drive and summarizes the drive...

Page 10: ...dentifies GoVault environmental compliances and provides instructions for proper disposal of unwanted electrical and electronic equipment Appendix D Regulatory Compliances identifies the GoVault compl...

Page 11: ...e information about this product is available on the Service and Support website at www quantum com support The Service and Support website contains a collection of information including answers to fr...

Page 12: ...Preface GoVault for Windows User s Guide xii...

Page 13: ...1 Product Description on page 2 Operational Features on page 5 Overview The GoVault drive is an easy to use cost effective high performance removable disk data protection device for the following Mic...

Page 14: ...of your computer workstation or server system External GoVault Tabletop Is already mounted inside a standalone enclosure The following subsections provide a brief description of each GoVault component...

Page 15: ...tes The cartridges are all read write compatible interchangeable and can be used with any GoVault dock Each GoVault cartridge Is a removable disk that can withstand a 1 meter drop to a hard surface an...

Page 16: ...ting temperature or voltages are out of range internal dock only View operating statistics about the GoVault dock and individual cartridges Determine if a Self Monitoring Analysis and Reporting Techno...

Page 17: ...e applied to the drive before each cartridge eject operation Timeout standby modes for the GoVault dock electronics to extend product life and maximize the Mean Time Between Failure MTBF Operational F...

Page 18: ...cluding System Requirements on page 7 Cartridge Handling Precautions on page 8 Unpacking and Inspection Procedures on page 8 Installing the Internal GoVault Dock on page 9 Installing the External GoVa...

Page 19: ...2 Mbytes of hard disk storage for the GoVault system application software For the internal GoVault dock One available 3 5 or 5 25 inch internal drive bay A SATA compliant interface provided by either...

Page 20: ...s Excessive dust and particles Do not stack cartridges such that the bottom cartridges are under compressive stress Do not attempt to open cartridges They are tamper evident assemblies Tampering with...

Page 21: ...either a SATA equipped motherboard or a SATA compliant host bus adapter PCI card you should follow the procedures provided by the manufacturer of the SATA card and your computer reference manual If t...

Page 22: ...erver system already has either a SATA equipped motherboard or a SATA compliant host bus adapter PCI card use the following procedure to install the internal GoVault dock Note See your computer manufa...

Page 23: ...edure 2 As required a Save and close your open files and terminate all running applications b Shut down the workstation or server system c Disconnect the AC power cord from the facility AC power recep...

Page 24: ...the other end to either the SATA equipped motherboard or the SATA card see figure 6 Figure 6 Connecting the SATA Data Cable to the SATA Card 8 Connect the drive end of the SATA power supply conversio...

Page 25: ...install the system cover and reconnect the AC power cord to the facility AC power receptacle 11 Restart the workstation or server system 12 Verify that the LED on the front panel of the GoVault dock i...

Page 26: ...em Application Software in the next subsection If you are not going to install the GoVault system application software then skip to Installing the Backup Application Software on page 23 Figure 9 Succe...

Page 27: ...in a secure location that provides adequate circulation for the rear panel air vents see figure 10 4 Plug the power adapter converter into a 115 230 VAC facility power receptacle and verify that the...

Page 28: ...the Backup Application Software on page 23 Installing the GoVault System Application Software After installing the GoVault dock and cartridge disk drive and verifying that your operating system recogn...

Page 29: ...the General tab under the System heading look for the words x64 Edition Installing the GoVault System Application Software 2 After determining which system application applet you need to use install t...

Page 30: ...Chapter 2 Installation Procedures Installing the GoVault System Application Software GoVault for Windows User s Guide 18 Figure 11 GoVault Setup Wizard...

Page 31: ...the GoVault System Application Software GoVault for Windows User s Guide 19 Figure 12 License Agreement Dialog 5 Read the License Agreement select I Agree and click Next to continue and display the Se...

Page 32: ...Use the Select Installation Folder dialog to specify the location where you want to install the GoVault system application software 7 The default location is shown in figure 13 If you want to specify...

Page 33: ...ows User s Guide 21 Figure 14 Confirm Installation Dialog 9 Click Next to start the installation 10 Appearance of the Installation Complete display signifies a successful installation of the GoVault s...

Page 34: ...sful installation of the GoVault system application software by right clicking the GoVault drive letter and seeing the Set Password and GoVault Help options on the menu display 14 If you are going to...

Page 35: ...com ServiceandSupport CompatibilityGuides Index aspx After installing the backup application software proceed to Registering GoVault in the following subsection Registering GoVault After installing G...

Page 36: ...ator Display on page 25 Inserting and Ejecting Cartridges on page 26 Attaching Labels to Cartridges on page 31 Changing the Volume Label of Cartridges on page 33 Reformatting Cartridges on page 33 Acc...

Page 37: ...not flashing is functioning correctly and either There is no cartridge in the dock A cartridge load operation has completed and there is a cartridge in the dock is flashing on slowly approximately onc...

Page 38: ...slide the cartridge into the dock stop and make sure the cartridge is oriented properly with the connector to the rear and the alignment slot to the upper right 3 Firmly push the cartridge the rest of...

Page 39: ...Eject Procedure or your backup application software If neither of those procedures ejects the cartridge and you must remove the cartridge from the dock you could also Force an emergency cartridge eje...

Page 40: ...2 Right click the GoVault icon in either Windows Explorer or the My Computer window to display the GoVault menu see figure 14 on page 30 3 Click Eject to eject the cartridge 4 Remove the cartridge fr...

Page 41: ...5 Before using the cartridge again verify the integrity of its directory and file system as follows a Insert the cartridge into the GoVault dock b Use the Windows chkdsk command or a third party utili...

Page 42: ...eject the cartridge from the GoVault dock by straightening a large paper clip and inserting it into the front panel manual cartridge eject hole see figure 17 Do not use a pencil or other breakable ite...

Page 43: ...front and one on the top as shown in figure 18 Additionally the protective plastic cartridge case has an area for attaching a label Figure 18 Cartridge Label Locations Caution Use only Quantum labels...

Page 44: ...can be both written to and read from the cartridge locked disabled write protected Data can be read from the cartridge but not written to it Note The Windows operating system displays an error message...

Page 45: ...ither Rename on the menu display and typing a new volume name on the My Computer or Explorer display Properties on the menu display and typing a new volume in the name field of the General tab dialog...

Page 46: ...ystem application software features 1 Right click the GoVault icon in the Windows My Computer or Explorer display to view the GoVault system application software menu see figure 20 Note If you have in...

Page 47: ...Search the standard Windows File Search window with the GoVault drive displayed in the Look in list box Set Password the GoVault Set Cartridge Password dialog that you can use to configure password pr...

Page 48: ...he GoVault drive name highlighted for the file rename function Properties the standard Windows local disk Properties dialog for the GoVault drive see figure 21 with extensions to support the following...

Page 49: ...idge you will have to type the password each time you insert the cartridge into the dock You might want to use a cartridge password if the data stored on the cartridge is sensitive to you and you don...

Page 50: ...sensitive characters No spaces symbols or special characters 2 Record the password and store it in a safe secure location 3 Insert a write enabled cartridge into the GoVault dock 4 Right click the GoV...

Page 51: ...password to the GoVault cartridge and close the Set Cartridge Password dialog Entering the Cartridge Password 3 When you insert a password protected cartridge into the GoVault dock the GoVault system...

Page 52: ...e the Enter Cartridge Password dialog and access the GoVault cartridge 7 If you entered a second incorrect password a second error message asks you to try again Repeat steps 4 5 and 6 8 If you enter a...

Page 53: ...figure 23 in the preceding subsection 2 As prompted type the current cartridge password in the Password text box 3 Select the Change Password checkbox 4 Click OK to display the Change Cartridge Passwo...

Page 54: ...hange Password checkbox 4 Click OK to display the Change Cartridge Password dialog see figure 25 5 Select the Remove password protection checkbox 6 Verify that the New Password and Confirm Password te...

Page 55: ...y Applications that might try to access the GoVault cartridge File managers such as My Computer or Explorer 2 Insert or eject and reinsert the password protected cartridge to redisplay the Enter Cartr...

Page 56: ...on 7 Click OK when the erase function completes 8 Reformat the cartridge see Reformatting Cartridges on page 33 Checking the GoVault Dock and Cartridge Status The GoVault application system software k...

Page 57: ...about the GoVault dock on the left side of the display under the Dock heading The displayed dock information includes The vendor product name and serial number of the GoVault dock as well as the revis...

Page 58: ...dock and the displayed status information is for the loaded cartridge Previous signifies that there is no cartridge in the dock and the displayed status information is for the last cartridge that was...

Page 59: ...ed on your dock a If they are the same then there is no need to proceed with the firmware update procedure b If the firmware on the Quantum website is a later version than the firmware installed on yo...

Page 60: ...Update Dialog Figure 30 Ready to Commence Firmware Update Message 10 Click OK to begin the firmware update 11 When the firmware update operation completes the GoVault system application software prom...

Page 61: ...age 36 c Click the Status tab on the GoVault Properties dialog to display the GoVault Status dialog see figure 28 on page 45 d Verify that the Revision field displays the updated firmware revision Han...

Page 62: ...Flashes the activity LED indicator on the internal GoVault dock quickly at approximately four time per second Ejects the cartridge Displays a cartridge eject message If you reinsert a cartridge while...

Page 63: ...ws Application Event log Updates the GoVault Properties setting the SMART set status to Yes see figure 28 on page 45 Contact Quantum Technical Support for diagnosis instructions IF a problem occurs TH...

Page 64: ...dows dock and cartridge disk drive technical specifications including Physical Specifications on page 53 Power Specifications on page 55 Performance Specifications on page 57 Reliability Specification...

Page 65: ...on Configuration 3 5 inch 5 25 inch Height 41 3 mm 1 63 in 41 3 mm 1 63 in Width 101 6 mm 4 00 in 146 0 mm 5 75 in Length 166 5 mm 6 56 in 166 5 mm 6 56 in Weight N A 500 g 17 6 oz Tabletop Dock Stand...

Page 66: ...Chapter 4 Specifications Physical Specifications GoVault for Windows User s Guide 54 Figure 32 GoVault Internal Dock Dimensions Figure 33 GoVault Tabletop Dock Dimensions...

Page 67: ...er converter plugs into a standard 115 230 VAC facility power receptacle A two meter 24 AWG cord applies the 12 VDC output to the GoVault dock through a rear panel 2 0 mm surface mount power jack Tabl...

Page 68: ...Dock Input voltage 60 Hz 115 230 VAC 10 DC voltage tolerance 12 0 VDC 10 Non operating maximum 28 VDC Maximum operating current Idle 0 30 Amps with cartridge inserted 0 11 Amps without cartridge Cont...

Page 69: ...ns Specification Value Capacity A function of the installed cartridge 40 80 120 or 160 Gbytes Data transfer rates 26 Mbytes second typical 34 Mbytes second maximum peak Seek rates Minimum 1 track 1 0...

Page 70: ...eliability specifications Table 6 Reliability Specifications Specification Value Load unload cycles 5 000 dock and cartridge Dock service life 5 years at 2 75 load unload cycles per day MTBF Internal...

Page 71: ...t environmental specifications Table 7 Environmental Specifications Specification Value Temperature Operating 50 F to 104 F 10 C to 40 C Nonoperating Dock 40 F to 140 F 40 C to 60 C Cartridge 68 F to...

Page 72: ...SI 2 SCSI 2 Small Computer System Interface 2 SCSI 2 ANSI INCITS 131 1994 SCSI Architecture Model 2 SAM 2 ANSI INCITS 366 2003 SCSI Primary Commands 2 SPC 2 ANSI INCITS 351 2001 SCSI Block Commands 2...

Page 73: ...Volume 3 Serial Transport Protocols and Physical Interconnect ATAPI 7 V3 draft standard ANSI INCITS Project T13 1532D Serial ATA High Speed Serialized AT Attachment Revision 1 0a Serial ATA Workgroup...

Page 74: ...install the dock in a 3 5 inch drive bay use the procedure in this appendix for removing the side brackets and changing the bezel Parts and Tools Required Make sure you have the following parts and to...

Page 75: ...screws that attach each side bracket to the GoVault dock see figure 35 2 Remove the side brackets store them in a safe place Figure 35 Removing the Side Brackets 3 Carefully insert the dowel into eac...

Page 76: ...inch Bezel 5 Set the chassis up right and carefully align all four clips of the 3 5 inch bezel with the access holes 6 Verify that cartridge manual eject button is aligned with the through hole on the...

Page 77: ...Appendix A Changing the Bezel Procedure GoVault for Windows User s Guide 65 Figure 38 Installing the 3 5 inch Bezel...

Page 78: ...s DMA mode for GoVault data transfer operations About Data Transfer Modes By default depending on the hardware configuration of the motherboard in your workstation or server system if you do not insta...

Page 79: ...rocedure in Determining Your Motherboard Configuration to see if it uses an ICH5 ICH6 or ICH7 I O Controller Hub 2 Then if it does use the procedure in Changing the Transfer Mode on page 69 to configu...

Page 80: ...el f Secondary IDE Channel Figure 40 Devices by Connection Listing 1 If you do not see QUANTUM GoVault listed as either an Intel R XXXXX Serial ATA Storage Controller or an Intel R XXXXX Ultra ATA Sto...

Page 81: ...should use the procedure in Changing the Transfer Mode to configure high speed DMA mode for your GoVault data transfer operations Do not close the Device Manager window Changing the Transfer Mode If...

Page 82: ...w right click the IDE Channel listing under which QUANTUM GoVault is shown either the Primary IDE Channel or Secondary IDE Channel and select Properties to display the appropriate IDE Channel Properti...

Page 83: ...see figure 43 Figure 43 Changing the Transfer Mode 8 Click OK to close the IDE Channel Properties dialog 9 To implement the change a Save and close your open files and terminate all running applicatio...

Page 84: ...nder which QUANTUM GoVault is shown and select Properties to display the appropriate IDE Channel Properties dialog c Open the Advanced Settings tab to verify that DMA is configured as the GoVault tran...

Page 85: ...cable environmental laws rules and regulations This product was designed manufactured and made available with consideration to worldwide laws rules and regulations applicable to the product and the el...

Page 86: ...nated collection point for the recycling of electrical and electronic equipment The separate collection and recycling of your waste equipment at the time of disposal helps conserve natural resources a...

Page 87: ...D DRegulatory Compliances This appendix identifies the GoVault regulatory compliances The topics include Safety Standard Compliances on page 76 Electromagnetic Compatibility EMC Compliances on page 77...

Page 88: ...ECEE member nations IECEE International Electrotechnical Commission on Electrical Equipment IECEE for Mutual Recognition of Test Certificates for Electrical Equipment CB Scheme CB Scheme per IEC 60950...

Page 89: ...us EU member nations CE Emissions per CISPR 22 EN55022 and Immunity per CISPR 24 EN55024 Japan Voluntary Control Council for Interface VCCI VCCI South Korea MIC CISPR 22 and CISPR 24 Taiwan Bureau of...

Page 90: ...pplied Extra Low Voltage SEC for UL and CSA and Safety Extra Low Voltage for BSI and VDE if applicable Regulatory Agency Certifications GoVault is certified by the regulatory agencies and organization...

Page 91: ...dian Standards Association CSA 4 GoVault is certified under the CSA s Component Recognition Program CSA Standard C22 2 NO 950 International Electrotechnical Commission IEC 4 GoVault is classified for...

Reviews: