Initial Configuration
21
DXi4000
14
Review the settings you selected to make sure they are correct. If necessary, click
Previous
to return to a previous step to make changes
15
After you have confirmed all settings, click
Finish
.
A message appears stating that completing the setup will restart the system.
16
Click
Yes
to restart the system.
17
Disconnect the computer from the DXi4000. Reset the computer network settings
back to its default values.
18
Wait for the system to fully restart. This can take up to 30 minutes.
Continue with the next section to create a typical backup configuration.
Connecting the
Ethernet Cables
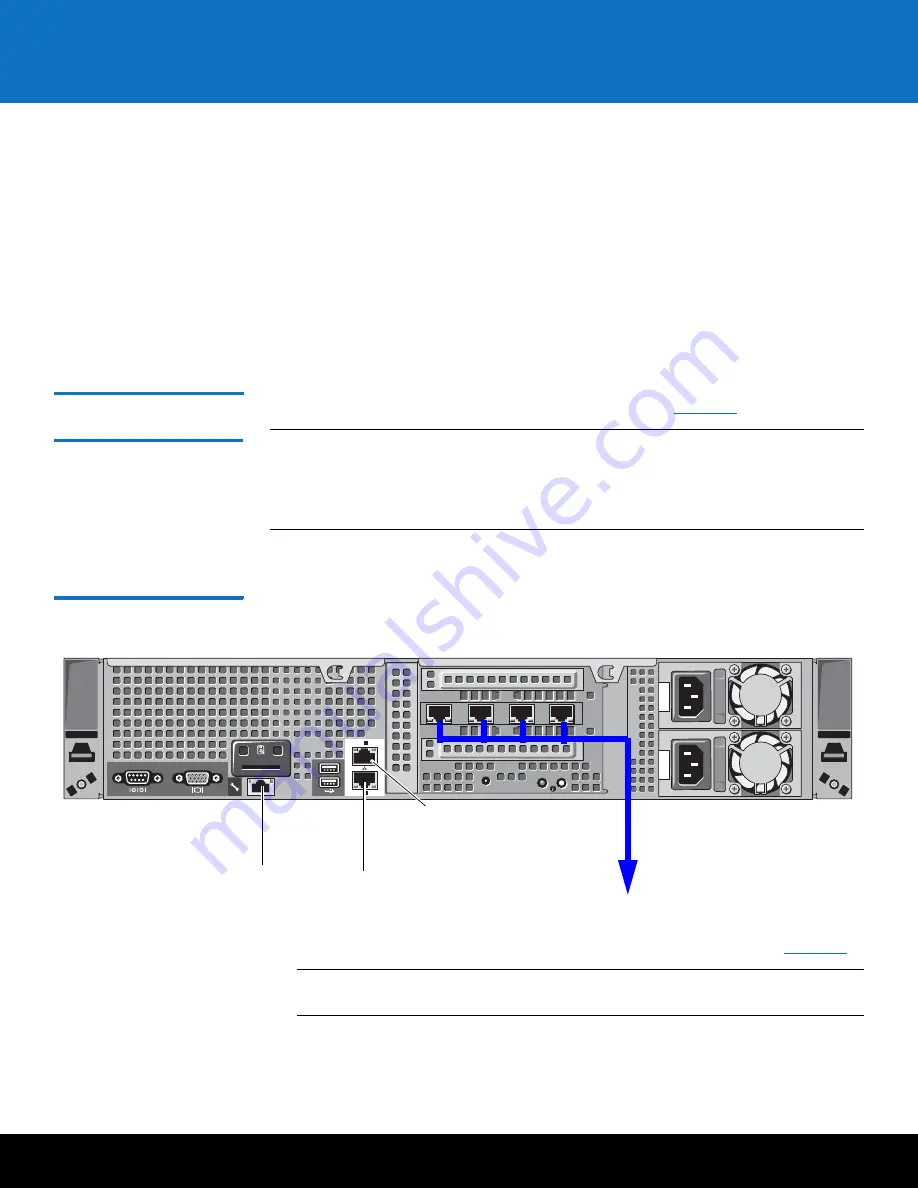
Connect the Ethernet cables to the DXi4000 as follows (see
Figure 17
).
Note:
The Ethernet cables are used for remote management and NAS connectivity.
Review the
DXi4000 Site Planning Guide
(6-67093) to determine the number of
Ethernet cables to attach. When connecting and disconnecting Ethernet cables
or making configuration changes, it is normal for the
Admin Alert
indicator to
display on the remote management console.
1
Connect up to four Ethernet cables to the quad port NIC (ports 2, 3, 4, and 5).
Figure 17 Connecting the
Ethernet Cables
2
Install a bezel on the front of the DXi4000. The bezel snaps into place on the front
of the DXi4000 to prevent the removal of the system from the rack (see
Figure 18
).
Note:
The keys that lock and unlock the front bezel are located in the accessory
kit.
ST
1
3
2
1
2
Gb
2
Gb
1
2
3
4
5
Ethernet ports
Service port (not
for customer use)
Not used
iDRAC port (not
for customer use)


