Troubleshooting
If the DCM Manager program is unable to communicate with the DCM hardware...
• Verify the USB cable connections. Re-seat each cable-end.
• Try a known-good USB cable, if possible.
• Confirm the USB port you are using is operating properly. Windows has provisions for checking hardware in the Windows Control
Panel. Refer to the Windows help system for more information.
• Cycle the power of both the PC and the DCM.
If there is no audio from the front panel Monitor Loudspeaker....
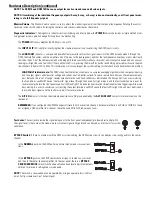
• Check the Monitor Volume control; it should be set to a useful level, not fully counter clockwise.
• Verify the desired active monitor source is selected by pressing the AMPS/PROC selector button and observing the illuminated LEDs
above channels selected for monitoring. Select or deselect your desired monitor sources.
• Try just selecting the center channel of the Cinema Processor input (select PROC, then select C using the front panel push-button con-
trols). If there is a center channel input signal connected to the selected input (Main if analog selected, Digital if digital selected) connec-
tor on the rear of the DCM, it should be audible now. If not, continue with the next step.
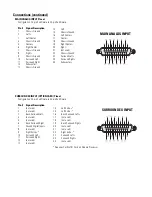
• Verify the connections of the Cinema Processor cable. This is the cable that connects the Cinema Processor’s outputs to the DCM’s
inputs. Make sure the Input Select Switch is set to the desired input. (Analog for Main Input, Digital for Digital Input). Re-seat each
cable-end and finger-tighten connector retaining screws.
• Make sure that an active film score is playing and the center channel output of the Cinema Processor is functioning.
• Make sure the jumper between the IN SPR screw terminal and the EXTERNAL SPKR + screw terminal is installed. Otherwise monitor
audio is only available on the EXTERNAL SPKR terminals.
• If the sound is audible, but all attempts to get it louder fail, connect the DCM to a PC running DCM Manager software and check the
Monitor Attenuation Levels settings on the Monitor Setting page. These settings have an attenuation range of 0 to -20 dB.
If no sound in the theater...
• Verify the Cinema Processor is providing active inputs to the DCM by monitoring the PROC inputs.
- If PROC inputs are active, then monitor the AMPS outputs (next step).
- If PROC inputs are not active, check the cable between the DCM and the Cinema Processor or the Cinema Processor itself.
• Verify the amplifiers outputs by monitoring the AMPS outputs.
- If no amplifier audio, check that the amplifiers are turned on and their gain controls are set to some useful level (not fully counter-
clockwise or minimum).
- Also check the DCM front panel LOAD FAULT LED; if it is illuminated, press and keep pressed the PROC/AMP button and an LED
will flash above any channel indicator that has an open or shorted loudspeaker cable. Use standard audio troubleshooting tech-
niques to isolate which of the amplifier channels may have the fault.
- If the LOAD FAULT LED is not illuminated, switch the BYPASS switch to the EMERGENCY position and verify center channel audio
is present. If it is, you know that the cables, amplifier, and loudspeaker for the center channel are okay. If you switch this back and
still have no sound, check the DCM configuration file for proper signal routing using the DCM Manager software.
If one audio channel is missing ...
• Verify the amplifier for the respective channel is on and its gain controls set to a useful setting.
• Verify the DataPort cable for the respective amplifier is seated properly and secured to its respective connectors.
• Verify none of the channels are muted in the DCM configuration. Connect with the DCM Manager software and upload the configura-
tion to the host PC. See if the Speaker settings pages show any channels muted; correct any settings as required. Check the configuration
for proper signal routing.


