&KDQJLQJ
%RRNOHW)RUPDW
4064'2&%RRNOHWPDNLQJ6\VWHP8VHUV*XLGH
5
Turn the dial clockwise to lock the paper size guide.
6
Repeat steps 1-6 for the other two paper size guides.
»
Note:
If you are setting up the tray for 11"x17" (ledger), the left
paper guide is stored in a slot near the front section of the tray.
7
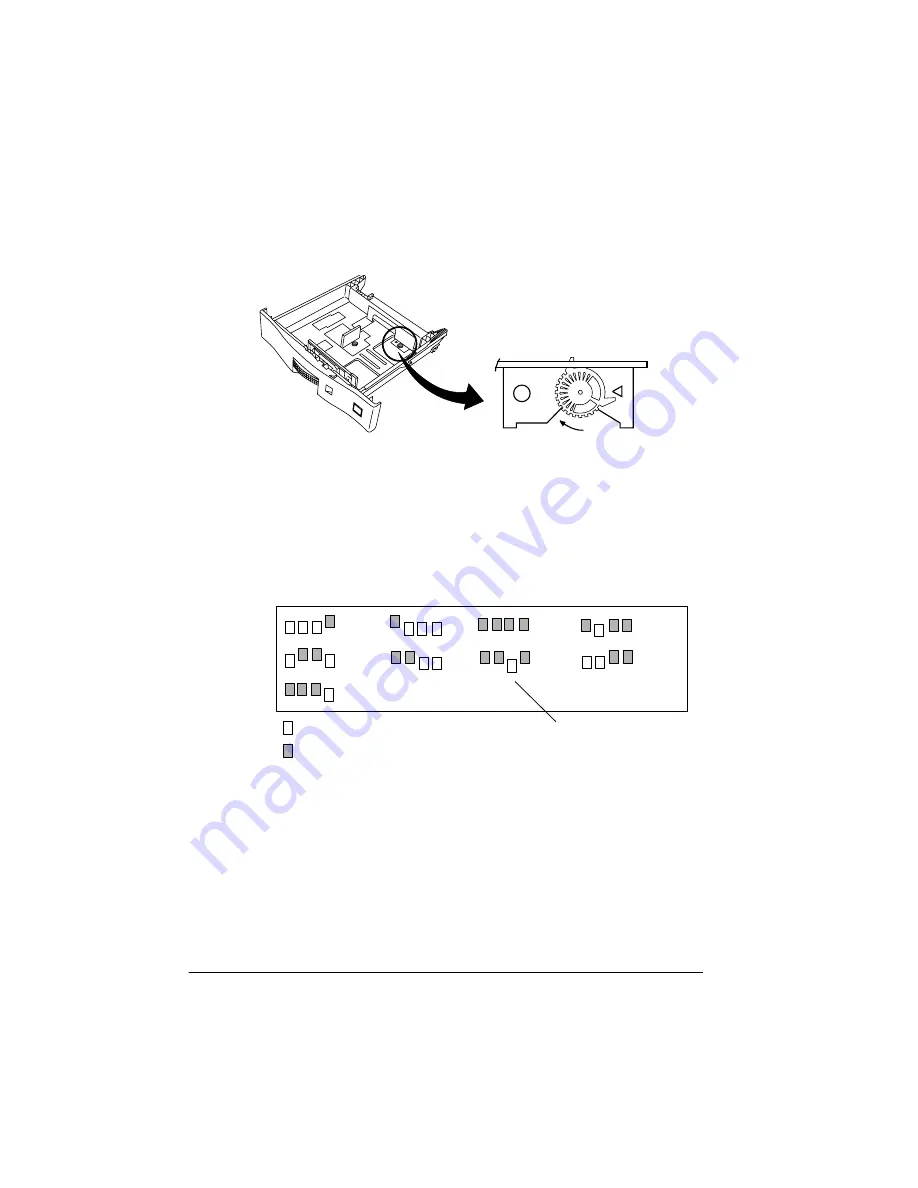
Set up the tray paper size tabs on the rear of the paper tray.
Use the following chart for reference or the label attached to the
paper tray.
8
6HWWLQJ8SWKH3DSHU6L]H,QGLFDWRU
1
Open the plastic bag in the QMS 4060 starter kit containing
the paper-size cards.
LTR
CL
O
S
E
OPE
N
LT
R
:A5
:A4
:A3
:B5
:B4
:LTR
:LGR
:LGL
:EXEC
- Tab is pushed forward
- Tab is pushed backward
6HWWKHWDEVOLNH
WKLVIRU[
SDSHU
Summary of Contents for QDOC
Page 1: ...k k 3 k bk p p...
Page 9: ...QWURGXFWLRQ Q 7KLV KDSWHU Introduction on page 1 2 Standard Product Documentation on page 1 5...
Page 32: ......
Page 46: ......
Page 122: ......
Page 140: ......
Page 141: ...2SWLRQV Q 7KLV KDSWHU Introduction on page 7 2 Stapler Head on page 7 2...
Page 143: ...6WDSOHU HDG 2SWLRQV 3 Open the cover RYHU...
Page 154: ......
Page 172: ......


