Psion 8585/8595 Vehicle-Mount Computers User Manual
Chapter 4: Installing The Computer
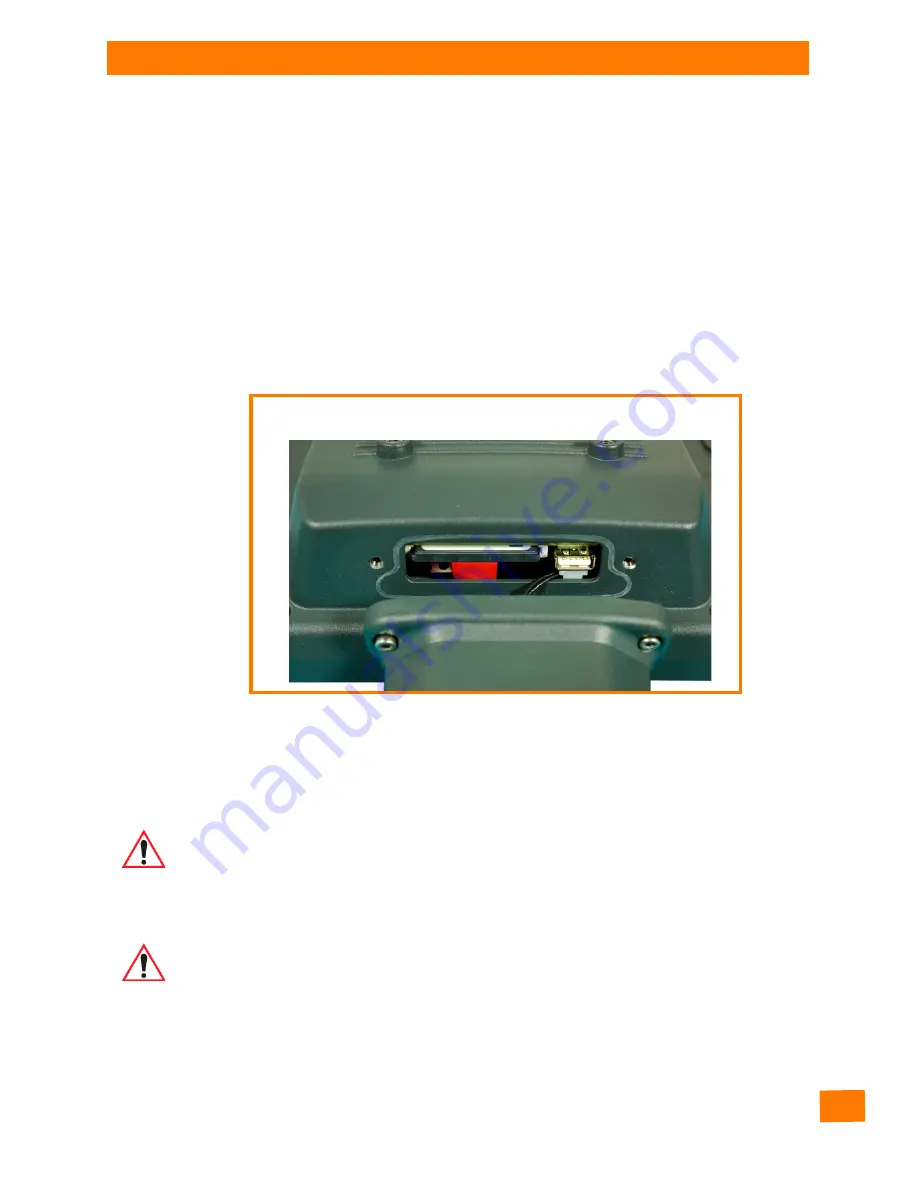
Antenna Cap and Service USB Interface
31
Figure 4.3 Service USB under the antenna cap
Unfasten antenna cap from unit and refasten it:
1.
Unscrew the two screws from the antenna cap with an Allen key (size 3 mm).
2.
Lift the antenna cap carefully to avoid pulling on the antenna connection cables (max. 2 to 3 cm).
3.
Holding the antenna cap, making sure that no pulling tension is exerted on the antenna connec-
tion cables.
4.
The Service USB interface is now accessible.
5.
Place the antenna cap back onto the 8585.
6.
Reinsert and tighten the two screws of the antenna cap (1 Nm torque).
Caution:
Property
Damage
Incorrect or improper removal and fastening of the antenna cap can impair the function of the
entire 8585 system. These actions, or if the 8585 is operated with the antenna cap/service
USB interface open for a longer period of time than required for service tasks, will invalidate
any warranty provided by Psion Inc.
The service USB interface may only be used for maintenance purposes, e.g. to load software
updates.
The antenna cap/service USB interface may only remain open for the duration of the service
work. It may only be opened and closed by qualified technical personnel.
No objects or fluids may be introduced into the 8585 while the antenna cap and the USB
interface are open.
Only when the antenna cap/service USB interface is properly closed again may operation be
resumed; protection class is then ensured again.
Do not pull the antenna connection cable too far out of the unit, catch it, or cut it.
Caution:
One end of the antenna connection cables is attached to the antenna cap, the
other end to the internal WLAN unit of the 8585. The cables must not be pulled
out of the 8585 too far and become detached from the WLAN unit! This might
damage the WLAN unit or other components of the device.
Caution:
Take care not to trap the antenna connection cables when doing this.
The antenna cap seal must not be damaged; it must be seated correctly in
the groove.
Summary of Contents for 8585
Page 4: ......
Page 10: ......
Page 12: ...2 Psion 8585 8595 Vehicle Mount Computers User Manual...
Page 16: ......
Page 26: ...16 Psion 8585 8595 Vehicle Mount Computers User Manual...
Page 36: ...26 Psion 8585 8595 Vehicle Mount Computers User Manual...
Page 42: ......
Page 44: ...34 Psion 8585 8595 Vehicle Mount Computers User Manual...
Page 52: ......
Page 54: ...44 Psion 8585 8595 Vehicle Mount Computers User Manual...
Page 58: ...48 Psion 8585 8595 Vehicle Mount Computers User Manual...
Page 62: ...52 Psion 8585 8595 Vehicle Mount Computers User Manual...
Page 102: ......
Page 106: ......


