background image

49

  Power Management

  Rear

  Remote Control

To reduce power consumption and maintain life cycle of lamp, the power management function will turn 

off the projection lamp after your projector has been idle for a period of time.  Available options are: 

Ready .........  

The lamp 

turns on again if an input signal is connected or any key on the rear panel and remote 

controller is pressed during this period of time. 

Power off .... The projector shut down after the lamp is fully cooled down. 

Off ...............Disable the power management function. 

Timer .......... Once the input signal is interrupted and no keys has been pressed for 30 seconds after-

wards, the “No signal” message displays in the timer.  The timer counts down until the 

lamp turns off.  Press arrow key to set up the timer in range of 1~30 minutes. 

Ready countdown ..... Set up the interval from ready mode change to standby (0 to 30 minutes) au-

tomatically. A setting of zero minute keeps your projector from auto transition.  

Press the Power key to change your projector from ready to standby mode and 

any other key to power it on.

side of projection screen. 

Remote Control

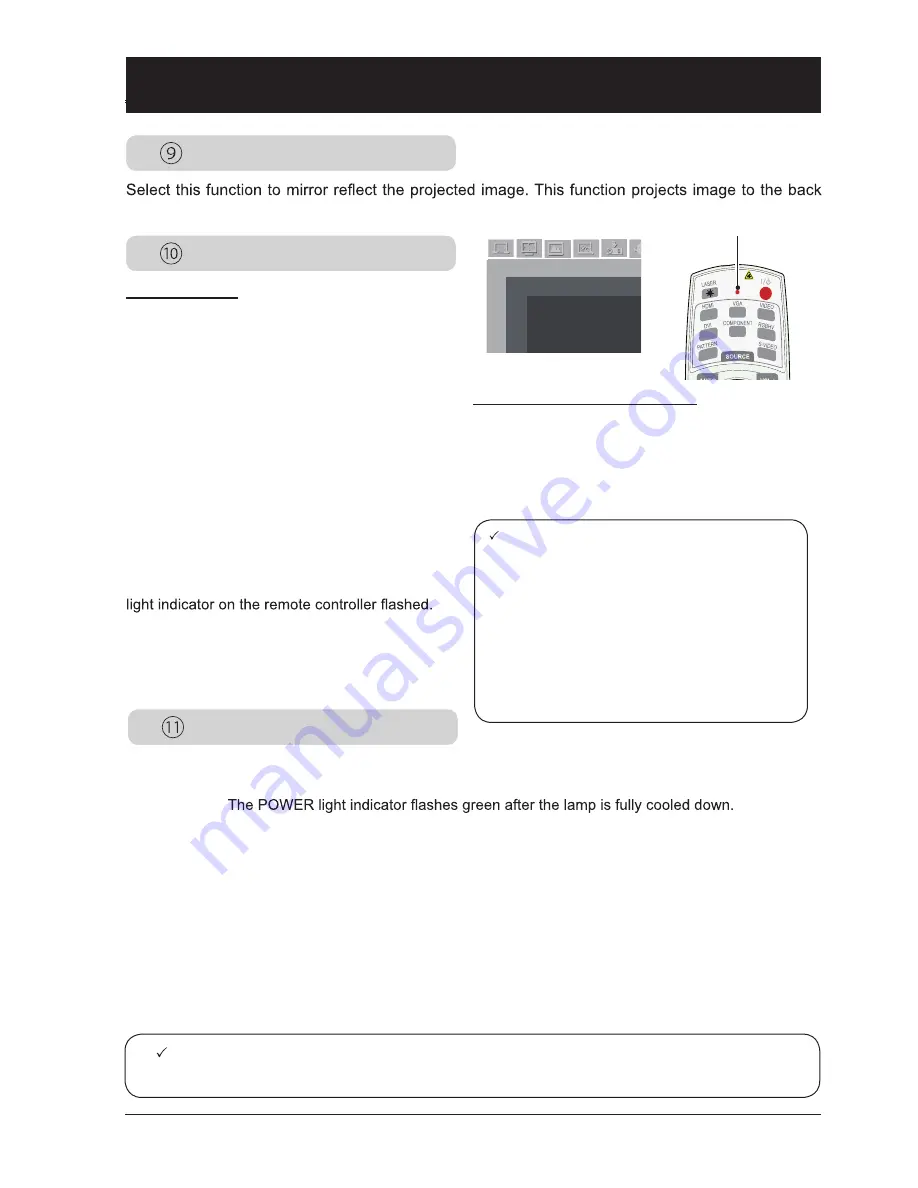
Select this function to prevent one remote con-

troller from interfering multiple projectors. 
Your projector comes with 10 remote controller 

code (0-9) with default code at “0”.
Your projector and the remote controller must 

be paired with the same code. For example: For 

a projector set to be operated by code 7, then 

the remote controller for controlling it needs be 

set to code 7 as well.
Change code of your projector:  

Select Remote Control in the Setup menu. 
Change code on remote controller:  

Press and hold the OK key and one of the num-

ber key for 5 seconds to set the code to that 

number.  The code is set successfully when the 

 Note: 

Factory default for standby time: 5 minutes.  Count down for ready mode: 0 minutes. 

 Note: 
 

No control operation is available if your 

projector and the remote controller is in dif-

ferent remote control code.  You may have 

to change the remote control code on both 

devices to pair with each other in case like 

this. 


The remote control code will be reset if 

battery of the remote controller is removed 

for long time.

设置

Setting

Remote Control
Sensor for the remote controller

Remote Control

Lamp

Sensor for the remote controller

Set up the sensor when operating your projector 

with remote controller. 

Front ......Select the front sensor. 

Rear .......Select the rear sensor.

Both .......Select the front and rear sensors.

Setting

Summary of Contents for M1010X

Page 1: ...ures shown in this document may differ slightly from your product Changes to this manual may be made without notice LCD Multimedia Projector Model M1010X M1020W Manufacture Address 1250 E 223rd Ste 114 Carson CA 90745 PROXIMA DISPLAYS INC ...

Page 2: ...al to check your operation and connections and try solutions given in the Troubleshooting section at end of this manual If the problem persists call your dealer or our service center Your projector s lamp is a consumable and will get dimmer after long term use It s normal for an older lamp to be dimmer than a newer one Please power on and off your projector by strictly following steps given in Pow...

Page 3: ... use accessories without recommendation by the manufacturer as it may result in potential risks Warning Precautions on air outlet below for the least clearance requirements The least clearance is a MUST when your pro jector is placed within a cabinet or other closed environment 0 7 20cm 1 5 50cm 3 1m 3 1m Sides and bottom Rear DO NOT cover the air outlet of your projector Poor ventilation not only...

Page 4: ...y be damaged by contact with oil or chemicals DO NOT place your projector near exhaust pipe or air conditioning equipment DO NOT place your projector near radiator or heating pipes DO NOT place your projector atop unstable truck rack or table It may fall of the surface and lead to personal injuries and property damages Please use cart or rack recommended by the manufacturer or included with your p...

Page 5: ... in your projector c Your projector exposed to rain or water d If your projector fails to work as expected by following operation instructions adjust it ac cording to given instructions Other invalid operations may damage your projector which requires the technician to spend more time before returning it back to normal e The projector falls off to ground or its casing is damaged f In case of any a...

Page 6: ...e flammable materials or sprayers near your projector Keep the air outlet one meter away from other objects DO NOT touch the area close to the air outlet especially the metal components e g screws This area and parts will get very hot once your projector starts op erating DO NOT place any object atop your projector They may not only be dam aged but also lead to fire after being overheated Cooling ...

Page 7: ...O NOT place your projector as illustrated above DO NOT tilt your projector more than 20 degrees 20 0 20 0 Note Enable the Ceiling function if flip over screen is required Safety operation guideline Note Precautions on ceiling mount racket installation Get qualified technician to install the ceiling mount racket Warranty of your projector does not cover hazards and damage caused by using ceil ing m...

Page 8: ...er personnel from shipping your projector with improper boxes Your projector may become damaged Please consult your dealers for shipping your projector by express or other shipping service providers Place your projector in box only after it has been fully cooled down Moving your projector When moving your projector close its adjustment legs as they may damage the lens and casing Keep your projecto...

Page 9: ...may get hurt DO NOT let children touch the lens Precautions on dealing with your projector DO NOT lift or move your projector by holding the lens or projecting decoration ring as it may dam age the lens and your projector Be careful when handling your projector DO NOT drop it subject it to external forces or place ob jects atop it DO NOT hold the lens or area around it ...

Page 10: ...t source selection VGA RGBHV 33 Input source selection HDMI DVI 33 System selection 34 Auto PC Adjusting 35 Manual computer adjustment 36 Image mode selection 37 Image Adjust 38 Screen size adjustment 39 Input signal source VIDEO signal 40 Image mode selection 42 Image Adjust 43 Screen size adjustment 44 Setting 45 Language 45 OSD Setting 45 Auto Setup 46 Keystone 47 Blue Back 47 Display 47 Logo s...

Page 11: ...Overview This chapter presents names and functions of individual component ...

Page 12: ...your projector is in standby mode It turns steady green when your projector is in normal operation It flashes green when your projector is in power control mode standby mode STATUS light indicator It flashes red when internal temperature of your projector is out of operation range FILTER light indicator It turns red when the filter needs be replaced Lens release button 1 2 3 4 5 6 ...

Page 13: ...t mode BLANK key Dark out screen images temporarily MENU key Open or close the OSD menu LENS SHIFT key Enter the lens moving mode ENTER GEOMETRY key Enter the OSD menu or select options in a menu INPUT key Select source of input Air outlet Adjustment pad Note Air outlet emits hot air DO NOT place heat sensitive objects near it 1 3 4 5 6 10 9 7 8 360 2 141 7 VOL VOL AUDIO AUDIO IN2 AUDIO IN1 AUDIO ...

Page 14: ...put signals to this port AUDIO port Connect audio signal from to this port MONO L R port Connect audio signal from to this port AUDIO IN1 AUDIO IN2 port Connect audio signals for device to AU DIO IN1 Connect audio signals for device to AU DIO IN2 AUDIO OUT port equipment SERIAL port Connect serial cable to this port when using RS232 device to control or operate your projector REMOTE IN port Connec...

Page 15: ... source VIDEO key Select VIDEO input source RGBHV key Select RGBHV input source S VIDEO key Select S VIDEO input source COMPONENT key Select Component input source Arrow key Select items or adjust values in the OSD menu Select display area in digital zoom mode AUTO key Enter auto adjustment mode OK key Enter the OSD menu or select options in it MENU key Open or close the OSD menu VOLUME key Increa...

Page 16: ... Wired remote controller output port Connect cable of wired remote controller to this port when the latter is used for operating your projector 30 30 5 m Remote controller operation range Point your remote controller to the IR receiver of your projector Maximum operation range of your remote con troller is an area of radius 5 meters and arc 60 in front of and behind your projector Name and functio...

Page 17: ...r LR6 alkaline batteries Replace both batteries at the same time Do not mix new and old batteries in one pair Keep your remote controller away from water or other liquids Do not expose your remote controller to environments with high humidity or tempera ture Do not drop your remote controller In case of any battery solution leaking in the compartment clear it thoroughly before placing new batterie...

Page 18: ...sure the lens is fully inserted in your projector 4 Turn the lens clockwise and replace its decoration ring Installation Lens installation Please follow steps given below to install lens after its replacement or when optional ones are employed Please consult your dealers for details on optional lenses Lens release button Note Be careful in removing the lens Do not drop it Note Do not press and hol...

Page 19: ... of your image may be moved leftward a distance up to 10 of the width of the image Move lens to it leftmost position The projection location of your image may be moved rightward a distance up to 10 of the width of the image Move lens to it rightmost position Scope of lens movement adjustment 50 10 Center the lens Movement range Installation Lens movement adjustment The electric lens movement funct...

Page 20: ...t Shortest Longest 30 64 0 40 4 80 9 132 1 100 215 4 134 6 280 0 451 5 150 323 1 201 9 422 2 679 6 200 430 8 269 2 564 5 907 7 300 646 2 403 9 848 9 1364 0 Installation 300 609 6x457 2cm 200 406 4x304 8cm 150 304 8x228 6cm 100 203 2x152 4cm 30 64 0x45 7cm 76 8cm 266 5cm 402 0cm 537 4cm 808 3cm 4 3 Screen size Setup distance Diag X Width Height Shortest Longest 30 64 0 45 7 76 8 125 6 100 203 2 152...

Page 21: ...o not use any other type of power cords or you may face the risks of electric shock In case you have any doubt on type of power cord you are using please call authorized dealer or service center for help Before powering on your pro jector get all external equipment connected in advance Keep your AC power socket close to your projector for easy plugging and unplugging Note Note Use of invalid power...

Page 22: ...pment before connecting any wire to them Connection to equipment Ports on your projector Connection wire Equipment DVI D HDCP DVI wire HDMI HDMI wire R PR G Y B PB H HV V BNC wire COMPUTER IN COMPUTER OUT VGA wire RS232C RS232 control cable Ports on your projector Connection wire Equipment S VIDEO IN S VIDEO wire VIDEO IN VIDEO wire R PR G Y B PB H HV V BNC wire Lors du branchement de câble débran...

Page 23: ...uipment Unplug power cord of your projector and all external equipment before connecting any wire to them Connection to equipment Ports on your projector Connection wire Equipment MONO L R Audio wire AUDIO IN Audio wire AUDIO IN OUT Audio wire AUDIO DVI D REMOTE IN OUT Audio wire ...

Page 24: ...Operation This chapter introduces you to basic operation of your projector ...

Page 25: ...d is invalid the password dis played as will be in red Please try again with a valid one Note In case the Logo Select option is set to OFF then no welcome image will display in screen You can do nothing but powering off your projector during the welcome image is displaying What is a password PIN A password PIN is an ID code for identifying people with knowledge about it to oper ate your projector ...

Page 26: ...t use your projector without stop as it may hurt the life cycle of your lamp Power off your projector at least once every 24 hours and have it idle for an hour Power off Power off message disappears in 4 seconds Note If the On Start option is set to On your projector will power on once it is connected to an AC power socket Speed of the cooling fan varies with internal temperature of your projector...

Page 27: ...el Leftward or right ward 10 3 Press and hold the LENS SHIFT key on the rear control panel or remote controller for 5 seconds to home it to the center position Auto setup function Press the AUTO key on your remote controller the function is now enabled to auto execute settings given in the Auto Setup menu includ ing Auto Searching Auto PC Adjusting and Auto Keystone Zoom focus Lens movement 设置 1 5...

Page 28: ... settings for keystone adjustment H V keystone adjustment Press arrow key to narrow upper part of the image Press arrow key to narrow lower part of the image Press arrow key to reduce height to the left Press arrow key to reduce height to the right Corner key stone adjust ment Press arrow key to adjust keystone distortion at the upper left corner Press arrow key to adjust key stone distortion at t...

Page 29: ...om for WXGA model Image Select menu Available options in the Image Select menu are Dynamic Normal Cinema Blackboard Green Colorboard or User Image Image Adjust menu For computer input the computer screen adjustment options are Contrast Brightness Color Temp White Balance Red Green Blue Sharpness Gamma For video input the computer screen adjustment options are Contrast Brightness Color Tint White B...

Page 30: ...select one main menu item Press arrow key or OK key to enter a submenu 3 Press arrow key to select desired sub menu then press OK key or arrow keyto set up or enter an option 4 Press arrow key to select settings or navigate options then press OK key to act on the item and exit 5 Press arrow key to return to mainmenu Press the MENU key on remote controller to exit the OSD Arrow key OK key Menu key ...

Page 31: ... key again to stop timing Press the TIMER key again to disable the tim ing function 02 02 Timer display Freeze key FREEZE Press the FREEZE key on remote control ler to freeze image on the screen Press the FREEZE key or any key to cancel the freeze function Blank key BLANK Press the BLANK key on remote controller a blank screen displays to replace existing image Press the BLANK key or any other key...

Page 32: ...OSD displays Press arrow key select the input icon press arrow key or OK key to enter the Input menu 2 Press arrow selection 360 2 141 7 VOL VOL AUDIO AUDIO IN2 AUDIO IN1 AUDIO OUT S VIDEO VIDEO R C IN R C OUT RS 232C DVI D P PR MONITOR OUT VGA IN G Y B PB H HV V INPUT key OK key VGA key HDMI key RGBHV key OK key DVI key 设置 输入源 HDMI 1 DVI VGA COMPONENT S VIDEO VIDEO RGBHV 系统 信号格式 Auto Input menu N...

Page 33: ...lect input DVI if a device is connected to the DVI terminal with a DVI cable Select input RGBHV if a PC is connected to the BNC terminal with a BNCx5 cable Input signal source computer Input source selection VGA RGBHV Input source selection HDMI DVI Note If the Input Search option in the Auto Setup function is set to On your projector will search for input signals automatically ...

Page 34: ...eces sary adjustment to your projector to project valid images If images are displayed incorrectly adjust it manually No PC signals detected Check the connection between PC and your projector 设置 输入源 HDMI 1 DVI VGA COMPONENT S VIDEO VIDEOZ RGBHV 系统 信号格式 Auto VGA system menu The selected system displays in the PC system menu Select the computer system manually 1 Press the MENU key on remote controll...

Page 35: ...to PC choice Note Total Dots Horizontal and Vertical position of certain computers may be fully adjusted by the Auto PC Adjusting function In case the post adjustment image still looks incorrect adjust it again manually The Auto PC Adjusting function will be disabled once 480i 575i 480p 575p 720p 1035i or 1080i has been selected in the PC system menu 设置 PC Adjusting Auto PC Adjusting Phase 16 Tota...

Page 36: ...cal position Press arrow key to adjust vertical position of image Clamp function Press arrow key to select Clamp Try this function to remove black strips in image Display area H Press arrow key to adjust horizontal projection area of your projector Display area V Press arrow key to adjust vertical projection area of your projector Reset Select Reset then press OK key to reset adjustments to its in...

Page 37: ...or viewing movies Blackboard Green An image mode designed for displaying on a blackboard Green It boosts quality of im age projected on blackboard Green This is designed for a board in green rather than black as indicated by its name Colorboard A image mode suitable for image projecting on surface of wall in red blue yellow or green User Image Default image mode set by users in the Image Adjust me...

Page 38: ...e 32 Sharpen 8 Gamma 8 Image Adjust Contrast Press arrow key to decrease contrast press arrow key to increase contrast Brightness Press arrow key to decrease brightness press arrow key to increase brightness Color Temp Press arrow key to select desired color temperature cold warm Mid Red Press arrow key to lighten red tint and key to darken it Green Press arrow key to lighten green tint and key to...

Page 39: ...ppears unavailable Adjust the horizontal ratio and the screen size is adjusted according to the aspect ratio Horizontal position Vertical position Adjust horizontal vertical position of image Global Save adjustment ratio applicable with all input Point to Global and press OK to display 设置 Normal True Wide screen Full screen Custom Digital Zoom Digital Zoom Screen your ratio settings The saved rati...

Page 40: ...select Component S Video or VIDEO then press OK key to select input source 360 2 VOL VOL AUDIO AUDIO IN2 AUDIO IN1 AUDIO OUT S VIDEO VIDEO R C IN R C OUT RS 232C DVI D P PR MONITOR OUT VGA IN G Y B PB H HV V INPUT key OK key Component VIDEO S VIDEO OK key 设置 Input icon HDMI 1 DVI VGA Component S VIDEO VIDEO RGBHV 系统 信号格式 Auto Input Select menu Component VIDEO S VIDEO Select Component when a video ...

Page 41: ...3 PAL M PAL N If image cannot be displayed correctly you may need to select one from PAL SECAM NTSC NTSC 4 43 PAL M and PAL N for playing VIDEO system menu VIDEO or S VIDEO VIDEO system menu component Input signal source VIDEO signal 设置 输入源 Auto PAL SECAM NTSC NTSC4 43 PAL M PAL N 系统 信号格式 视频 设置 输入源 Auto PAL SECAM NTSC NTSC4 43 PAL M PAL N 系统 信号格式 视频 设置 Auto 1080i 1035i 720p 576p 480p 576p 480i 输入源...

Page 42: ...board Red User Image Image mode Dynamic An image mode suitable for viewing in bright rooms Normal The default image mode of your projector Cinema Vivid image mode Blackboard Green Improve quality of image projected on blackboard Green This is designed for a board in green rather than black as indicated by its name Colorboard A image mode suitable for image projecting on the surface of a wall in re...

Page 43: ...e it Tint Press arrow key to adjust image to desired tint White balance Red Press arrow key to lighten the red color and key to darken it White balance Green Press arrow key to lighten green tint and key to darken it White balance Blue Press arrow key to lighten the blue color and key to darken it Sharpness Press arrow key to soften image and to sharpen it Gamma Press arrow key to adjust gray scal...

Page 44: ...o the aspect ratio Horizontal Vertical position Adjust horizontal vertical position of image Global Save adjustment ratio applicable with all input Point to Global your ratio settings The saved ratio will be used when Custom is selected by user Reset Reset your adjustments to its initial status Point to Reset and reset Input signal source VIDEO signal Screen size adjustment Your projector comes wi...

Page 45: ...ow Upper left upper right center lower left Lower right upper left Translucency Change translucency of OSD menu Press key to select Off High Medium or Low Background Color Change background color of the OSD menu Press key to select color in code 0 6 Setting 设置 Setting 1 3 Language English OSD Setting Auto Setup Keystone Blue Back open Display open Logo Screen Ceiling mount Close Rear Close Remote ...

Page 46: ...ng On Press the AUTO key on remote con troller to enable the Auto PC Adjusting function Off Disable the Auto PC Adjusting function Auto Keystone Off Disable the Auto Keystone function Auto Execute auto keystone adjustment ac cording to inclination of your projector Manual Press the AUTO key on remote control ler to enable this function Note Your projector detects only the input source you selected...

Page 47: ...one at lower right corner key to adjust keystone at lower left corner Select this function to save or reset keystone adjustment of projection after your projector is dis connected from AC power Press arrow key to navigate available options Blue Back Display Set default background color of your projector when no signals are detected Press arrow key to navigate available options On Enable blue proje...

Page 48: ...yped the 3 diit number Press ENTER key If the password is invalid the password displayed as will be in red Please try again with a valid one After you have entered valid logo screen PIN code you may press key to toggle switch Off and On Logo PIN Code change You may change the Logo PIN Code to any 3 digit number you like Press ENTER key to select Logo PIN Code change The Logo PIN Code change dialog...

Page 49: ...to prevent one remote con troller from interfering multiple projectors Your projector comes with 10 remote controller code 0 9 with default code at 0 Your projector and the remote controller must be paired with the same code For example For a projector set to be operated by code 7 then the remote controller for controlling it needs be set to code 7 as well Change code of your projector Select Remo...

Page 50: ...d by OSD and Timer display Lamp Control Test Pattern On Start Standby Mode Set this option to On to power on your projector automatically when it is connected to an AC power source Select this function when operating your projector through network ECO Select ECO mode when your projector is operated not through network The Network RS232C and MONITOR OUT function will be disabled once your projector...

Page 51: ...key and the Logo PIN Code change popup dialog box prompts Enter the code Press arrow key to select a number press arrow key to enter it and move the cursor The num ber you typed is displayed as To edit number you have entered press key to move the cursor to the number you want to change press arrow key to select the correct one Repeat this step to type in a 3 digit number Move the cursor to OK aft...

Page 52: ...y Default 设置 Setting Filter counter 1hour Timer 200hour Reaet the filter counter Filter counter Timer Filter cleaning cycle after is has been cleaned Note Set this function to On when your projector is in use in environment of altitude above 1400 meter Filter counter You may set up fan control function in the Setting menu Set up fan speed according to the altitude your projector is operating Off N...

Page 53: ...Key Lock Input Display selected input and current signal format H sync Freq Display horizontal frequency of input signal in unit of KHz Show KHz when no signals are in existence V sync Freq Display vertical frequency of input signal in unit of Hz Show Hz when no signals are in existence The frequency Hz doubles in case of progressive display Screen Display selected screen mode Language Display lan...

Page 54: ...Maintenance This chapter describes the regular maintenance procedure of your projector to ensure its optimal operation status for long ...

Page 55: ... the following Is adequate clearance provided for your projector s ventilation Check the installation status and any air outlet block Is your projector installed at location close to outlet of air conditioning equipment Keep your projector away from air outlet of air conditioning equipment Is the filter in clean condition Please clean the filter regularly The status light indicator turns red and y...

Page 56: ...ch may lead to dusts accumulated on surface of internal components Clogged filter may reduce cooling fan effects which in turn will overheat your projector and shorten its life cycle Clean the filter immediately whenever the Filter Warning icon displays Please follow these steps to clean your filter 1 Power off your projector and unplug from AC power source 2 Remove the filter 3 Gently clean it wi...

Page 57: ...e Filter counter Filter counter Lamp replacement The lamp replacement icon displays when its use life dues Please replace it with a new one of the same model immediately The lamp replacement icon Lamp replacement Note Do not replace the lamp after it went dark as it may be broken Always assume the lamp of a ceiling mount your projector is broken when replacing it Stand beside the lamp cover instea...

Page 58: ...on take the following safety measures Disconnect your projector from power source immediately in case of lamp explosion Call authorized service center to inspect your projector and replace lamp Make a thorough inspec tion to ensure every piece of debris after explosion has been removed Remove every piece of debris after explosion No one else may inspect the internal of your projector except those ...

Page 59: ...Appendix ...

Page 60: ...s is a filter or lamp replacement alerts A non input or lamp mode icon displays This is a filter replacement alerts Image looks fuzzy Adjust focus of your projector Provide proper projection distance The projection lens requires cleaning Moving your projector from a colder environment to a hotter one may result in condensing on the lens If this is the case wait until the condensing water evaporate...

Page 61: ...Check input signal Auto PC Adjusting function in unavailable in 480p 576p 720p 480i 576i 1080i or 1080p mode Settings do not save after power off Make sure you have selected Store after settings adjustment Certain settings do not keep without selecting Store Power management failure In case of Freeze or Blank operation the power management function does not work Auto Setting does not work Make sur...

Page 62: ...r source and have been powered on If your projector fails to project image of the connected computer restart the computer Warning Avertissement Your projector employs high voltage power for operation Do not open its casing La haute tension est utilisée pour la marche de ce projecteur Interdire d ouvrir le coffret du projecteur If the problem persists call your dealer or service center Along with m...

Page 63: ...efore powering on your projector If it powers off again please unplug the cord and call your dealer or service center for maintenance or inspection Do not let it continue operating as this may lead to electric shock or fire Your projector detects lamp abnormality and cools down Your projector detects lamp abnormality and switches into standby mode Your projector cannot power on as its internal tem...

Page 64: ...A 1400x1050 60 1400x1050 75 UXGA 1600x1200 60 WSXGA 1680x1050 60 WUXGA 1920X1200 60 Component 480i 720x480i 60 576i 720x576i 50 483p 720x483p 60 576p 720x576p 50 720p 1280x720 50 720p 1280x720 60 1080i 1920x1080i 50 1080i 1920X1080i 60 Input Signal format Resolution Frequency Hz HDMI VGA 640x480 60 640x480 68 640x480 72 640x480 75 640x480 85 SVGA 800x600 56 800x600 60 800x600 72 800x600 75 800x600...

Page 65: ... Terminal HDMI Type A 19 1 2 4 6 8 9 7 5 3 10 12 14 16 18 19 17 15 13 11 1 TMDS Data2 11 TMDS Clock Shield 2 TMDS Date2 Shield 12 TMDS Clock 3 TMDS Date2 13 CEC 4 TMDS Date1 14 Reserved N C on device 5 TMDS Date1 Shield 15 SCL 6 TMDS Date1 16 SDA 7 TMDS Date0 17 DDC CEC Ground 8 TMDS Date0 Shield 18 5V Power 9 TMDS Date0 19 Hot Plug Detect 10 TMDS Clock DVI Terminal DVI D 24 1 TMDS Date 2 13 2 TMD...

Page 66: ...Description on network control operation ...

Page 67: ...You may set DHCP to Off and set up IP address manually if you are somehow familiar with networking 3 Enter the network setup menu 1 Press MENU key on remote controller or top of the control panel press key to select network icon 2 Press ENTER key or key and the network menu displays 3 Press key select network settings and press ENTER to 4 Press key to set DHCP On and 5 Press key to select OK press...

Page 68: ... 4 In the network menu select network setting status press OK check network IP address 5 Open a browser program e g IE on any computer in the LAN Enter the IP address you just 6 Set up options in the page including home page network control settings projector status and control reminder email settings and safety settings ...

Page 69: ...tatus and control Check projector s current status and change its settings Reminder email settings Set up your email address to get reminder email in case of projector failure Safety settings Users may change login password Default value is without password ...

Page 70: ...ne sont pas recommandées par le fabricant pour éviter le danger Aver ssement A en on sur le trou d aéra on Laisser de l espace au haut aux côtés et au derrière du projecteur pour le refroidissement et la radia on Dans le plan suivant les distances minimum sont indiquées Si le projecteur était posé dans l armoire ou d autres endroits pareils il faut assurer les distances minimum Haut et côté Derriè...

Reviews: