Manual: Orcabot XXL
Pro 2
version 1.0.1 Mar 2017
16
www.prodim-systems.com
6.2.2.
Slicing object(s) for Dual extruder mode
Dual extruder mode is in general equal to Single extruder mode. However there are additional other
settings. This mode we use to combine two colours or materials. If you want to print a product with
two extruders, the zero point (origin) of the two objects will have to be placed on top of each other
in the software. Ensure that the origin of both .stl files match before a
combination of the parts is made. As an example we use a cone in which
two different colors are combined.
Dual extruder mode steps:
1.
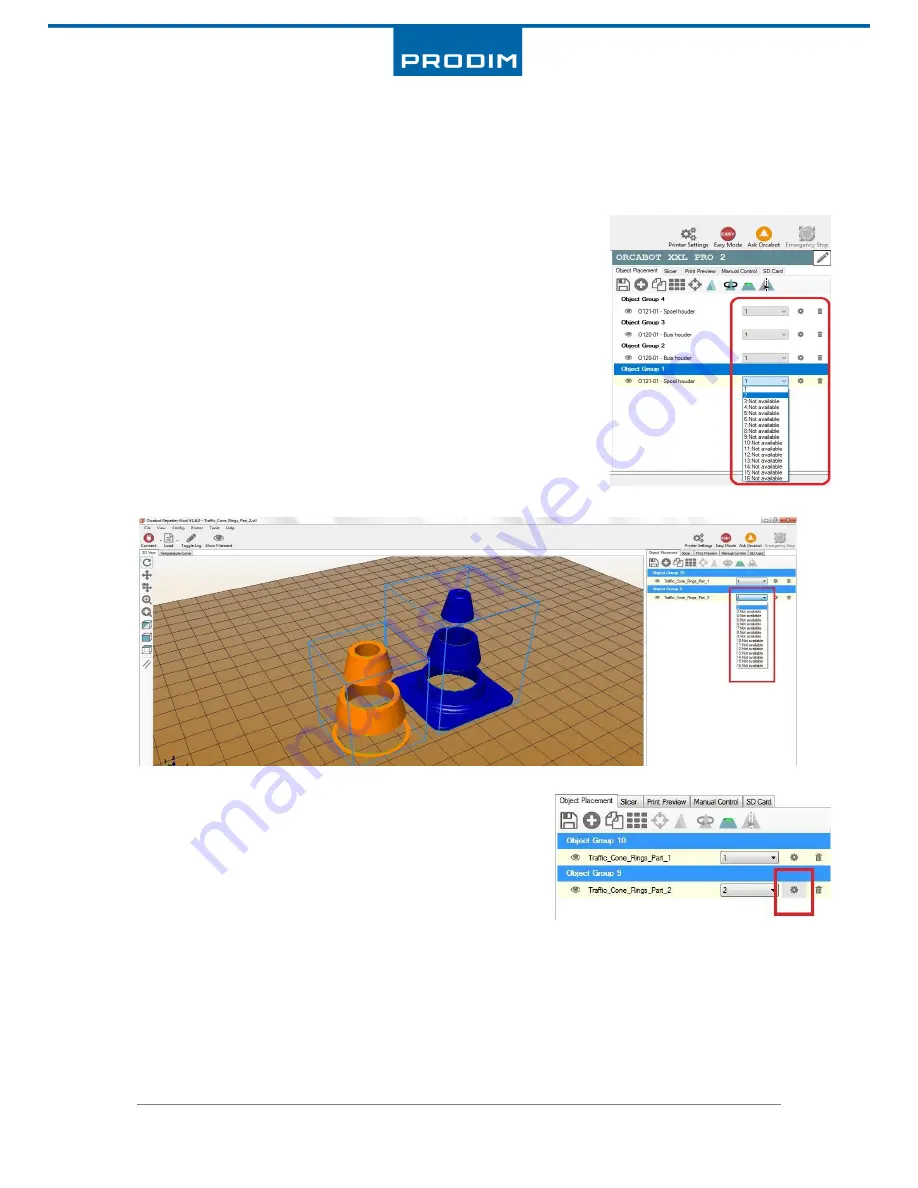
Place two or more objects on the (virtual) bed via tab “object
placement”
2.
Determine which print head (extruder) will print the object. See
picture right for selection of the print head. Assign the (2nd)
object to an extruder. In this example the second part of the
cone is assigned to “extruder 2”.
3.
Select in the Orcabot Repetier Host software the tab ‘’Slicer”.
4.
Choose the object you want to combine and click on
the small gear.
5.
A screen pops up in which objects can be grouped together. Select in the dropdown menu
the group to assign one object to another. After assigning an object to a group, the object
will be in the same group as object 1. This way you can overlay the zero points (origins) of
both objects on each other.
Grouping can be undone by clicking “exact from group”.
See next page for the example.


