background image


12

Shift / Throttle / Trim 


Your vessel can be ordered with different shift/throttle systems based upon motor type.  Refer to the owner's packet to 
find the manual pertaining to your particular installation.  Each motor has an individual tilt/trim switch located on the 
throttle lever.  Separate shift and throttle controls are available for each outboard motor. 


The throttle lever has three range positions:  “Forward”, “Neutral”, and “Reverse”.  The shift function occurs in the first 
portion of the lever travel.  After the transmission is shifted into gear, further movement of the lever advances the throttle. 


Push the throttle lever ahead to move forward and pull it back for reverse.  Centralize the lever to the detent position for 
neutral.  The throttle lever is equipped with a neutral safety switch to prevent the motor from starting in gear.  The initial 
short movement of the lever to engage the transmission should be made firmly to avoid causing gear clash. 


CAUTION:  Use care in shifting to avoid advancing the throttle more than intended.


Steering 

 
Steering systems will differ depending upon your selection of engine package.  Please carefully read the owner’s manual 
provided by the specific manufacturer.  Check your particular engine specifications for details specific to your engine 
package.  Always follow the engine manufacturer’s recommendations relating to the care and maintenance of their 
product. 
 

Mechanical – No Feedback 

When the steering wheel is turned, the helm pump pumps fluid to the steering cylinder causing it to extend or retract.  
Periodically, check the fluid level and fill as necessary.  Beware of adding too much fluid, especially if the ambient 
temperature is cold because subsequent expansion could cause leaking or damage to your system.  Refer to the owner’s 
manual that was provided by your engine manufacturer. 
 
 
After every 24 hours of operation check all nuts, caps, and hose fittings for tightness.  Make sure the hoses are not 
chafing or kinking on sharp corners.  Also, check that hose ends are not damaged or distorted.  The fluid should be 
changed annually under normal conditions and every six months during times of heavy usage.  If your steering does


not 

operate properly, check the following: 
 

 Drive 

entanglements 


Hoses and/or fittings for leaks 


Level of the hydraulic steering fluid (applies with 
optional Hydraulic steering 


Air in the steering system 

 
To properly check the steering system, start by turning the steering wheel port to starboard.  If the engine does not 
respond the same time as the steering wheel is being turned, this means that there is air in the steering system and the 
steering system needs re-bleeding.  When there is air in the steering, the steering wheel will feel “loose”.  Contact your 
dealer to have them bleed the steering system. 


Hydraulic Steering (Optional) 

This option is not available on all SE Series models.  Check your particular engine specifications for details specific to 
your engine package.  Always follow the engine manufacturer’s recommendations relating to the care and maintenance of 
their product. 
 

Power Trim 

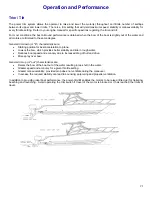
The power trim unit is located on the engine and can be operated by using the trim button on the engine or by using the 
trim toggle switch on the binnacle.  To ensure the power trim is working, start by pressing the toggle trim switch in the up 
position and trim the engine to the full up position.  Repeat the same process by pressing the trim toggle switch down and 
the engine will go into the full down position.  See the Trim and Tilt information in the Operations section of this manual. 


Steering Wheel 

The steering wheel is mounted at the helm along with the binnacle, switch panel and other controls.  Please refer to the 
Care and Maintenance section of this manual for cleaning recommendations. 


Summary of Contents for 2012 21 CC

Page 1: ...ual 21 CC 23 CC Specifications subject to change without notice Actual boats may vary from drawings and or photos Copyright 2012 Pro Line Boats Inc PO Box 457 Washington NC 27889 All rights reserved S...

Page 2: ...the Road 10 Alcohol 10 Controls Throttle and Shift Controls 11 Ignition Binnacle Fwd Neutral and Reverse Gear Operation 11 Key Switch Alarm 11 Lanyard Stop Switch 11 Shift Throttle Trim 12 Steering 1...

Page 3: ...in Plug 19 Cockpit Deck Drains 19 Half Dive Platform with Ladder 19 Bimini Top 19 Canvas T Top Optional 19 Seating 20 Vinyl Upholstery 20 Operation and Performance Trim Tilt 21 Propellers 22 Starting...

Page 4: ...33 Once A Month 33 Once A Year 33 Trouble Shooting Chart 34 Boat Identification Information 35 Some of the individual components listed in this owner s manual may not be available and or applicable f...

Page 5: ...wner s package to maximize your enjoyment and safety as well as familiarize yourself with your new boat We have prepared this manual to help you fully enjoy each voyage while operating your boat safel...

Page 6: ...2...

Page 7: ...l of the separately warranted equipment and accessories Discuss the terms of all warranties and emphasize the importance of registering each warranty with the specific manufacturers Repair any damages...

Page 8: ...d Warranty is attached to the warranty card After signing the warranty card your dealer will provide you with your copy of the warranty and mail the warranty card to Pro Line Boats Inc A copy of the P...

Page 9: ...hat is a result of normal wear and tear racing rental charter or military use abuse negligence vandalism lack of maintenance casualty loss or docking damage Alterations and modifications made without...

Page 10: ...d or replaced items are warranted as provided herein for the unexpired portion of the applicable warranty period ANY ORAL STATEMENT OR PRINTED ADVERTISING REGARDING ANY PERFORMANCE CHARACTERISTIC OF T...

Page 11: ...and convulsions Do not stand or swim near the motor when the engine is idling Carbon monoxide can harm and even kill you inside or outside your boat Did you also know CO symptoms are similar to seasic...

Page 12: ...Know where your engine and generator exhaust outlets are located and keep everyone away from these areas Never sit teak surf or hang on the back deck or swim platform while the engines are running Tea...

Page 13: ...e great lakes In addition here is a list of suggested equipment you should have aboard your Pro Line Binoculars First aid kit and blankets EPIRB emergency beacon Bailing device Mooring lines and fende...

Page 14: ...nd the International Rules The latter rules are applicable to all vessels inside the demarcation lines separating inland and international waters You may obtain a copy of the rules from any of the fol...

Page 15: ...y depending upon the engine package that was selected Key Switch Alarm The key switch alarm is located in the binnacle and sounds when the ignition key is turned on The key switch alarm is actually a...

Page 16: ...hat was provided by your engine manufacturer After every 24 hours of operation check all nuts caps and hose fittings for tightness Make sure the hoses are not chafing or kinking on sharp corners Also...

Page 17: ...p is not going to be used for an extended period of time the seacock valve should be in the closed position To activate the pump depress the switch to the up or forward position To turn the pump off a...

Page 18: ...manual provided by the manufacturer of the compass for operational procedures and for information related to the care and maintenance of their product When in doubt always defer to the compass manufa...

Page 19: ...n in the closed position Before turning the pump on from the helm check to be sure that the seacock is open The seacock is wide open when the yellow seacock lever is vertical When the yellow seacock l...

Page 20: ...g occurs the boat could swamp causing damage and possible loss of life or property Casting Deck with Storage Your boat is equipped with a casting deck with a storage box that can be used for your gear...

Page 21: ...mum Fuel tanks that are not kept full accumulate water faster due to condensation Therefore the filter cartridge may need to be replaced more often depending upon usage and conditions or if motor begi...

Page 22: ...nsure that the oil tank and hoses remain properly connected and secured If you notice a fuel odor or see fuel in the bilge there may be a leak somewhere in the fuel system Correct any fuel leaks befor...

Page 23: ...boat is sitting static in the water If you live in an area where it snows and you are storing your boat on a lift during the winter make sure that you remove the drain plug When the snow melts if the...

Page 24: ...ackrest are cushioned and covered with a durable vinyl An optional leaning post seat which is accessory ready is available on some SE Series models Vinyl Upholstery Please see the Service and Care sec...

Page 25: ...ition for best acceleration to plane Lowers the bow which provides better stability and ride in rough water Reduces boat speed and economy due to increased drag of hull and drive More spray over bow G...

Page 26: ...g a damaged prop could cause costly damage to your lower drive unit Starting Follow the information in your engine manual if it deviates from the following instructions Before Starting the Engines Ven...

Page 27: ...e to ventilate if fumes are present Loading The performance of any boat is contingent upon the amount of load carried Reduce the load to permit safe operation in rough and adverse conditions Heavy loa...

Page 28: ...port left side of your trailer to insure it has an adequate gross vehicle weight rating GVWR for the combined boat and trailer The tow vehicle must be capable of handling the weight of the trailer boa...

Page 29: ...a wide berth when negotiating corners Prior to operating on the road practice turning backing up etc on a level un congested parking area Make certain that water from rain or cleaning has been removed...

Page 30: ...a sufficient distance from the ramp so that others may use it Retrieval The steps for removing your boat from the water are basically the reverse of those taken to launch it However keep in mind that...

Page 31: ...eave power buffing to a professional The gelcoat on your Pro Line is approximately 25 mil thick Minor scratches and deep stains that do not penetrate the gelcoat can be lightly wet sanded with 600 gri...

Page 32: ...for cleaning gelcoat Never use any harsh chemicals abrasive cleaners or any hard objects as they will damage the graphics Be sure to read the manufacturer s directions carefully before using any prod...

Page 33: ...g the boat and should be hand washed and dried often This area is likely to be the first place that staining or pitting occurs Additional information from Taco Metals is included in your owner s packa...

Page 34: ...ough cleaning will be needed every two to three years When it s time for a thorough cleaning Sunbrella fabrics can be cleaned while still installed on your boat It is important to observe the followin...

Page 35: ...zinc anode to mitigate the effects of electrolysis which causes corrosion Maintain this anode in accordance with the maintenance schedule in your engine manual Winterizing and Storage Your new Pro Li...

Page 36: ...or use on brass copper stainless steel chrome silver gold pewter nickel factory gun bluing bonze platinum tin aluminum magnesium anodized aluminum painted surfaces fiberglass Plexiglas and plastics Fl...

Page 37: ...oses for burned cracked or deteriorated sections All rubber hoses should be pliable and free of kinks Clean the bilge and all bilge components with a mixture of bleach and water Then follow up by mist...

Page 38: ...ive unit Entangled in lines or weeds Anchor is down Prop cavitates Trim out too far Motor is too high Weeds on prop Bow heavy damage to hull Prop is damaged Excessive vibration Propeller engine or dri...

Page 39: ...arance Hull Deck Interior Warranty Registration Date Fuel Capacity Gallons Ignition Key Other Key Other Key Radio Call Letters Bat Engine Make Model HP Port Engine S N Port Drive S N Center Engine S N...

Reviews: