16
Bilge Pump
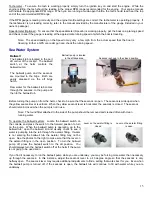
The bilge pump and float switch are installed as far aft as possible in the bilge and both are accessible via the hatch
installed in the motor well. There are 2 steps in properly checking the bilge pump. First, turn the bilge pump on at the
instrument panel by pressing the bilge pump switch to the on or forward position. When the bilge pump switch is in the on
position, the switch light should be illuminated. To check and see if the bilge pump is operating, open the bilge hatch over
the bilge pump and listen to hear the bilge pump running.
Second, turn the bilge pump off at the instrument panel and check the bilge
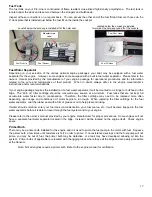
pump float switch. The bilge pump is equipped with an automatic float switch
(white box) that is mounted in close proximity to the pump. As long as your
boat is equipped with an operable battery, the pump will operate automatically
when water is present in the area. The float switch is equipped with two plastic
knobs located on either side of the switch. Turn either one of the knobs to
raise the float to engage the bilge pump. If the pump comes on, the automatic
float is operating properly. It is recommended that you check the operation of
each automatic float switch monthly.
If for some reason the indicator light on your bilge pump switch comes on, check your bilge for water. It is not uncommon
for rain water or water from washing your boat to accumulate in the bilge. Standing water will activate the automatic float
that is connected to the bilge pump. If you notice your pump running frequently during your day on the water, you should
check the thru hull fittings, hose connections, etc. for any possible leaks.
Keep the bilge area clean and free from debris that could clog ports or inhibit float movement. Also, keep the
House
battery that provides power to the bilge pump charged. If the battery is not charged and flooding occurs, the boat could
swamp causing damage and possible loss of life or property.
Casting Deck with Storage
Your boat is equipped with a casting deck with a storage box that can be used for your gear. For the following SE Series
models, the storage box is insulated so it can also be used as a fish box:
20
cc
22
cc
20
Bay
22
Bay
Note: The casting deck storage box is plumbed to gravity drain via a thru hull on the side of the boat.
Fish Boxes
Your boat may be equipped with one or more fish boxes and they are plumbed to gravity drain via a thru hull on the side
of the boat. Please refer to the Specifications section of this owner manual for capacity information.
Note: Not all SE Series models are equipped with a fish box.
Fuel/Oil Systems
Fuel Fill Fitting
The vented fuel fill fitting is labeled “Gas” or “Fuel” and is located approximately amidships on the starboard gunwale.
Twist the cap to open the fitting. The cap is connected to the fitting by a chain or cable so that it will not fall into the water
and/or get lost. Be careful not to pump fuel into any other fitting on the vessel. While you are filling the tank, fuel entering
the tank pushes air in the tank out through the fuel vent.
Note: Never pump fuel into any fitting, opening or access on the boat unless it is labeled “Gas” or “Fuel”.
Fuel Sender and Fuel Pick Up
The fuel sender and fuel pick up are accessible via the access pie that is installed aft of the helm seat. The fuel sender is
equipped with a float that moves up and down with the fuel level in the tank. The fuel level information is sent to the fuel
gauge and keeps you informed of the approximate fuel level in the tank. If you feel that your fuel gauge is reading
incorrectly, before considering changing the gauge, have your Pro-Line dealer’s Service Department or a qualified
professional remove the fuel sender and check to make sure that the float is able to move up and down freely. We DO
NOT recommend that you inspect or change the fuel sender yourself. This should be done by a qualified professional.
Float Switch
Bilge Pump
Summary of Contents for 2012 21 CC
Page 6: ...2...


