background image

Prism

Operation Manual Issue 2.00

Page iii

6.

DSA-1 menus reference . . . . . . . . . . . . . . . . . . . . . . . . . . . . . . . . . . . . . . 6.1
6.1.

Carrier tests (menu 1.) . . . . . . . . . . . . . . . . . . . . . . . . . . . . . . . . . . 6.4
6.1.1. fs Freq (menu 1.1.) . . . . . . . . . . . . . . . . . . . . . . . . . . . . . . . . 6.4
6.1.2. fs Jitter (menu 1.2.) . . . . . . . . . . . . . . . . . . . . . . . . . . . . . . . 6.5
6.1.3. Data Jitter (menu 1.3.) . . . . . . . . . . . . . . . . . . . . . . . . . . . . . 6.6
6.1.4. Amplitude (menu 1.4.) . . . . . . . . . . . . . . . . . . . . . . . . . . . . . 6.8
6.1.5. Eye Closure (menu 1.5.) . . . . . . . . . . . . . . . . . . . . . . . . . . . . 6.8
6.1.6. Errors (menu 1.6.) . . . . . . . . . . . . . . . . . . . . . . . . . . . . . . . . 6.9
6.1.7. Phase v Ref (menu 1.7.) . . . . . . . . . . . . . . . . . . . . . . . . . . . 6.10
6.1.8. CM Ampl (menu 1.8.) . . . . . . . . . . . . . . . . . . . . . . . . . . . . . 6.10
6.1.9. LoBand Ampl (menu 1.9.) . . . . . . . . . . . . . . . . . . . . . . . . . . 6.10
6.1.10.

Log Carrier (menu 1.10.) . . . . . . . . . . . . . . . . . . . . . 6.11

6.2.

Data tests (menu 2.) . . . . . . . . . . . . . . . . . . . . . . . . . . . . . . . . . . . 6.12
6.2.1. Audio Meter (menu 2.1.) . . . . . . . . . . . . . . . . . . . . . . . . . . . 6.13
6.2.2. Active Bits (menu 2.2.) . . . . . . . . . . . . . . . . . . . . . . . . . . . . 6.14
6.2.3. C-S Fields (menu 2.3.) . . . . . . . . . . . . . . . . . . . . . . . . . . . . 6.15
6.2.4. C-S Bytes (menu 2.4.) . . . . . . . . . . . . . . . . . . . . . . . . . . . . 6.16
6.2.5. C-S Idents (menu 2.5.) . . . . . . . . . . . . . . . . . . . . . . . . . . . . 6.16
6.2.6. C-S Timecode (menu 2.6.) . . . . . . . . . . . . . . . . . . . . . . . . . 6.17
6.2.7. Log Data (menu 2.7.) . . . . . . . . . . . . . . . . . . . . . . . . . . . . . 6.18

6.3.

Test Sequences (menu 3.) . . . . . . . . . . . . . . . . . . . . . . . . . . . . . . 6.19
6.3.1. Run (menu 3.1.) . . . . . . . . . . . . . . . . . . . . . . . . . . . . . . . . . 6.20
6.3.2. Select (menu 3.2.) . . . . . . . . . . . . . . . . . . . . . . . . . . . . . . . 6.21
6.3.3. Log Sequence (menu 3.3.) . . . . . . . . . . . . . . . . . . . . . . . . . 6.22

6.4.

Generator (menu 4.) . . . . . . . . . . . . . . . . . . . . . . . . . . . . . . . . . . . 6.23
6.4.1. Sync Source (menu 4.1.) . . . . . . . . . . . . . . . . . . . . . . . . . . 6.27
6.4.2. Edit Modes (menu 4.2.) . . . . . . . . . . . . . . . . . . . . . . . . . . . 6.28
6.4.3. Audio Function (menu 4.3.) . . . . . . . . . . . . . . . . . . . . . . . . 6.29
6.4.4. Audio Parameters (menu 4.4.) . . . . . . . . . . . . . . . . . . . . . . 6.30
6.4.5. Channel Status (menu 4.5.) . . . . . . . . . . . . . . . . . . . . . . . . 6.31
6.4.6. C-S Capture (menu 4.6.) . . . . . . . . . . . . . . . . . . . . . . . . . . 6.33
6.4.7. Valid Bit (menu 4.7.) . . . . . . . . . . . . . . . . . . . . . . . . . . . . . . 6.34
6.4.8. Jitter Generator (menu 4.8.) . . . . . . . . . . . . . . . . . . . . . . . . 6.35
6.4.9. Log Generator (menu 4.9.) . . . . . . . . . . . . . . . . . . . . . . . . . 6.36

6.5.

Channel Check (menu 5.) . . . . . . . . . . . . . . . . . . . . . . . . . . . . . . . 6.38
6.5.1. Run to Log (menu 5.1.) . . . . . . . . . . . . . . . . . . . . . . . . . . . . 6.39
6.5.2. Setup (menu 5.2.) . . . . . . . . . . . . . . . . . . . . . . . . . . . . . . . . 6.41

6.6.

Watchdog (menu 6.) . . . . . . . . . . . . . . . . . . . . . . . . . . . . . . . . . . . 6.43
6.6.1. Run to Log (menu 6.1.) . . . . . . . . . . . . . . . . . . . . . . . . . . . . 6.44
6.6.2. Setup (menu 6.2.) . . . . . . . . . . . . . . . . . . . . . . . . . . . . . . . . 6.46

6.7.

Microscope (menu 7.) . . . . . . . . . . . . . . . . . . . . . . . . . . . . . . . . . . 6.47

6.8.

Results Log (menu 8.) . . . . . . . . . . . . . . . . . . . . . . . . . . . . . . . . . . 6.49
6.8.1. Start Block (menu 8.1.) . . . . . . . . . . . . . . . . . . . . . . . . . . . . 6.51
6.8.2. Print Log (menu 8.2.) . . . . . . . . . . . . . . . . . . . . . . . . . . . . . 6.51
6.8.3. Clear Log (menu 8.3.) . . . . . . . . . . . . . . . . . . . . . . . . . . . . 6.52
6.8.4. Log Viewer (menu 8.4.) . . . . . . . . . . . . . . . . . . . . . . . . . . . 6.52

Summary of Contents for DSA-1

Page 1: ...2 00 1st March 1996 Prism Media Products Limited William James House Cowley Road Cambridge CB4 4WX U K Telephone 44 0 1223 424988 Fax 44 0 1223 425023 Email 100612 1135 compuserve com Prism Media Prod...

Page 2: ...Dennis Original release Issue 2 00 01 03 96 Ian Dennis Updated for V2 0 firmware A file named READ ME may be included with the software it includes information relevant to this manual The purpose of...

Page 3: ...3 3 REF SYNC input connectors 3 3 3 4 Headphone socket 3 3 3 5 Test out connectors 3 4 3 6 RS 232 serial port 3 5 3 7 DC IN connector 3 6 4 Indicator panels 4 1 4 1 CARRIER panel indications 4 1 4 1...

Page 4: ...2 7 Log Data menu 2 7 6 18 6 3 Test Sequences menu 3 6 19 6 3 1 Run menu 3 1 6 20 6 3 2 Select menu 3 2 6 21 6 3 3 Log Sequence menu 3 3 6 22 6 4 Generator menu 4 6 23 6 4 1 Sync Source menu 4 1 6 27...

Page 5: ...nce 7 6 7 3 3 Test Sequence Instruction reference 7 8 7 3 4 Using the Test Sequence Compiler Downloader 7 15 7 4 Automated and Remote operation 7 21 7 4 1 Serial Slave mode 7 21 7 4 2 Macro Processor...

Page 6: ...Prism Operation Manual Issue 2 00 Page v Appendix B DSA 1 Serial Data Protocol B 1 Appendix C System Test Sequence Listings C 1 Appendix D References D 1...

Page 7: ...ty requirements can range from complete failure as when a source operates at a sample rate not supported by a receiver or the most subtle effects which result from truncation of the audio word as when...

Page 8: ...rate Measures sampling rate fs Measures sampling rate accuracy in ppm fs measurements may be calibrated to house reference Jitter Measures fs Jitter from source Measures Data Jitter from cable Measur...

Page 9: ...ng of Valid bit In line superimposing of generator audio signal In line jitter modulation Channel Check Checks cables tape machines data links etc by comparing every incoming audio bit within the sele...

Page 10: ...r uploading to a host PC Monitoring DAC Feeds headphones or integral loudspeaker Test Inputs XLR AES3 coaxial AES3 ID SPDIF optical CP340 Copper inputs have switchable termination for in line use Test...

Page 11: ...wnloader program for MS Windows Macro Processor program for DOS Firmware Loader program for DOS Latest issue DSA 1 firmware program in DSA 1 s FLASH memory READ ME software information update where ap...

Page 12: ...ed to as ON When references are made to the contents of the LCD display of the DSA 1 the display contents are shown in a rectangular box for example Prism Sound DSA 1 sw2 0 hwC Where LED indicators or...

Page 13: ...mediately as described below 2 1 Equipment overview The layout of the DSA 1 controls and connections is designed for maximum ease of use in both hand held and desk top situations In the centre of the...

Page 14: ...has been installed at the factory or elsewhere the current version will be displayed instead of V2 0 as above The READ ME file on the system software diskette will also contain information about the c...

Page 15: ...IER panel should extinguish and a sampling frequency and accuracy should be indicated The DATA panel shows the basic activity of the audio and status data if a 16 bit source has been chosen only the m...

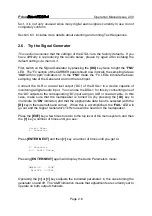
Page 16: ...ou are at the top level of the menu system and then use the and keys until the display shows Select Mode 1 Carrier Tests Now press the ENTER NEXT key and the display will show 1 Carrier Tests 1 1 fs F...

Page 17: ...again and use the key to select the Test Sequence which is appropriate to your test signal If the DATA panel shows PRO select Selected Sys03 General Pro Test Or if the DATA panel shows CONS select Sel...

Page 18: ...le of monitoring a digital audio input You can use the DSA 1 for this by connecting one of the DO outputs to the corresponding DI input using an XLR or coaxial cable In this case make sure that the lo...

Page 19: ...default settings where appropriate in this case re setting an amplitude of 14dBFS This amplitude is often used as a standard line up level being 4dB above 18dBFS Pressing the ENTER NEXT key again move...

Page 20: ...w The following connectors are provided DI digital audio inputs for measurement 1106 balanced 756 coaxial OPTical TOSLINK DO digital audio outputs for loop through re clocking and Generator modes 1106...

Page 21: ...rier amplitude measurements are not available when the optical input is selected although all timing related carrier measurements such as jitter are available 3 2 DO Digital audio Output connectors Th...

Page 22: ...alternatively be driven with a TTL level sampling rate clock of 50 duty cycle i e a Wordclock or SDIF2 Wordsync The DSA 1 will automatically determine which connector and which format is in use whenev...

Page 23: ...occurs at the output The SYNC test output provides a signal designed to be used as a trigger for the oscilloscope It drives a pulse of arbitrary amplitude and duration whose rising edge is timed just...

Page 24: ...The port employs a 9 way connector with the same pinouts as a PC AT compatible computer and for the majority of the above functions a null modem cable is connected between the serial ports of the DSA...

Page 25: ...ted ground connection to the PC 3 7 DC IN connector The DC IN connector is used for battery charging and remote power and is a standard 2 1mm DC barrel connector with the centre terminal positive A su...

Page 26: ...hat the DSA 1 cannot decode it properly The DSA 1 receiver is very tolerant and therefore any signal which cannot be decoded by the DSA 1 is unlikely to be recognised by other equipment When the FAIL...

Page 27: ...on this LED indicates a PHASE error specifically that the phase of the incoming carrier differs from the Generator s reference by more than the 25 90 which the interface standard states that a receive...

Page 28: ...Ds is lit then the source fs is within 1000ppm of the standard rate unless the OTHER LED is lit A more precise measurement of sampling frequency accuracy is available through the menu system The right...

Page 29: ...eneral case the AUX and AUDIO LEDs can be regarded collectively as an indicator of active word length of which the right most three two or one LEDs may be illuminated to signify a 21 24 bit a 17 20 bi...

Page 30: ...ly a consumer status can indicate Copy Prohibition since no protection mechanism exists in the professional status Either 15 50 s emphasis or J17 emphasis can be indicated and the channel mode can be...

Page 31: ...eys may be used to operate the sub menu controls 5 2 Audio monitor controls The row of four keys to the left of the ON key are used to control the audio monitoring functions Monitoring can be by stere...

Page 32: ...e de emphasis mode is set in the Settings Menu as described in section 6 9 1 3 5 3 I O selection controls The row of five keys at the bottom of the panel are used to control the modes of the I O conne...

Page 33: ...errant receiver and can be toggled between loop through and RPT modes to diagnose the failure The FNC function setting causes the DSA 1 Signal Generator to be turned on and routed to the DO outputs As...

Page 34: ...ted by the CHAN key In BLK mode the SYNC pulse marks the Z preamble at the start of each Channel Status block REF mode behaves like CHAN mode except that the SYNC pulse is referred to the REF SYNC inp...

Page 35: ...following First check that you are at the top level of the menu system if necessary by pressing EXIT several times Now press to cycle through the top level menu option until you see the following in...

Page 36: ...lect Mode Select Mode Select Mode 1 Carrier Tests 2 Data Tests 3 Test Sequence Select Mode Select Mode Select Mode 4 Generator 5 Channel Check 6 Watchdog Select Mode Select Mode Select Mode 7 Microsco...

Page 37: ...alue 4 4 Audio Params ON OFF freq ampl word 4 5 Chan Status GEN1 C S edits GEN2 P C In 4 5 GEN1 4 6 C S Capture Loads input C S to GEN1 ENTER toggles select adjust mode 4 7 Valid Bit GEN1 sets gen Val...

Page 38: ...em press EXIT 6 1 1 fs Freq menu 1 1 This selection complements the information provided on the Fs sections of the CARRIER display panel providing more precise details It measures the sampling rate of...

Page 39: ...ion 8 and appendix A The measurement of jitter is subject to a low frequency roll off in the rejection response of the PLL which means that jitter below the PLL corner frequency is tracked by the PLL...

Page 40: ...the jitter sampling period and is just under 50Hz The corner frequency indicator on the DSA 1 is thus replaced with 50 6 1 3 Data Jitter menu 1 3 This selection measures interface timing jitter in a s...

Page 41: ...neral use since it has lower intrinsic jitter and so can measure jitter at lower amplitudes the 700Hz setting should be used specifically to detect low frequency jitter The ENTER NEXT key toggles the...

Page 42: ...special way which is designed to be independent of program or status activity This is done by measuring the duration of the first short pulse in the X preamble and comparing this result with the ideal...

Page 43: ...1 6 This selection displays a count of biphase violations since the last acquisition of lock The result can be cleared to zero by pressing the EDIT CLEAR key when this sub menu is selected Errors 132...

Page 44: ...se wrt Ref 1 6 To return to the Carrier Tests level of the menu system press EXIT 6 1 8 CM Ampl menu 1 8 This selection measures the common mode voltage present for the balanced XLR input format If ei...

Page 45: ...Locked fs Jitter P P 2 9ns fc 700 Data Jittr P P 8 5ns fc 700 Amplitude 3 829 V P P Closure ZeroX 16 6ns 10 2 UI Errors 0 since last CLEAR Commonmode Ampl 677mV P P Audio band Ampl 199mV P P The actio...

Page 46: ...sub menus shown below which can be selected using the and keys 2 Data Tests 2 Data Tests 2 Data Tests 2 1 Audio Meter 2 2 Active Bits 2 3 C S Fields 2 Data Tests 2 Data Tests 2 Data Tests 2 4 C S Byt...

Page 47: ...al notation of the peak held sample value 40 30 20 10 0 26CA21 NOTE If the peak sample value is negative the hexadecimal readout shows the ONES COMPLEMENT of the value i e a positive number is display...

Page 48: ...on the left A double headed arrow indicates an active bit i e moving or fixed at logic 1 a down pointing arrow represents an inactive bit fixed at zero Where bits which become active very briefly the...

Page 49: ...us fields menu is quite self explanatory however one or two features are worth noting If a consumer status is being examined the Category Code in the second byte indicates the nature of the source equ...

Page 50: ...he menu system press EXIT 6 2 5 C S Idents menu 2 5 This selection displays the Channel Status idents alphanumeric source and destination labels as text if professional format is detected and text ide...

Page 51: ...inary sample count as defined in the interface standard or as BCD binary coded decimal data These display modes are indicated by or separators in the timecode display respectively The display mode can...

Page 52: ...Chan A selected D23 D0 INVALID No user data Channel Status A B identical CS B00 1 Profesnal status CS B00 0 Audio use CS B00 001 No emphasis CS B00 0 Source locked CS B00 10 fs 48 0kHz CS B01 1000 2 c...

Page 53: ...mpiler software package on a PC The program is then compiled and downloaded into the DSA 1 after which it can be simply executed at the touch of a key The order of the tests the limits of acceptabilit...

Page 54: ...nd the sampling rate is incorrectly indicated in the Channel Status the following failure message is displayed FAILED SEG 7 fs Conflict In general the top line of the display indicates which Segment o...

Page 55: ...displayed The Sequence designation is shown in the upper right of the display with the Sequence title on the bottom line The titles of User Test Sequences are decided by the Sequence programmer when...

Page 56: ...ts Log BLOCK 01 Test Sequence Strict Pro Test 1 Carrier qual PASSED 2 Pro CS PASSED 3 fs frequency PASSED 4 Amplitude PASSED 5 Jitter PASSED 6 Eye width PASSED 7 Channel Stat FAILED CRC error 8 Biphas...

Page 57: ...ertain other features of the DSA 1 principally the Carrier Tests For this reason GEN2 is provided as a Channel Testing generator GEN2 has less versatility than GEN1 but does provide the functionality...

Page 58: ...ifferent sub menus in the Generator menu shown below which can be selected using the and keys 4 Generator 4 Generator 4 Generator 4 1 Sync Source 4 2 Edit Modes 4 3 Audio Func 4 Generator 4 Generator...

Page 59: ...4 sine PRS noise Ramp Pulse with Jtest variable duration and polarity Jtest Audio Parameters On off Word length 12 On off 24 Frequency Peak amplitude Channel Status All fields may be Professional or g...

Page 60: ...Prism Operation Manual Issue 2 00 Page 6 26 Figure 6 2 Generator Editor simplified block diagram...

Page 61: ...o special order In REF Ref Sync mode the XLR or coaxial Ref Sync input is used In this case the DSA 1 automatically senses the appropriate Ref Sync input and determines whether an AES11 reference or W...

Page 62: ...tching between these two settings causes all sub frame A parameters to be copied to sub frame B The remaining fields are used to globally enable editing for audio Channel Status and Validity data resp...

Page 63: ...tion is a symmetrical triangular wave the Ramp function is a falling ramp The Pulse function is a narrow pulse of programmable width and polarity repeated every 192 samples If the Pulse function is se...

Page 64: ...he word length can generally be adjusted from 12 to 24 bits The DSA 1 Generator is undithered but is rounded and truncated to the selected word length Where a function s peak sample amplitude is adjus...

Page 65: ...ach field can be independently set to EDIT mode or can be left TRANSPARENT In general the LCD shows the state of the currently selected Channel Status field with the binary value of the field shown in...

Page 66: ...0 is incoming as or edited to a 1 q The alphanumeric source and destination label field edits are adjusted one character at a time in this case the ENTER NEXT key cycles from NON MODIFY to MODIFY CHAR...

Page 67: ...permitted 2 channel Mode 0 Category code General No source or destination numbers fs as CARRIER panel indication grade II To return to the Generator level of the menu system press EXIT 6 4 6 C S Capt...

Page 68: ...u system automatically returns to the Generator level 6 4 7 Valid Bit menu 4 7 The Valid Bit sub menu displays the current state of the Generator Valid Bit The display format is A B Valid bit 0 valid...

Page 69: ...rrent sampling frequency is 32kHz or nearby the peak to peak jitter step size becomes UI 12 about 20ns at fs 32kHz The jitter function is selected on the top line from the following options PRS L Pseu...

Page 70: ...might be Prism Sound DSA 1 Results Log BLOCK 01 Gen Ed Setup Snc INT Int 48 Editing TIED Aud Y C S Y V Y A B Sine Gen1 A B ON 14dB Wrd 24b 1000Hz A B 00 1 Profesnal status A B 00 001 No emphasis A B 0...

Page 71: ...Prism Operation Manual Issue 2 00 Page 6 37 After logging is completed the menu system automatically returns to the Generator level...

Page 72: ...ults Log The Channel Checker can test either sub frame A or B channel or both and the check can be made on 16 bit 20 bit or 24 bit data The test signal is the pseudo random sequence PRS waveform of th...

Page 73: ...ilure results in an Event being stored in the Results Log and the Event count in the top left hand corner being incremented A description of the Event appears on the bottom line of the display If it i...

Page 74: ...r running the Channel Checker the format of the Results Log is Prism Sound DSA 1 Results Log BLOCK 01 Channel Check 001 000 05 04 1 Sample Error A 002 001 20 10 6 Sequence Fail 003 001 20 10 9 Sequenc...

Page 75: ...ld be set to match the capacity of the data path to be tested or if the data path has some intermediate capacity to the next smaller value Setting this value larger than the capability of the data pat...

Page 76: ...ility of the data path under test or it may be that the data is being muted or modified somewhere Note that any signal processing at all in the data path under test e g gain adjustment re dithering EQ...

Page 77: ...e of interest after which the Run to Log mode can be left unattended for as long as necessary to log any changes By using the DSA 1 in loop through mode in line operation of the Watchdog mode is possi...

Page 78: ...k to the Watchdog Item Marker This effectively recommences the Watchdog logging operation Left to itself the timer wraps to zero after 1000 hours The Watchdog display mode described above is called Su...

Page 79: ...ts are accompanied by the transmission of an Event specific serial code from the RS 232 port This is done by enabling Alarms in the System Settings sub menu as described in section 6 9 1 4 If Alarms a...

Page 80: ...formation but instead show alarmed LEDs lit and masked non alarmed LEDs extinguished One LED at a time is selected for adjustment which flashes The current LED is selected using the and keys The EDIT...

Page 81: ...key can be used to bypass the processing at the DO connector allowing A B insertion of the programmed gain and masking Separate A and B sub frame clipping detectors are provided since this is a partic...

Page 82: ...e display The DO key should normally be selected to RPT when using the Microscope selection loop through mode bypasses the digital processing connecting DI directly to DO Note that Microscope mode can...

Page 83: ...tion of the data Log data can be printed directly to a serial printer either as it is being recorded or later Alternatively the Log can be uploaded to the Results Log Uploader Editor software running...

Page 84: ...he and keys 8 Results Log 8 Results Log 8 Results Log 8 1 Start Block 8 2 Print Log 8 3 Clear Log 8 Results Log 8 Results Log 8 Results Log 8 4 Log Viewer 8 5 Blk Manager 8 6 Form Feed When the desire...

Page 85: ...ide a convenient way of segmenting the Log for ease of later examination For instance all tests on a certain day or on a certain item of equipment can be placed in one Block Note that the Block Manage...

Page 86: ...Log Viewer is a quick and easy way to check that the desired Items have been successfully logged On entry the viewing point is the start of the Log The and keys scroll up and down through the Log resp...

Page 87: ...om the Log The ENTER NEXT key causes the current Block to be printed on a serial printer via the RS 232 port Note that the Log Header the Prism Sound DSA 1 Results Log message is only appended to the...

Page 88: ...em press EXIT 6 9 1 Settings menu 9 1 The following sections describe the system settings options There are ten different parameters which can be adjusted and these are displayed using the and keys Wh...

Page 89: ...et to follow the incoming Channel Status indication AUTO or can be over ridden ON or OFF De emphasis is applied to the DAC output and therefore ensures the correct audio response for both headphones a...

Page 90: ...to immediately next time the Carrier Tests menu was entered The OFF mode is principally provided for use by the Macro Processor software see section 7 4 2 so that menu navigation is more predictable...

Page 91: ...onus on the operator to specifically retain any logged results which are of future interest This option is especially useful in live printing mode described in the previous section where logged result...

Page 92: ...after transmission of each line Operation of the DSA 1 Results Log is described in section 6 8 6 9 2 Save Setup menu 9 2 Using this sub menu preferred settings can be stored as power up defaults On e...

Page 93: ...ese remain unaltered If it is desired to initialise the power up parameters you must execute sub menu 9 2 Save Setup after instating the defaults This facility is often used at the start of macros to...

Page 94: ...arn menu 9 4 This feature provides a means of software calibrating the unit against an external reference signal and storing the calibration so that sampling frequency accuracy measurements may be mad...

Page 95: ...libration nor clearing is required press EXIT to return to the Settings menu For optimum precision it is recommended that Ref Learn be used after the DSA 1 has been switched on for a few minutes NOTE...

Page 96: ...n the maximum capacity of the battery it is possible to manually jump straight into the charging part of the cycle by pressing ENTER NEXT during discharge This can save time if urgent topping up of a...

Page 97: ...y subsequent updates to the DSA 1 firmware or Host Support software will be issued on a similar diskette Two installation procedures need to be performed one for the MS Windows applications and anothe...

Page 98: ...rompt type A INSTALL Enter Installation is then conducted automatically prompting the user for any settings required such as the preferred installation target directory name The default target directo...

Page 99: ...3 1 or higher 7 2 2 Using the Results Log Uploader Editor 7 2 2 1 Starting the program The DSA 1 Results Log Uploader Editor is started by double clicking the appropriate icon in the DSA 1 Host Suppor...

Page 100: ...PC dialog box show that the transfer is taking place If anything is wrong a message box describing the error is displayed on the PC screen If all goes well the Results Log appears in the editor window...

Page 101: ...the following options Tile Tile the editor windows Cascade Cascade the editor windows Arrange Icons Rearrange any icons representing minimized editor windows Close All Close all editor windows Save st...

Page 102: ...C which provide a useful example The idea of a Test Sequence is that an operator can select and run a particular set of tests on an input carrier and be informed that these have all been accomplished...

Page 103: ...T_END lock_ok SET_PASS SEGMENT_END Instructions may appear on lines on their own or with several on one line separated by semicolons as in the example above Instructions may be simple with no paramete...

Page 104: ...uence and includes a 16 character text message that appears on the DSA 1 display when the Sequence is selected or run for example HEADER Special Test Similarly the final Instruction of the Sequence sh...

Page 105: ...results These Instructions cause a snapshot of a particlar DSA 1 operating parameter to be loaded into the 16 bit Test Register For most of these Instructions the value is only a single bit which is l...

Page 106: ...yte n n 0 23 7 3 3 5 Measure numeric results These Instructions cause a test to be performed using the specified DSA 1 function after which the numeric result is loaded into the Test Register in the u...

Page 107: ...llowing b or decimal without either value is enclosed in brackets 7 3 3 7 Sequence flow These Instructions cause the DSA 1 to branch or jump to another part of the Sequence Care should normally be tak...

Page 108: ...AND value g 0 The label parameter must begin with a character Note that labels when referred to in a JUMP_ instruction do not have a following colon character Jumps may be made backwards or forwards...

Page 109: ..._level Frequency MEAS_FS_ERROR Use units of parts per million depending on the sampling frequency in use with suffixes PPM_480 if fs 48 0kHz PPM_441 if fs 44 1kHz PPM_440 if fs 44 056kHz PPM_320 if fs...

Page 110: ...to FAIL 7 3 3 9 Miscellaneous This Instruction displays a message on the bottom line of the DSA 1 s display The text parameter must be enclosed in single quotes MESSAGE text Show the text on row 2 of...

Page 111: ...se save as so as not to overwrite the original standard file This will give you a feel for the process The following sections document the functions of the pull down menus 7 3 4 2 FILE menu The FILE m...

Page 112: ...e compilation one of two actions is taken If the compilation succeeds a file is written containing binary data representing the compiled Test Sequence This file has the same root name as the source fi...

Page 113: ...is stored in an initialisation file on disk so that it is retained indefinitely until changed When the desired batch of filenames have been loaded into the appropriate boxes and the correct COM port...

Page 114: ...e compiler during every compilation and contains details of the compiler output and any errors found The format of the file is as follows for each source line compiled error messages if any Line numbe...

Page 115: ...A list file cannot be written which could be due to the disk being too full Incomplete opcode The Instruction following has too few parameters specified Refer to the Test Sequence language reference B...

Page 116: ...long The required length for the text string element of a HEADER and MESSAGE Instruction is 16 characters For a SEGMENT Instruction the required length is 12 characters The above error message is dis...

Page 117: ...ut Serial Slave mode may is invoked and terminated by the external device typically a host PC sending special character strings to the DSA 1 Note that this cannot occur when the DSA 1 is in Host Mode...

Page 118: ...ation label Labels take the form JUMP bad_jitter reference to label here is the label itself bad_jitter BEEP Comments exist in two forms both illustrated in the label example above The form causes all...

Page 119: ...N presses the DSA 1 L S ON key SPKMODE presses the DSA 1 L S MODE key VOLUP or presses the DSA 1 Y Y key VOLDOWN or presses the DSA 1 Z Z key DIGI or DI presses the DSA 1 DI key TERM presses the DSA 1...

Page 120: ...w unconditional and conditional jumps to be made to another part of the macro sequence depending on the state of the DSA 1 LEDs or the values in the internal stores see above They all specify a label...

Page 121: ...Jump if the value in the numeric store is less than n JUMP_IF_GREATER n xxx or JG n xxx Jump if the value in the numeric store is greater than n JUMP_IF_LESS_OR_EQUAL n xxx or JLE n xxx Jump if the v...

Page 122: ...ET_PC_VAL Read a numerical input from the PC keyboard delimited by Enter This is then held in the internal numeric store and may be checked in a conditional JUMP instruction GET_PC_CHAR Read a single...

Page 123: ...e from GET_DSA_TEXT V displays the numeric value store from GET_DSA_VALUE or GET_PC_VALUE C displays the character store from GET_DSA_CHAR or GET_PC_CHAR In displays user input text variable n from GE...

Page 124: ...ctions SET_PASS Clear the global Fail Flag SET_FAIL Set the global Fail Flag SET_SPEED_FAST Sets the Macro Processor execution speed to the fastest possible this is the default state SET_SPEED_SLOW Se...

Page 125: ...f the DSA 1 are not lost ii Use sub menu 9 1 setting 5 to disable the DSA 1 s sub menu memory This will allow Macro segments to be independent of each other since navigation of the menu system will no...

Page 126: ...filename is the name of the Macro File to be executed including the extension and options are one or more of the following 1 or 2 selects the COM port number used to communicate with the DSA 1 Note th...

Page 127: ...mode is useful for debugging Macro Files In Single Step mode one Keyword of the Macro File is executed each time a PC key is pressed The programmer can thus step through the Macro File line by line t...

Page 128: ...again Note that if only the upper line of the message is displayed DC power has not been detected and the process must be restarted with DC applied When the message is displayed correctly choose the...

Page 129: ...re that you have a copy of the existing firmware before updating since you can reload the old firmware if you need to Also note that all setup options User Test Sequences and the Results Log are autom...

Page 130: ...now whether a carrier or a data problem exists or whether the sourcing or receiving equipment or the cabling is to blame In general intermittent and audio degradation failures are generally carrier re...

Page 131: ...ade to work successfully by forcing Valid then a source invalid fault is indicated if editing the Channel Status does the trick then a Channel Status compatibility fault must be the cause It may be di...

Page 132: ...short circuit leg In the case of a transformer coupled output the latter is indicated since an open circuit would result in loss of the differential amplitude reading If these readings seem to be rea...

Page 133: ...ess long and lossy cables are used in which case data jitter would probably dominate in any case Likewise the source impedance can be checked but is unlikely to be responsible for any practical failur...

Page 134: ...cable unless the equipment is faulty If the source can be synchronised externally the phase of its carrier output should be checked with respect to the reference input using the Phase v Ref sub menu T...

Page 135: ...the input with a different cable If this does not cure the problem try selecting the DSA 1 s GEN1 instead since this allows individual editing of the output Channel Status fields A single unexpected f...

Page 136: ...rator allows receivers to be tested with a jitter function which emulates a long or poor quality cable In this mode data jitter is added by emulating the intersymbol interference of a cable By connect...

Page 137: ...e whole chain at once since carrier degradation in cascade is normally progressive The following tests are made by connecting the DSA 1 s appropriate GEN2 output to the input of the system under test...

Page 138: ...a errors are usually caused by a marginal carrier 8 4 2 In line data tests By using GEN1 instead of GEN2 in the above setup it is possible to test aspects of data transparency Channel Status transpare...

Page 139: ...ontinuous noise If the signal breaks up or buzzes as it decays or if the noise is modulated by the decaying signal inadequate dither level or an inappropriate dither noise source is indicated The Micr...

Page 140: ...he normal driver and receiver if possible this is straightforward where reclocking routing switchers or distribution amplifiers are installed but may be less easy if equipment is cabled directly For d...

Page 141: ...r is it necessary Others have taken to inferring the performance of conversion equipment which has both digital inputs and outputs by measuring the jitter on the digital output and assuming it to be t...

Page 142: ...f a 10 bit system The jitter frequency is fs 8 6kHz at fs 48kHz since this falls conveniently in the lower half of the audio band This test can therefore be used to establish how much jitter attenuati...

Page 143: ...rator to the reference input of the converter and an analogue fs 4 tone just below clipping at the analogue input If a digital FFT analyser is not available the digital product could be returned to an...

Page 144: ...ling the Jtest effectively is a test of both the cable and the D A converter THD n for the non attenuating D A converter above is 73dB Finally it should be noted that the AES3 output and input tests d...

Page 145: ...he frequency to be varied in the usual way NOTE Concerning jitter parameters in the interface standard There are currently no proper specifications in the interface standards for any of the jitter par...

Page 146: ...IEC958 SPDIF or AES3 ID REF SYNC input formats 1106 balanced AES3 IEC958 AES11 or Wordclock 756 coaxial AES3 IEC958 AES3 ID or Wordclock Balanced connectors 3 pin XLR inputs female outputs male Coaxia...

Page 147: ...Hz CARRIER ANALYZER fs measurement Range 28kHz to 52kHz Accuracy internal set by TCXR as above external wrt ref 1ppm for 1 week Jitter eye measurement Self calibrating peak to peak measurement Range 1...

Page 148: ...kHz DC 250 500 750 1k 1k5 2k 2k5 3k 4k 5k 6k 7k 8k 9k 10k 11k 12k 13k 14k 15k 16k 17k 18k 19k 20k 21k 22k 23k 24k Frequencies scaled for other sampling rates Amplitude 0dBFS 1 2 3 4 5 6 7 8 9 10 11 12...

Page 149: ...line edit mode Jitter generation can be added to the incoming signal CHANNEL CHECKER Monitors any AES3 transmission medium and logs any bit errors against time Sub frames tested A B or both Word leng...

Page 150: ...gged functions Carrier tests Data tests Test Sequences Generator editor settings Channel Check Watchdog Printing uploading Prints to serial printer during measurements or later from non volatile log o...

Page 151: ...e each driver should be connected to no more than one receiver although the possibility for drivers to feed multiple receivers was allowed in early versions of the AES3 standard The serial data for th...

Page 152: ...of the sub frame to be picked out of what would otherwise be an endless stream of biphase mark 1s and 0s because it violates the biphase mark rule It doesn t have a transition at least every bit perio...

Page 153: ...receding equipment some transports assert Invalid when they are paused or stopped A logic 0 is Valid a logic 1 Invalid The User bit was originally just that a bit whose use was not defined in the inte...

Page 154: ...his format uses a 756 coaxial video type cable with BNC connectors The transmitter and receiver are both terminated and transformer coupled The loaded voltage is 1V P P Thus the level bandwidth cable...

Page 155: ...used not only as a data interface but also as a clock reference for conversion devices most D A converters derive their conversion clocks from their AES3 data input and AES11 essentially an AES3 sign...

Page 156: ...shared by and derived from both sub frames As if this were not shocking enough the crosstalk effect usually gets worse as the hostile channel gets quieter because the coherence of audio frequency in t...

Page 157: ...es are usually very good but it takes some determination to use these with equipment with XLR connectors directly although matching transformer barrels are available but quite expensive Twin axial cab...

Page 158: ...ies also occur through misuse or non operation of the various ancillary bits The Valid bit may cause strange behaviour over an interface because its meaning has been historically vague as described ab...

Page 159: ...d so must generate its own CRC at the end of the Channel Status block If such equipment receives a Channel Status CRC error it must generate its own CRC error deliberately to warn following equipment...

Page 160: ...trol the SCMS Channel Status transmitted when the tape is played back and control the further recording of the audio data on other SCMS machines If the recorder recognises that the material has ID6 se...

Page 161: ...dix since application programs to operate the host modes are provided with the DSA 1 This section is intended for programmers who need to know how to operate the DSA 1 s host modes from proprietary ho...

Page 162: ...ST terminates with STX 0x00 0x00 DSA 1 now aborts mode The latest hardware version is C the latest firmware version is 200 3 Serial Slave mode This mode allows the host to control the keyboard of the...

Page 163: ...button no effect 0x0d 0x0c 0x0b ENTER NEXT 0x0a EXIT 0x09 EDIT CLEAR 0x08 LS ON OFF 0x07 LS MODE 0x06 VOL UP 0x05 VOL DN 0x04 DI 0x03 TERM 0x02 CHAN 0x01 DO 0x00 SYNC O P The availability of a dummy...

Page 164: ...e relocated to 0xC0 0xC7 in order not to conflict with link control characters 0xC0 0xC7 are Kanji characters in the LCD module and would thus not be used 3 c LCD control codes from DSA 1 These codes...

Page 165: ...C_441_LED 0x0080h C_48_LED 0x0100h C_OTHER_LED 0x0200h C_200PPM_LED 0x0400h C_50PPM_LED 0x0800h C_10PPM_LED 0x1000h C_2PPM_LED 0x2000h C_WRTREF_LED 0x4000h K_LS_ON_LED 0x8000h Bank 1 D_AUX_LED 0x0001...

Page 166: ...00h K_SYNC_CH_LED 0x2000h K_SYNC_BLK_LED 0x4000h K_SYNC_REF_LED 0x8000h 3 e Exit Serial Slave mode To exit from Serial Slave mode the usual exit message is sent by the HOST HOST DSA 1 STX 0x00 0x00 DS...

Page 167: ...wnload exchange Note that Test Sequence download mode can only be instated in the DSA 1 if it is in Host Mode sub menu 9 5 The transfer type set in the wakeup exchange is 0x01 After wakeup is establis...

Page 168: ...ished the following transaction occurs HOST DSA 1 STX data byte 0 data byte n 1 ETX checksum all data ETX STX end token block 0x00 0x00 DSA 1 now exits mode ACK optional or redo wakeup exchange if blo...

Page 169: ...d Black 0x23 Main Aud Activ 0x24 Main Aud Black 0x25 V 1 Invalid 0x26 V 0 Valid 0x27 User Data 0x28 No User Data 0x29 C S Profes nal 0x2a unallocated 0x2b C S Consumer 0x2c unallocated 0x2d C S 15 50...

Page 170: ...SAGE No carrier lock SEGMENT_END lock_ok TEST_NFAIL_BIT JUMP_IF_ZERO carrier_ok MESSAGE Carrier nr fail SEGMENT_END carrier_ok TEST_BLOCKERR_BIT JUMP_IF_ZERO block_ok MESSAGE Block length err SEGMENT_...

Page 171: ...JUMP_IF_GREATER_THAN 200mv coax_done SET_FAIL MESSAGE Coax ampl 0 2V coax_done SEGMENT_END coax_tobig SET_FAIL MESSAGE Coax ampl 2 0V SEGMENT_END not_coax MEAS_DIF_AMPL XLR ampl 400mv 7V JUMP_IF_GREA...

Page 172: ...MESSAGE Coding errors SET_FAIL code_ok SEGMENT_END END End of sequence Sequence 02 Consumer Test This Sequence requires Consumer Channel Status and applies Consumer type limits similar to IEC958 HEAD...

Page 173: ...44k1Hz 1000ppm SEGMENT_END not_441 JUMP_IF_GREATER_THAN 2 not_440 MEAS_FS_ERROR AND 07FFFH JUMP_IF_GREATER_THAN 1000ppm440 bad_440 SEGMENT_END bad_440 SET_FAIL MESSAGE 44056 1000ppm SEGMENT_END not_44...

Page 174: ...TTER 3s test for 3s JUMP_IF_LESS_THAN 40ns data_ok MESSAGE Data jittr 40ns SET_FAIL data_ok SEGMENT_END Segment 6 tests for eye reduction 40ns runt reduction SEGMENT 6 Eye width SET_PASS SELECT_EYE_AT...

Page 175: ...g MESSAGE Analogue signal SEGMENT_END not_alog SET_PASS SEGMENT_END Segment 2 tests for professional channel status SEGMENT 2 Pro CS SET_PASS TEST_CSBYTE 0 AND 01H JUMP_IF_NOT_ZERO cs_pro MESSAGE CS i...

Page 176: ...ENT_END coax_tobig SET_FAIL MESSAGE Coax ampl 2 0V SEGMENT_END not_coax MEAS_DIF_AMPL XLR ampl 400mv 7V JUMP_IF_GREATER_THAN 7V xlr_tobig JUMP_IF_GREATER_THAN 400mV xlr_done SET_FAIL MESSAGE XLR ampl...

Page 177: ...E 23 JUMP_IF_ZERO cs_ok MESSAGE CRC 0 or true SET_FAIL cs_ok SEGMENT_END Segment 8 tests for any parity or biphase errors during the test sequence SEGMENT 8 Biphase errs SET_PASS MEAS_ERROR_COUNT JUMP...

Page 178: ...EGMENT_END not_48k JUMP_IF_GREATER_THAN 1 not_44k1 MEAS_FS_ERROR AND 07FFFH JUMP_IF_GREATER_THAN 10ppm441 bad_44k1 SEGMENT_END good 44k1 bad_44k1 SET_FAIL MESSAGE 44k1Hz 10ppm SEGMENT_END not_44k1 JUM...

Page 179: ...TA_JITTER 3s test for 3s JUMP_IF_LESS_THAN 10ns data_ok 64ths of a ns MESSAGE Data jittr 10ns SET_FAIL data_ok SEGMENT_END Segment 6 tests for eye reduction 10ns runt reduction SEGMENT 6 Eye width SET...

Page 180: ...GE Rsvd in CS byte1 SET_FAIL SEGMENT_END notrsvd1 TEST_CSBYTE 2 Reserved state of byte 2 JUMP_IF_MASKED 0C1h notrsvd2 MESSAGE Rsvd in CS byte2 SET_FAIL SEGMENT_END notrsvd2 TEST_CSBYTE 3 Reserved stat...

Page 181: ...ns and amendments including extensions to the allowed category codes and SCMS Serial Copy Management System 4 IEC958 Digital Audio Interface Amendment 2 International Electrotechnical Commission 1995...

Page 182: ...the Proceedings of the 10th International AES Conference London September 1991 pp 115 126 10 Julian Dunn and Ian Dennis Prism Sound The Diagnosis and Solution of Jitter Related Problems in Digital Aud...

Page 183: ...de 6 8 Analogue audio pathfinding 8 16 Analogue signal injection 8 16 Asynchronous input 4 2 Audio Function sub menu 6 29 AUDIO indicators 4 4 Audio meter function 6 13 Audio monitor controls 5 1 Audi...

Page 184: ...n to Log 6 39 Setup 6 41 Summary display mode 6 39 Channel mode indicators 4 5 Channel Status 6 15 6 17 6 31 Alphanumeric labels 6 32 Block 4 2 Block format A 3 Byte examination 6 16 Capture 6 33 CRC...

Page 185: ...I key 5 2 Digital audio inputs 3 2 Digital audio outputs 3 2 Digital gain 6 47 DO connectors 3 2 DO key 5 3 Edit Modes sub menu 6 28 Emphasis indicators 4 5 Error count 6 9 ERROR indicator 4 1 Eye clo...

Page 186: ...23 6 27 Tied Mode 6 28 Valid bit 6 34 Word length 6 30 Headphones 3 3 5 1 Hexadecimal readout 6 13 Host Mode 6 62 Host PC 3 5 6 62 7 1 Host Support software 7 1 I O connectors 3 1 I O selection contro...

Page 187: ...e 7 23 Macro Files 7 22 Macro Recording mode 7 31 Programming tips 7 29 Running 7 30 Single Step mode 7 31 Manual conventions 1 6 Maximum input voltage 3 2 3 3 Menu keys 5 1 Menu system reference 6 1...

Page 188: ...on 6 30 6 35 6 38 Pseudo random sequence 6 30 6 35 Pulse function 6 29 Pulse smearing 6 6 Re clocking mode 3 2 Re dithering 1 1 READ ME file i 1 5 2 2 Ref Learn mode 3 3 6 4 6 60 REF SYNC inputs 3 3 R...

Page 189: ...sub menu 6 27 SYNC test output 3 4 System Setup 6 54 System support software 7 1 System trouble shooting 8 1 TCXR crystal reference 6 4 TERM key 5 2 Test and measurement techniques 8 1 Test Sequence C...

Page 190: ...6 34 Valid bit problems A 8 Valid bit indicator 4 4 Volume keys 5 2 Watchdog mode 6 43 8 3 Alarming LEDs 6 44 Alarms 6 45 Event Viewer display mode 6 44 Events 6 44 Run to Log 6 44 Setup 6 46 Summary...

Reviews: