32
6
Capture 2
6.2
Start Page
StudioLive
™
ARc Series
Owner’s Manual
6.2.5
Options Menu
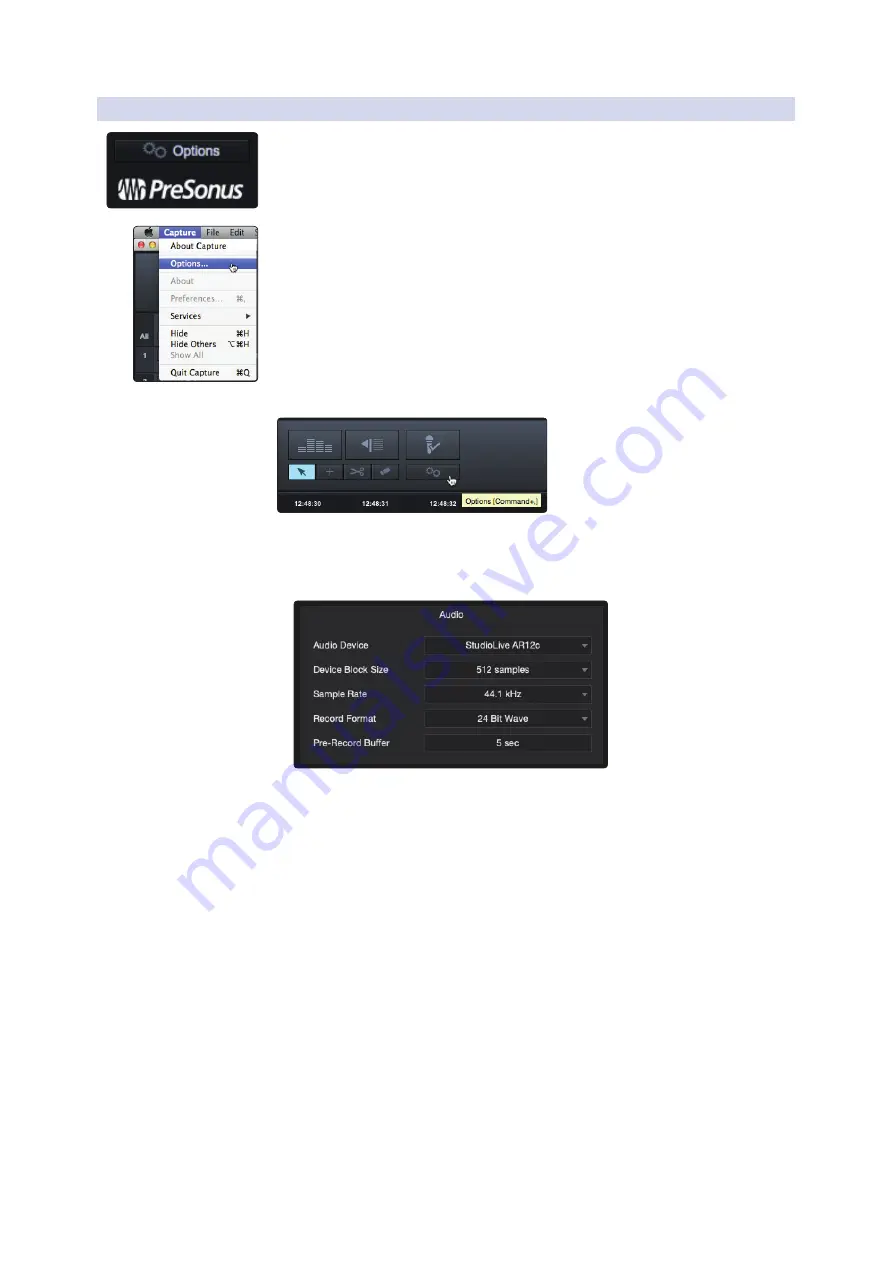
The Options button can be found just above the bottom of the Start page. This
launches the Options menu.
This menu can also be accessed from Capture>Options.
It can also be accessed by clicking on the Options button on the Session page.
The Options menu provides all the tools necessary
to configure your Session preferences.
Audio Options
•
Audio Device. At the top of the Audio Options, you will find
the Audio Device menu. This is the same menu that is on
the Start page.
See Section 6.2.4 for information
.
•
Device Block Size. This displays the buffer size. In general, the higher the
buffer size is set, the more stable your recording environment will be.
•
Sample Rate. The Sample Rate menu is also found on the
Start page.
See Section 6.2.4 for information
.
•
Record Format. The Record Format menu allows you to
choose the bit-depth of the recorded audio. You can select 16-
bit WAV, 24-bit WAV, or 32-bit floating-point WAV.
Power User Tip:
The higher the bit-depth of your audio, the better its resolution, and
the bigger the resulting file size will be. In general, we recommend recording at 24-bit.
•
Pre-Record. Capture 2 allows you to set a Pre-Record buffer. This
buffer starts recording audio before your click the Record button so
you won’t miss the beginning of a performance. The Pre-Record buffer
time is user-selectable, between five seconds and one minute.
Power User Tip:
The higher the Pre-Record buffer is set, the more RAM Capture 2 will
require. While this will not cause problems on modern systems that are equipped with
copious amounts of RAM, it is highly recommended that the Pre-Record buffer be set
as low as possible on systems with the minimum amount of required RAM (2 GB).


