14
A01-00030 Rev D
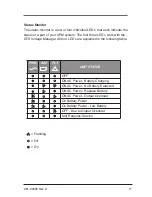
With the connected equipment powered off, perform an initial test of the
UPM backup function by pressing the Test/Silence button on the front
panel. During this test, the Battery LED on the front panel should briefly
illuminate. It is also possible to test the backup function by unplugging
the UPM input power cord. If you choose to test the UPM in this manner,
you will note that the UPM will beep every few seconds while the power
cord is unplugged. The Battery LED will also illuminate constantly.
Once you have performed an initial test of the UPM backup function,
turn on the connected computer equipment. Verify that the unit is not
overloaded. If the unit is overloaded all load LED’s will flash the fault LED
will flash then, remove the least critical devices from the UPM one by
one until the overload LED’s are extinguished. With the connected loads
powered up, perform the backup test once again by pressing the Test/
Silence button or unplugging the UPM. When this final test is completed,
the UPM will be ready to use.
NOTE:
• If you leave your UPM on continuously, it is a good idea to perform
a test at least once a month.
• If you are utilizing MopUPS Express software, you can configure
the system to automatically self-test periodically.
• The UPM is shipped with a charged battery, but some discharge
naturally occurs during storage and shipment. You may use the
UPM immediately, but you should realize that backup time may be
less than the stated rating until the UPM battery has had at least
six hours to charge.
• POWERVAR recommends that you do not plug laser printers into
the UPM. Laser printers are known to draw large amounts of current
when the fuser/heater assembly is energized. Laser printers can
easily overload the UPM or create a low voltage condition that can
interfere with the operation of the Voltage Manager circuit.
Summary of Contents for GTS Series
Page 1: ...GTS Series User Manual ...
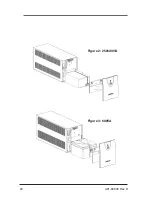
Page 24: ...24 A01 00030 Rev D Figure 2 250 400VA Figure 3 600VA ...
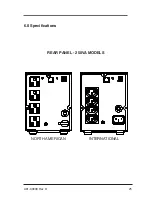
Page 25: ...25 A01 00030 Rev D 6 0 Specifications REAR PANEL 250VA MODELS INTERNATIONAL NORTH AMERICAN ...
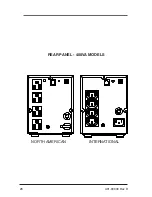
Page 26: ...26 A01 00030 Rev D REAR PANEL 400VA MODELS INTERNATIONAL NORTH AMERICAN ...
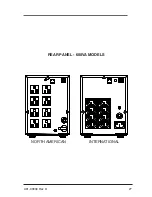
Page 27: ...27 A01 00030 Rev D REAR PANEL 600VA MODELS INTERNATIONAL NORTH AMERICAN ...
Page 33: ...33 A01 00030 Rev D ...
Page 56: ...56 A01 00030 Rev D Figure 2 250 400VA Figure 3 250 600VA ...
Page 58: ...58 A01 00030 Rev D PANNEAU ARRIÈRE MODÈLES 400VA INTERNATIONAL AMÉRIQUE DU NORD ...
Page 59: ...59 A01 00030 Rev D PANNEAU ARRIÈRE MODÈLES 600VA INTERNATIONAL AMÉRIQUE DU NORD ...
Page 65: ...65 A01 00030 Rev D ...


