6
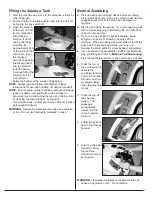
Checking the Coolant Level
1. Place the machine on a level surface.
2. Remove the radiator cap by turning it counterclockwise
and check the coolant level in the radiator.
3. Coolant level must be maintained to the first step
(pressure cap sealing seat) of the filler neck.
4. If the amount of coolant is insufficient, fill the radiator to
the bottom of the radiator filler neck with coolant, and
reinstall the cap by turning it clockwise.
CAUTION: For refilling, add a 1:1 mixture of coolant and
soft water. Adding water alone dilutes the coolant and
may result in corrosion of the aluminum engine parts.
The diluted coolant can attack the aluminum engine
parts. In an emergency, soft water can be added.
However, the diluted coolant must be returned to the
correct mixture ratio within a few days.
CAUTION:
Soft or distilled water must be used with the
antifreeze in the cooling system. Use a 1:1 mixture of
soft water and coolant. If hard water is used in the
system, it causes scales accumulation in the water
passages, and considerably reduces the efficiency of
the cooling system.
If coolant must be added often, there is probably leakage
in the cooling system. Check the system for leaks (see
“Visual Leak Inspection” in the engine service manual).
Connecting the Battery
The machine is shipped with the battery disconnected.
1. Connect the positive (RED) battery cable FIRST.
2. Connect the negative (BLACK) battery cable LAST.
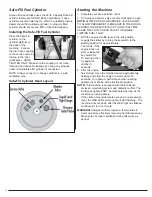
Filling the Safe-Fill Fuel Cylinder
Amano Pioneer Eclipse uses the 20 lb. capacity aluminum
Safe-Fill cylinder which meets the D.O.T. 4E240 standards.
These cylinders are also listed by UL. Filling should be
done ONLY by a qualified propane dealer. A properly filled
cylinder should not exceed 80% of the rated capacity.
DO NOT attempt Safe-Fill cylinder repair. Return the
cylinder to your propane dealer if repair is necessary.
Please note that DOT regulations prohibit shipping of
cylinders after the cylinder has been filled with propane.
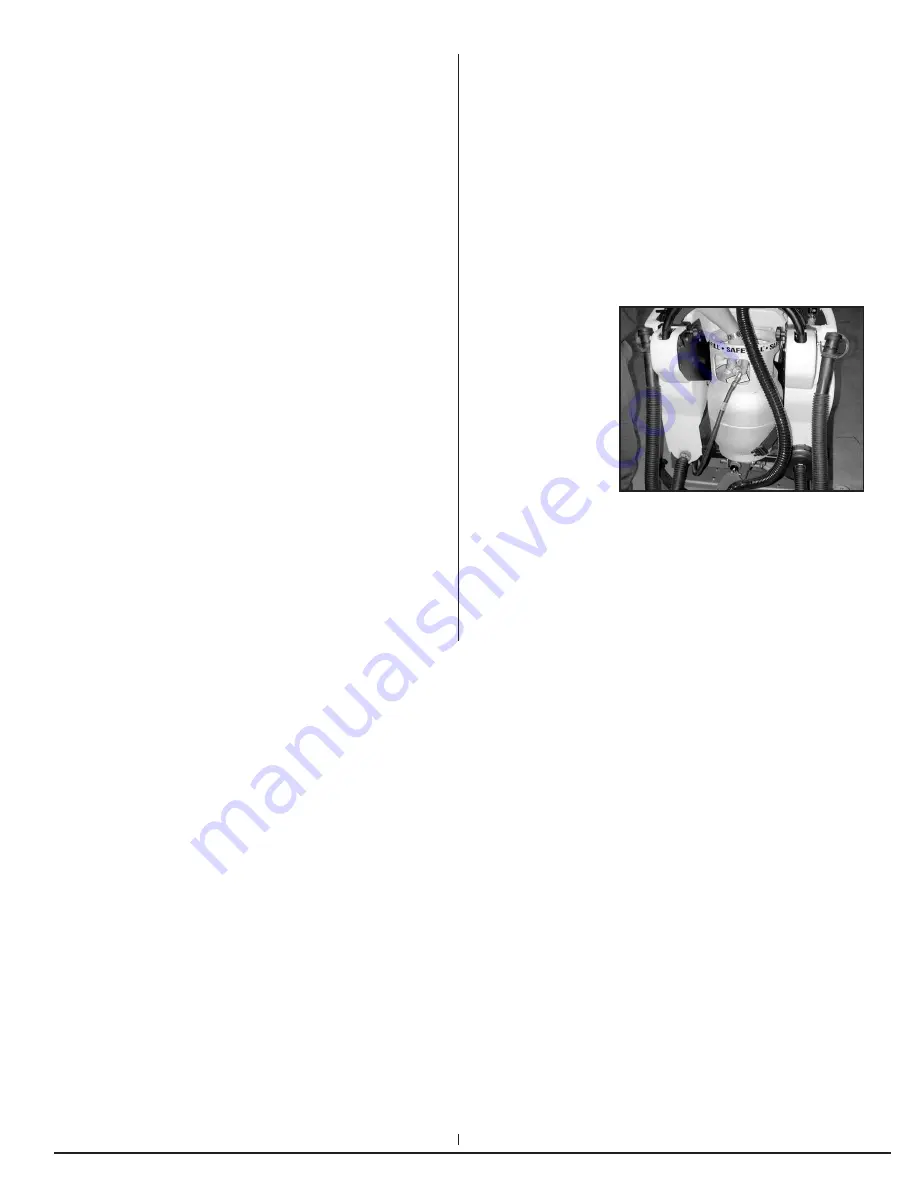
Installing the Safe-Fill Fuel Cylinder
Place the Safe-Fill
cylinder on the
cylinder platform at
the back of the
machine. Connect the
fuel hose coupling to
the service valve by
turning to the right
(clockwise).
HAND TIGHTEN
ONLY. Make sure
coupling is not cross threaded and check for leakage by
noting any propane odors immediately after cylinder is
connected. Next, connect the two ends of the tank strap to
one another and secure strap end to the velcro.
TO REMOVE THE SAFE-FILL CYLINDER, reverse the
above procedure. Always connect or change cylinders in a
well ventilated area.
Summary of Contents for Z1 PSZ133KWA
Page 3: ......
Page 19: ...16 Machine Troubleshooting...
Page 20: ...17 Maintenance...
Page 27: ...Service Replacement Parts PSZ133KWA 031708 24...
Page 29: ...26 Wiring Schematic PSZ133KWA SAFE SENSE FOR MACHINES SERIAL NUMBER 62233 AND EARLIER 031708...
Page 30: ...27 Wiring Schematic PSZ133KWA ECO SENSE FOR MACHINES SERIAL NUMBER 62420 AND LATER 031708...
Page 32: ...29 Hydraulic Schematic PSZ133KWA 031808...
Page 33: ...30 Hydraulic Hose Connection Group PSZ133KWA 031808...
Page 35: ...32 Frame Wheel Group PSZ133KWA 031808...
Page 37: ...34 Power Group Engine PSZ133KWA 031808...
Page 39: ...36 Hydraulic Reservoir PSZ133KWA 031808...
Page 41: ...38 Airbox PSZ133KWA 031808...
Page 43: ...40 LP Regulator PSZ133KWA 031808...
Page 45: ...42 Scrub Deck Group PSZ133KWA 052308...
Page 47: ...44 Squeegee Lift Group PSZ133KWA 031808...
Page 53: ...50 Solution Tank PSZ133KWA 031808...
Page 55: ...Recovery Tank PSZ133KWA 52 030808...
Page 57: ...54 Engine Cover PSZ133KWA 031908...
Page 59: ...Squeegee 45 PSZ133KWA 56 031908...
Page 61: ...58 Control Panel Bulkhead Group PSZ133KWA 031908...
Page 63: ...60 Operational Controls PSZ133KWA 031908...
Page 67: ...64 Relay and Timer Group PSZ133KWA 031908...
Page 73: ...70...


