V4.1
4-1/2 in. Metal Cutting Band Saw
8699159
Visit www.princessauto.com for more information
23
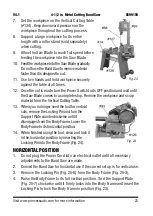
7. Set the workpiece on the Vertical Cutting Table
(#134). Keep downward pressure on the
workpiece throughout the cutting process.
8. Support a large workpiece for its entire
length with a roller stand (sold separately)
when cutting.
9. Allow the Saw Blade to reach full speed before
feeding the workpiece into the Saw Blade.
10. Feed the workpiece into the Saw Blade gradually.
Do not force the Band Saw to remove material
faster than it is designed to cut.
11. Use two hands and hold workpiece securely
against the table at all times.
12. Once the cut is made, turn the Power Switch to its OFF
position and wait until
the Saw Blade comes to a complete stop. Remove the workpiece and scrap
material from the Vertical Cutting Table.
13. When you no longer need the tool for vertical
cuts, remove the Locking Pin and turn the
Support Plate counterclockwise until it
disengages from the Body Frame. Lower the
Body Frame to its horizontal position.
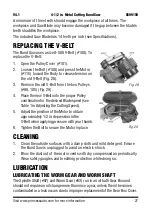
14. When finished using the tool, clean and lock it
in the horizontal position by inserting the
Locking Pin into the Body Frame (Fig. 24).
HORIZONTAL POSITION
1. Do not plug the Power Cord into an electrical outlet until all necessary
adjustments to the Band Saw are made.
2. Convert the Band Saw for horizontal use if the current set up is for vertical use.
3. Remove the Locking Pin (Fig. 25-8) from the Body Frame (Fig. 25-3).
4. Raise the Body Frame to its full vertical position. Turn the Support Plate
(Fig. 25-7) clockwise until it firmly locks into the Body Frame and insert the
Locking Pin to lock the Body Frame in position (Fig. 23).
Fig. 23
Fig. 24


